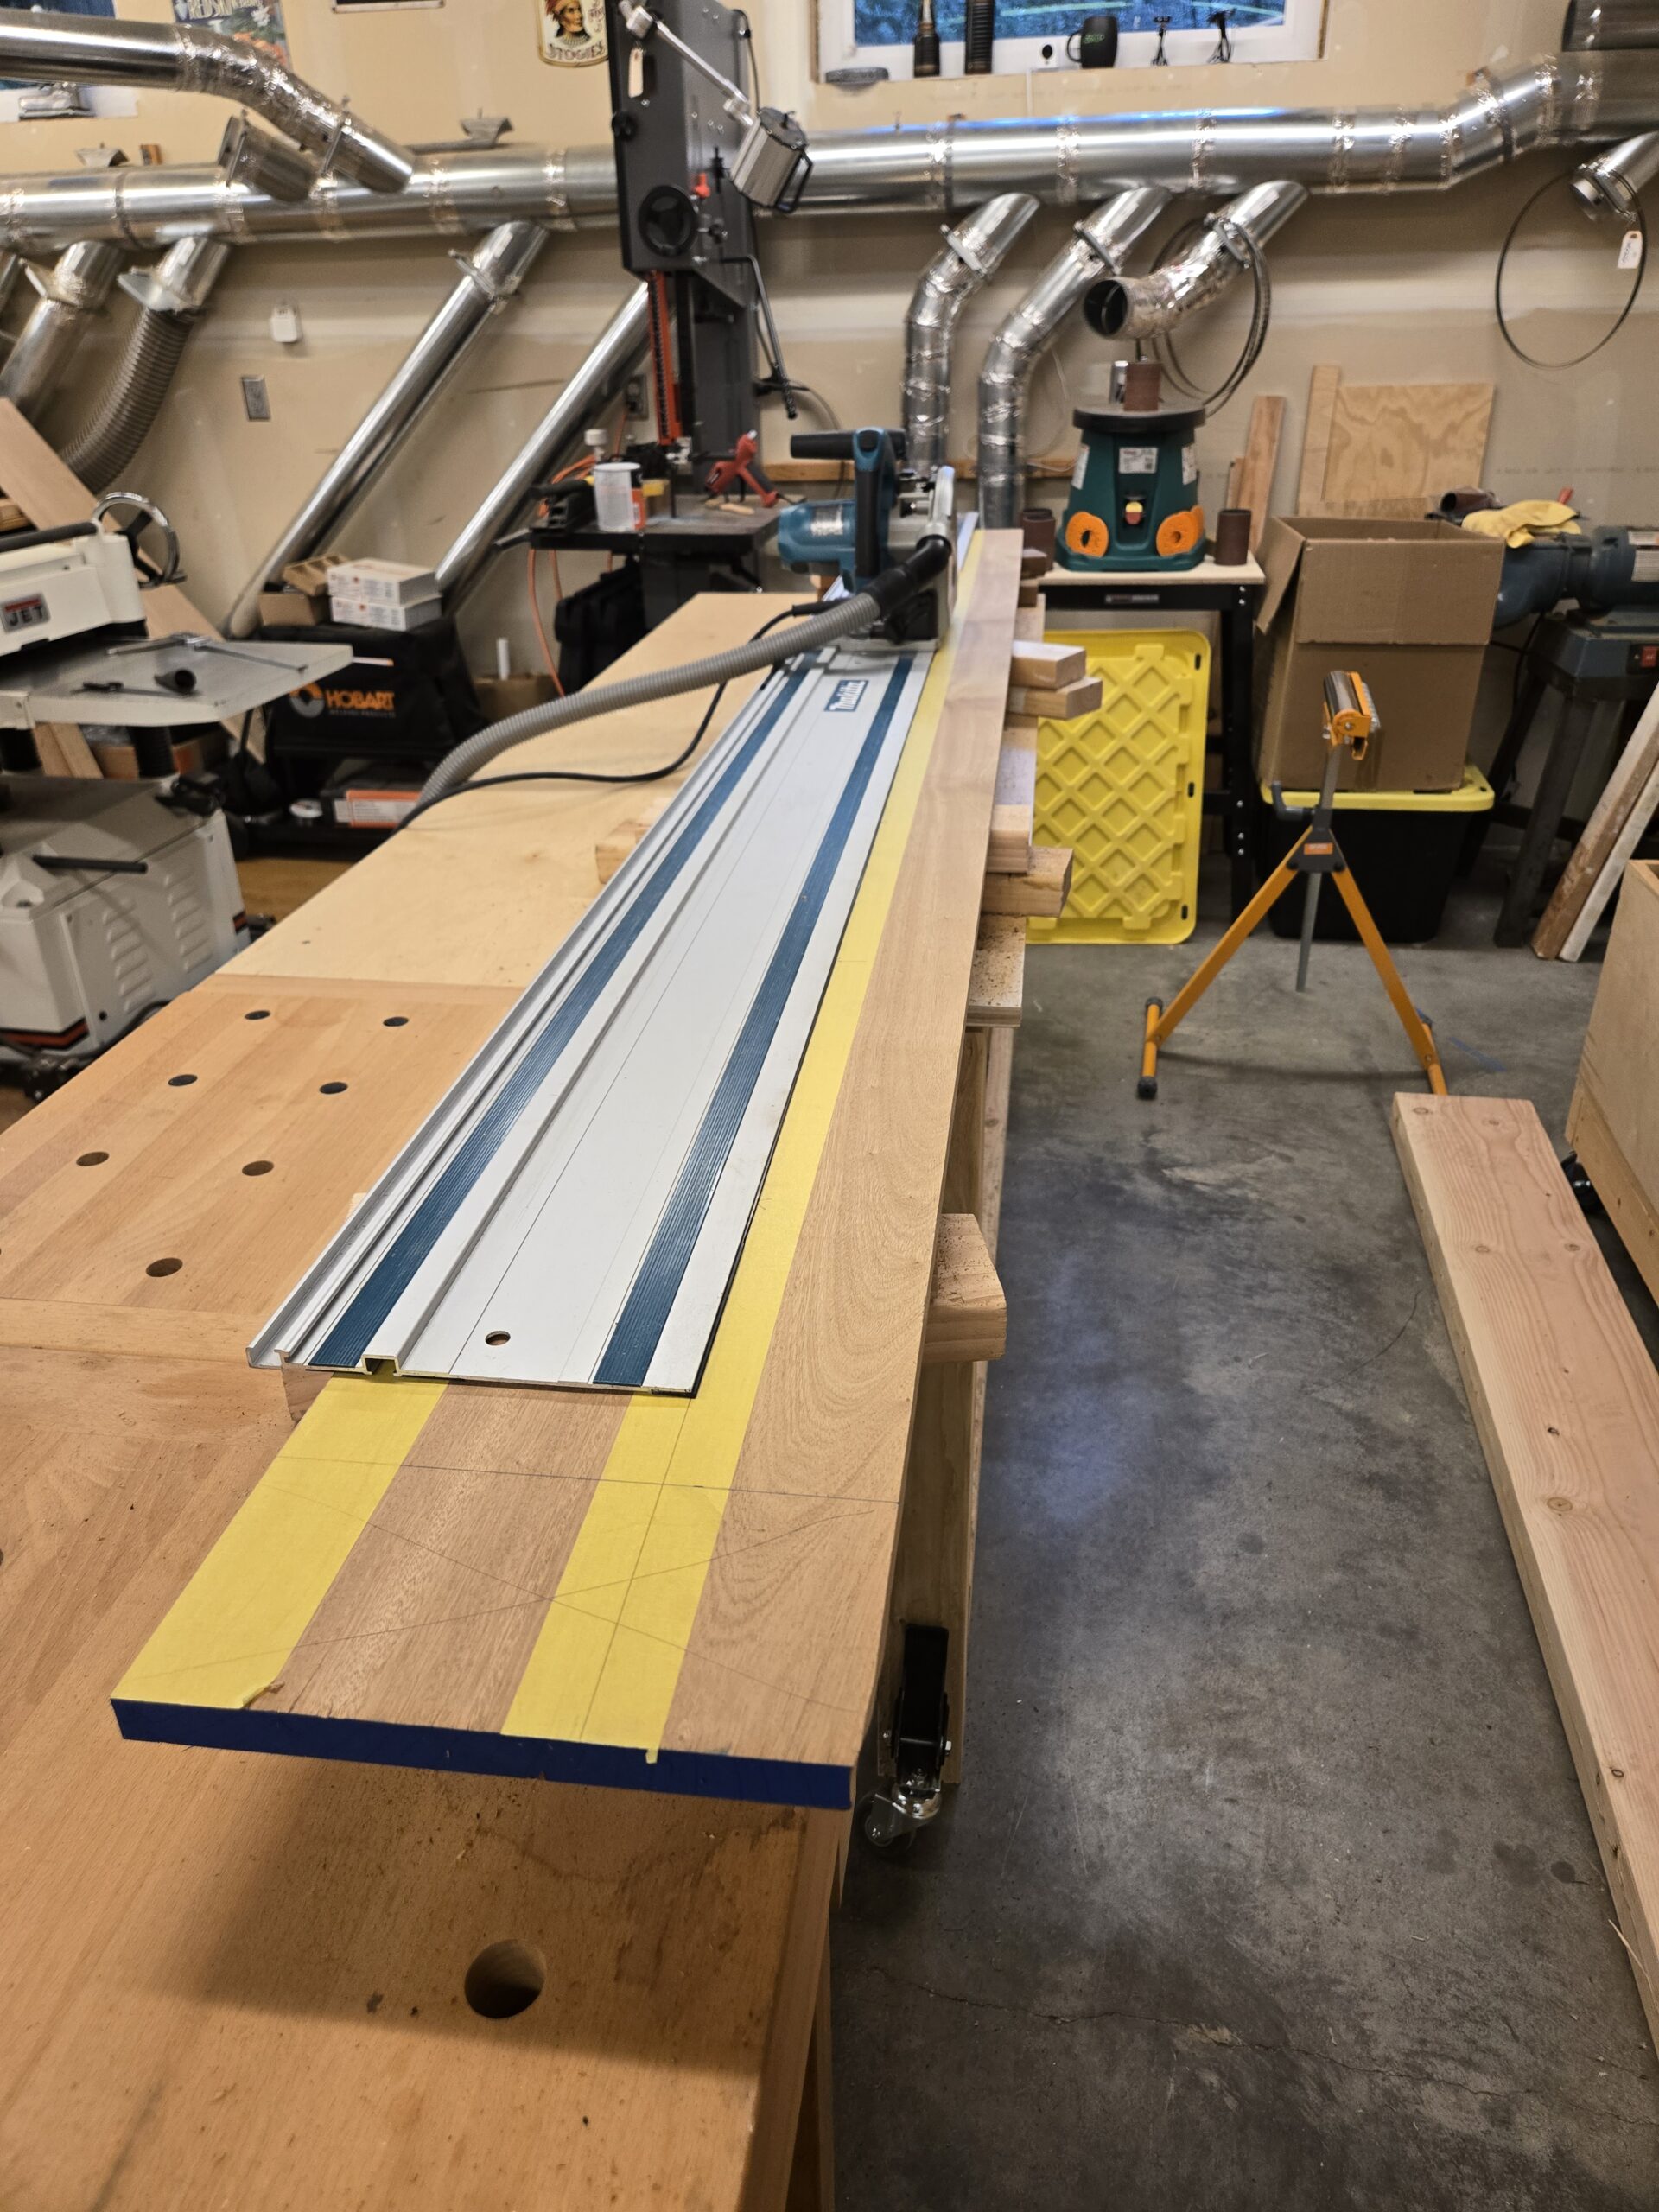
Since Edensaw sold the sapele planks in one foot increments I bought 9′ rough cut 4/4 planks for the bowsprit. The first step was dimensioning. I ran all boards through the planer until I had 3/4″ smooth boards. The planing exposed some checking in one board and a knot-like inconsistency in another, so I replaced them with new boards, one of the downsides of buying rough cut lumber. I then cut the bowsprit height taper into the boards by cutting them to the tapered width. One side was cut on the cabinet saw, the other tapered cut was done with a track saw.
The next step was to plane the taper into the thickness of the boards. With a thickness planer you do this with a ‘sled’ – a flat carrier board with wedges, progressivly getting thicker, between it and the board to be tapered. The taper is then planed in with multiple passes through the planer.
The close end is the end that will stay 3/4″ thick, the far end will taper to 1/2″ at 90 ” from the near end. Shims were placed under the boards and hot glued in place since I needed to do this to ten boards. I added a couple of wood strips to stiffen the sled, probably should have started with 1/4 plywood to have a 1/2″ sled. The cleat at the end is to ensure the board stays with the sled as it is propelled through the planer by the rollers. Here is the sled ready to go through the planer.
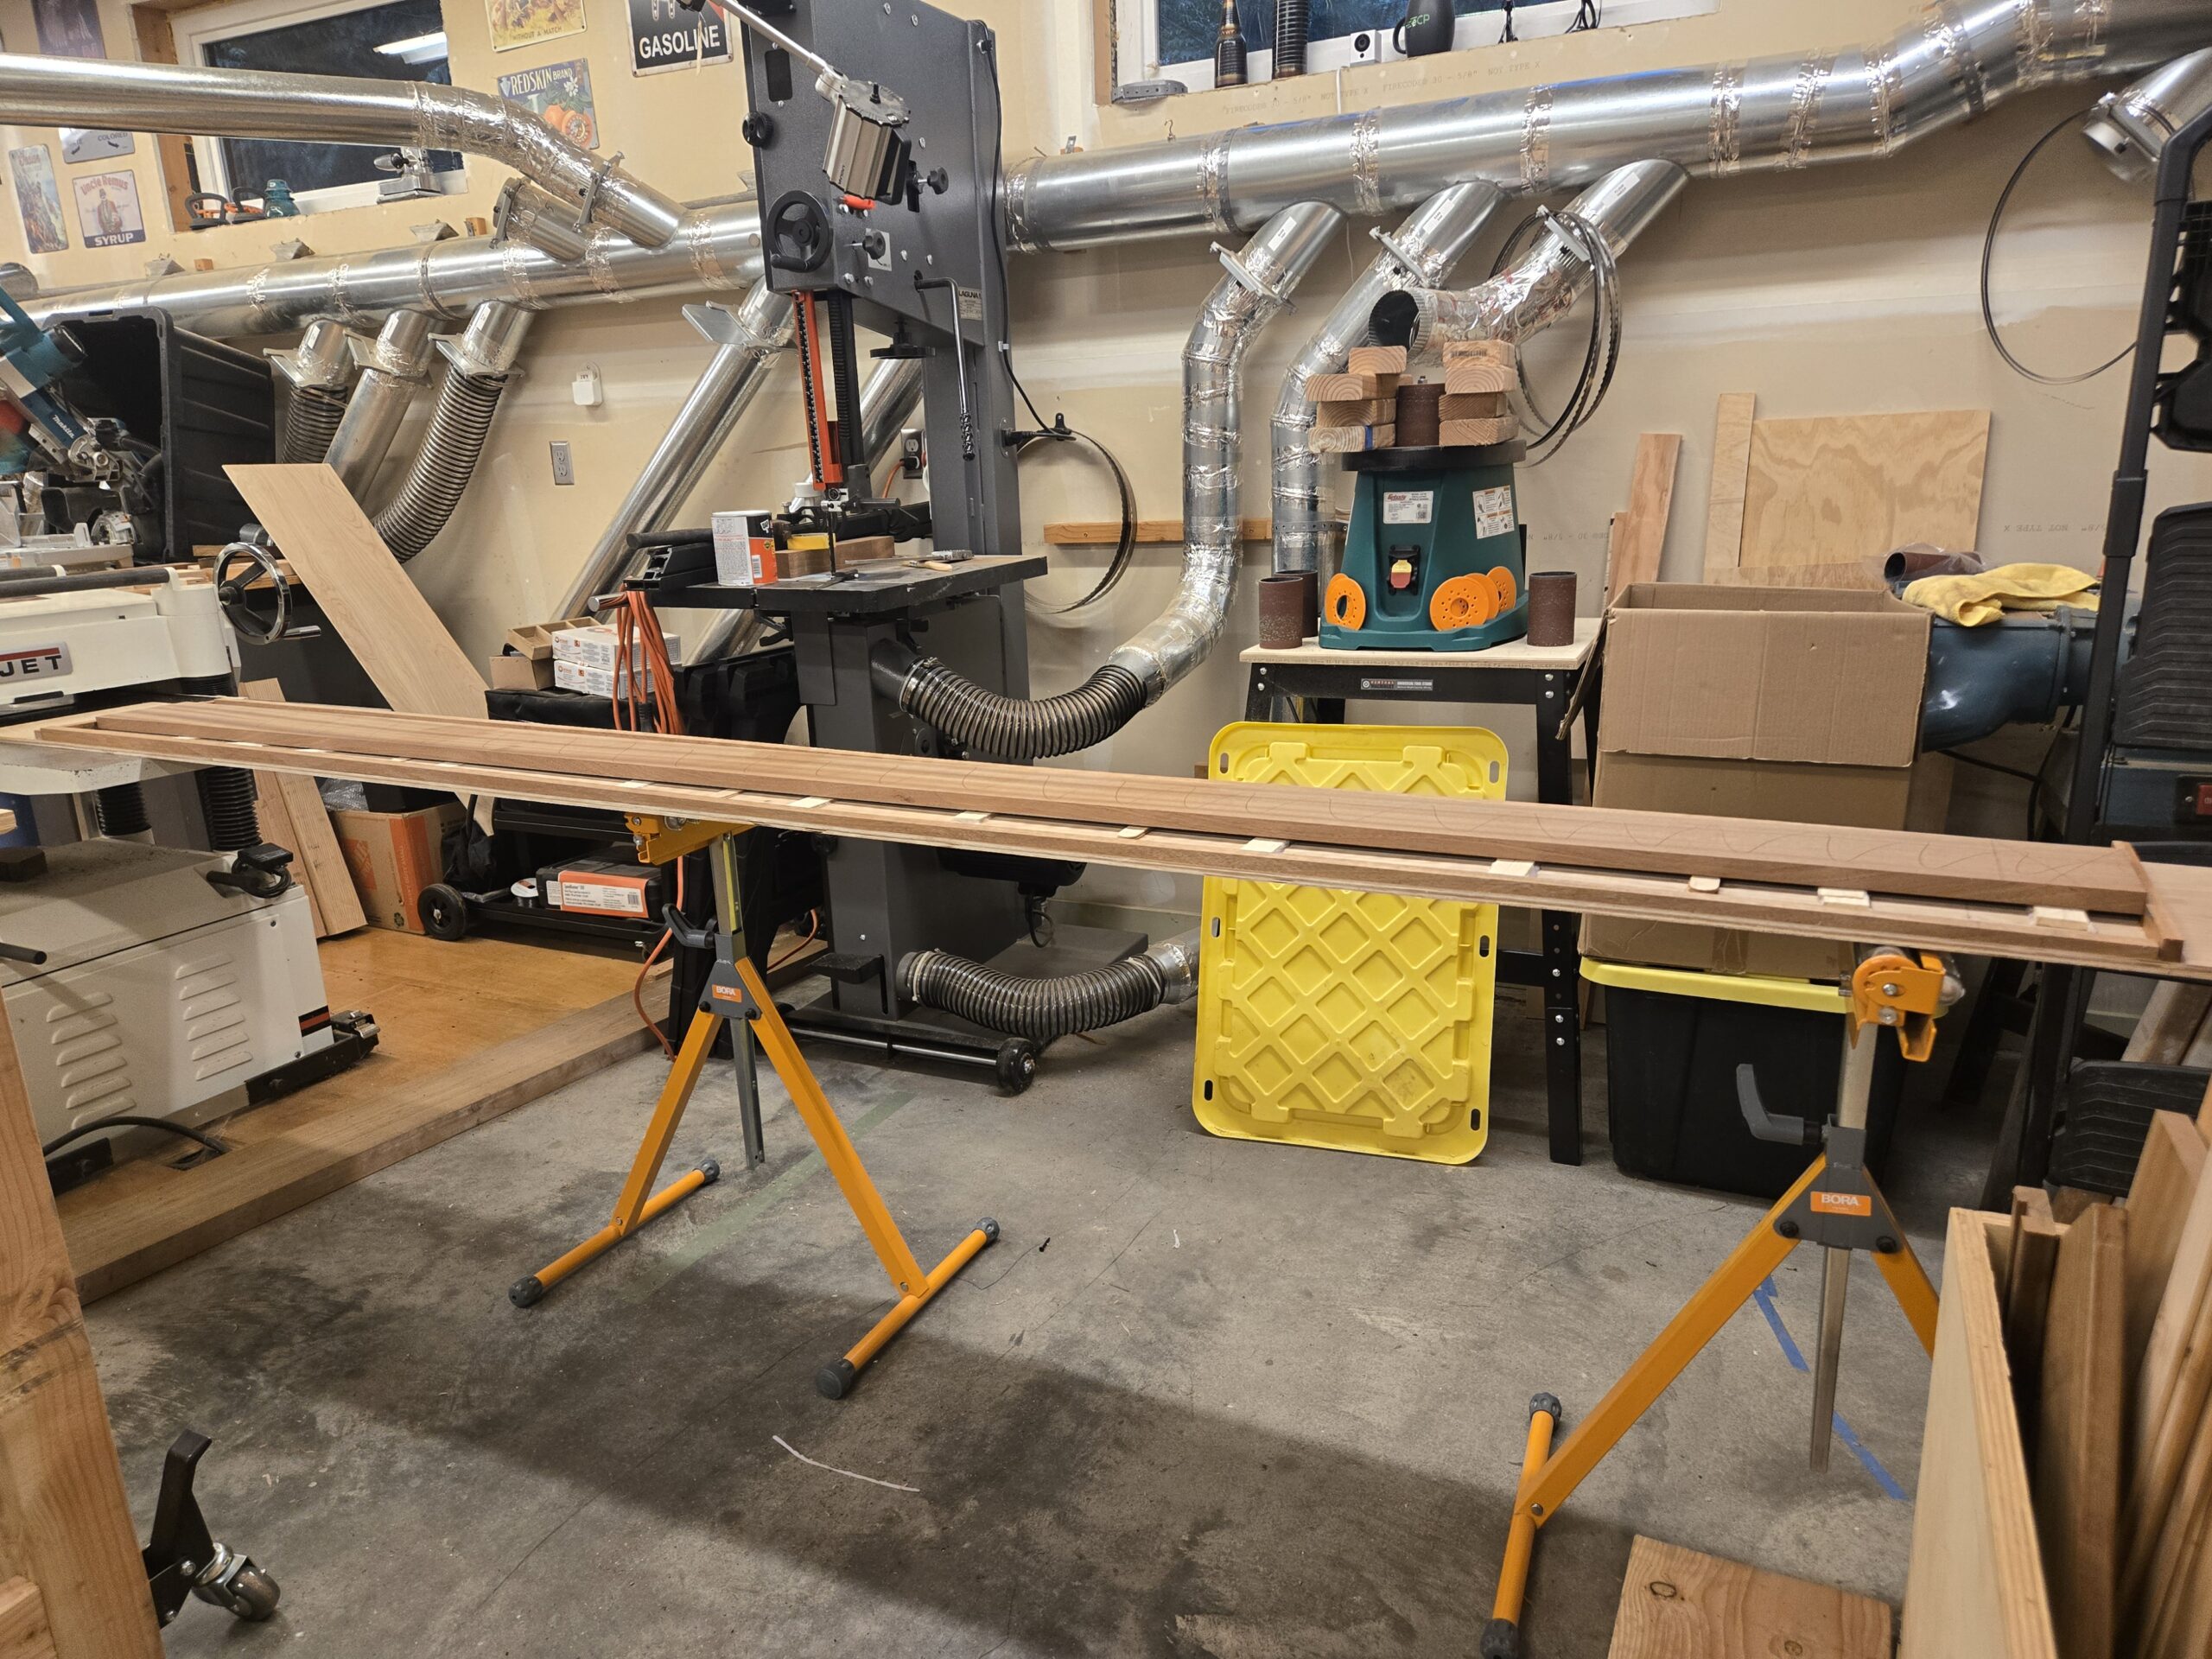
It required eight passes through the planer to take 1/4″ off one end with a consistent taper to the inboard end. Below are the boards lined up and dry clamped.
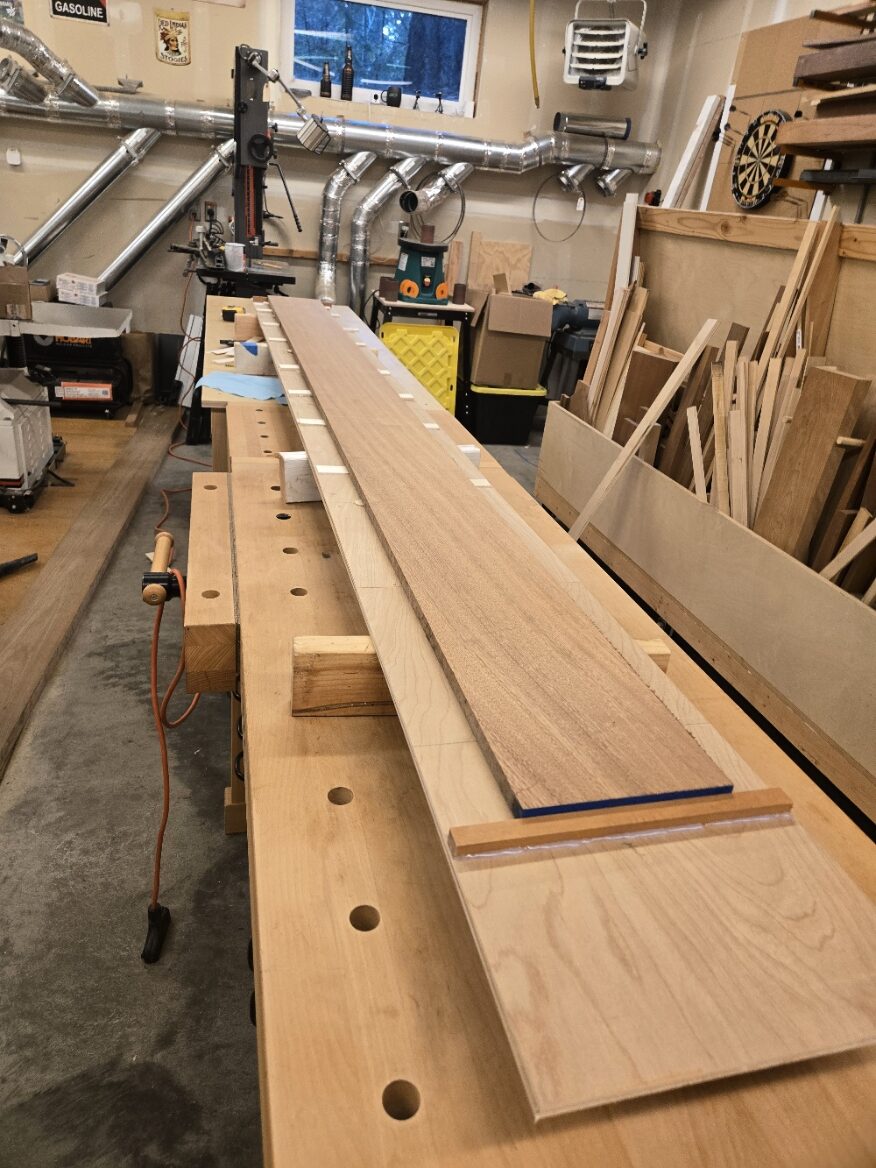
The inboard end of the bowsprit is closest to us, and with 9′ boards there is extra material at both ends, the true end of the new sprit is marked on the boards.
One last cut before glue up, 90″ from the end of the sprit I want to cut the step in for the 4″ round for the cranse iron. I made this cut on each board with a jigsaw.
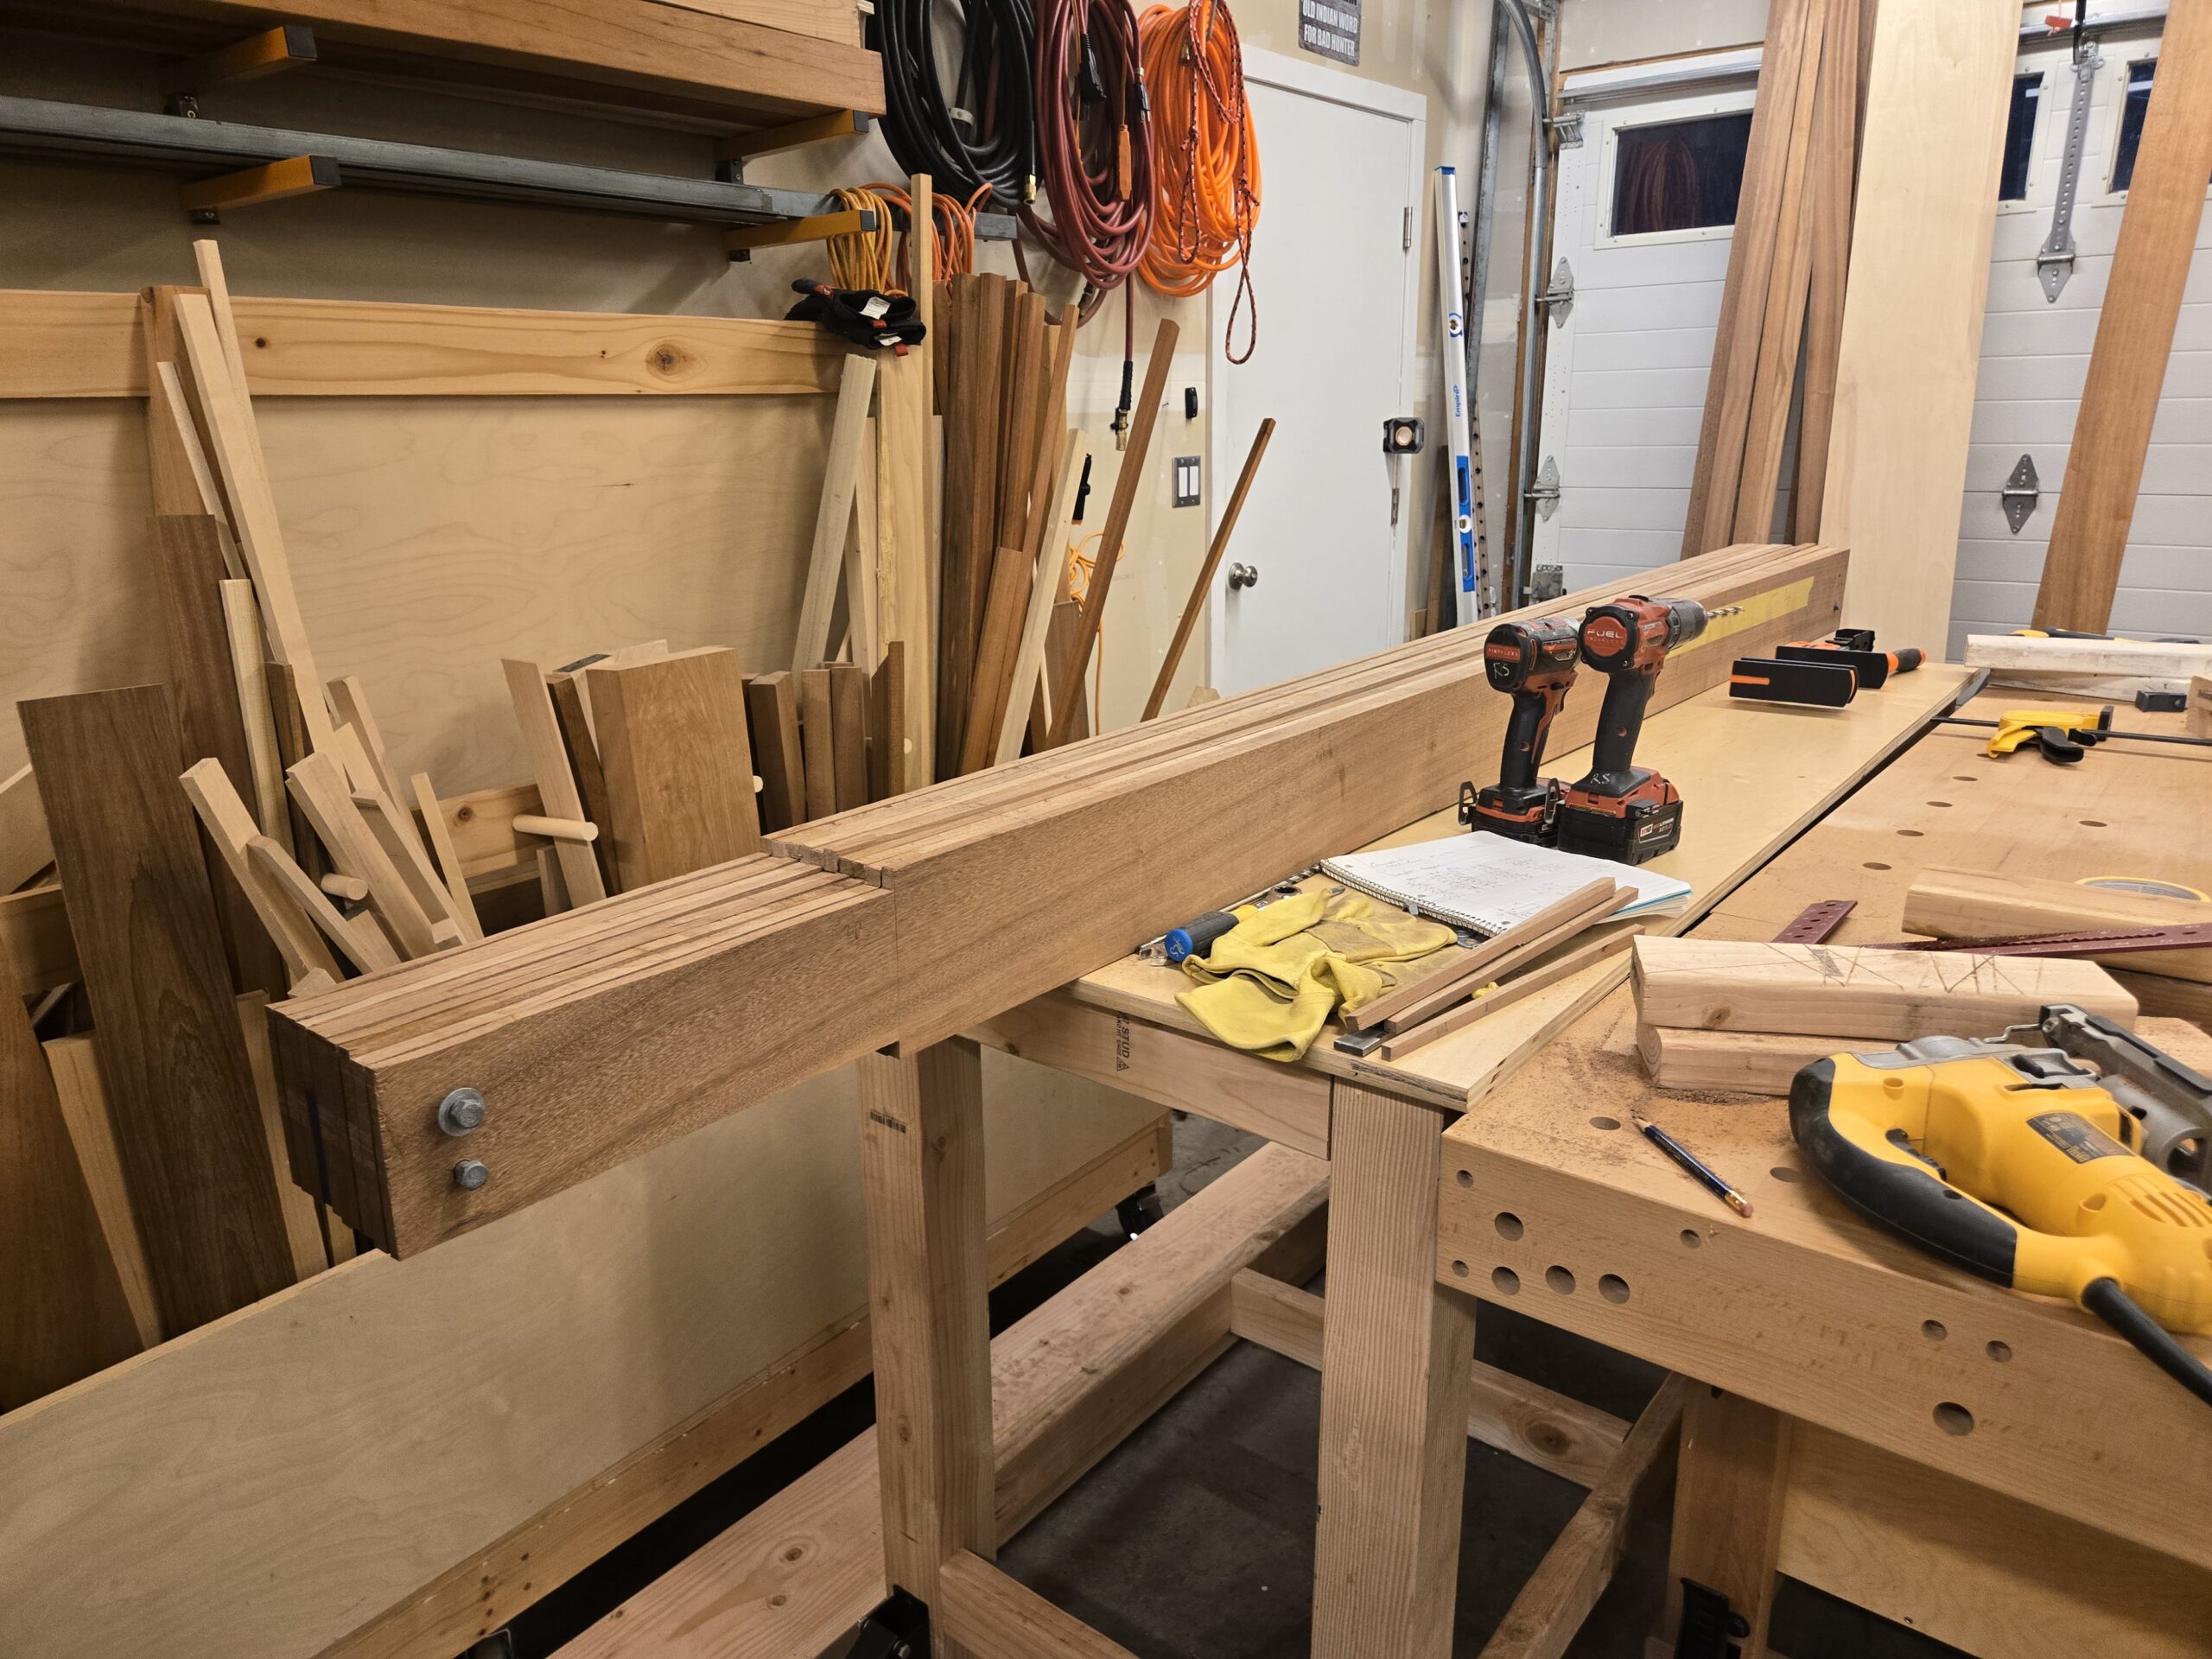
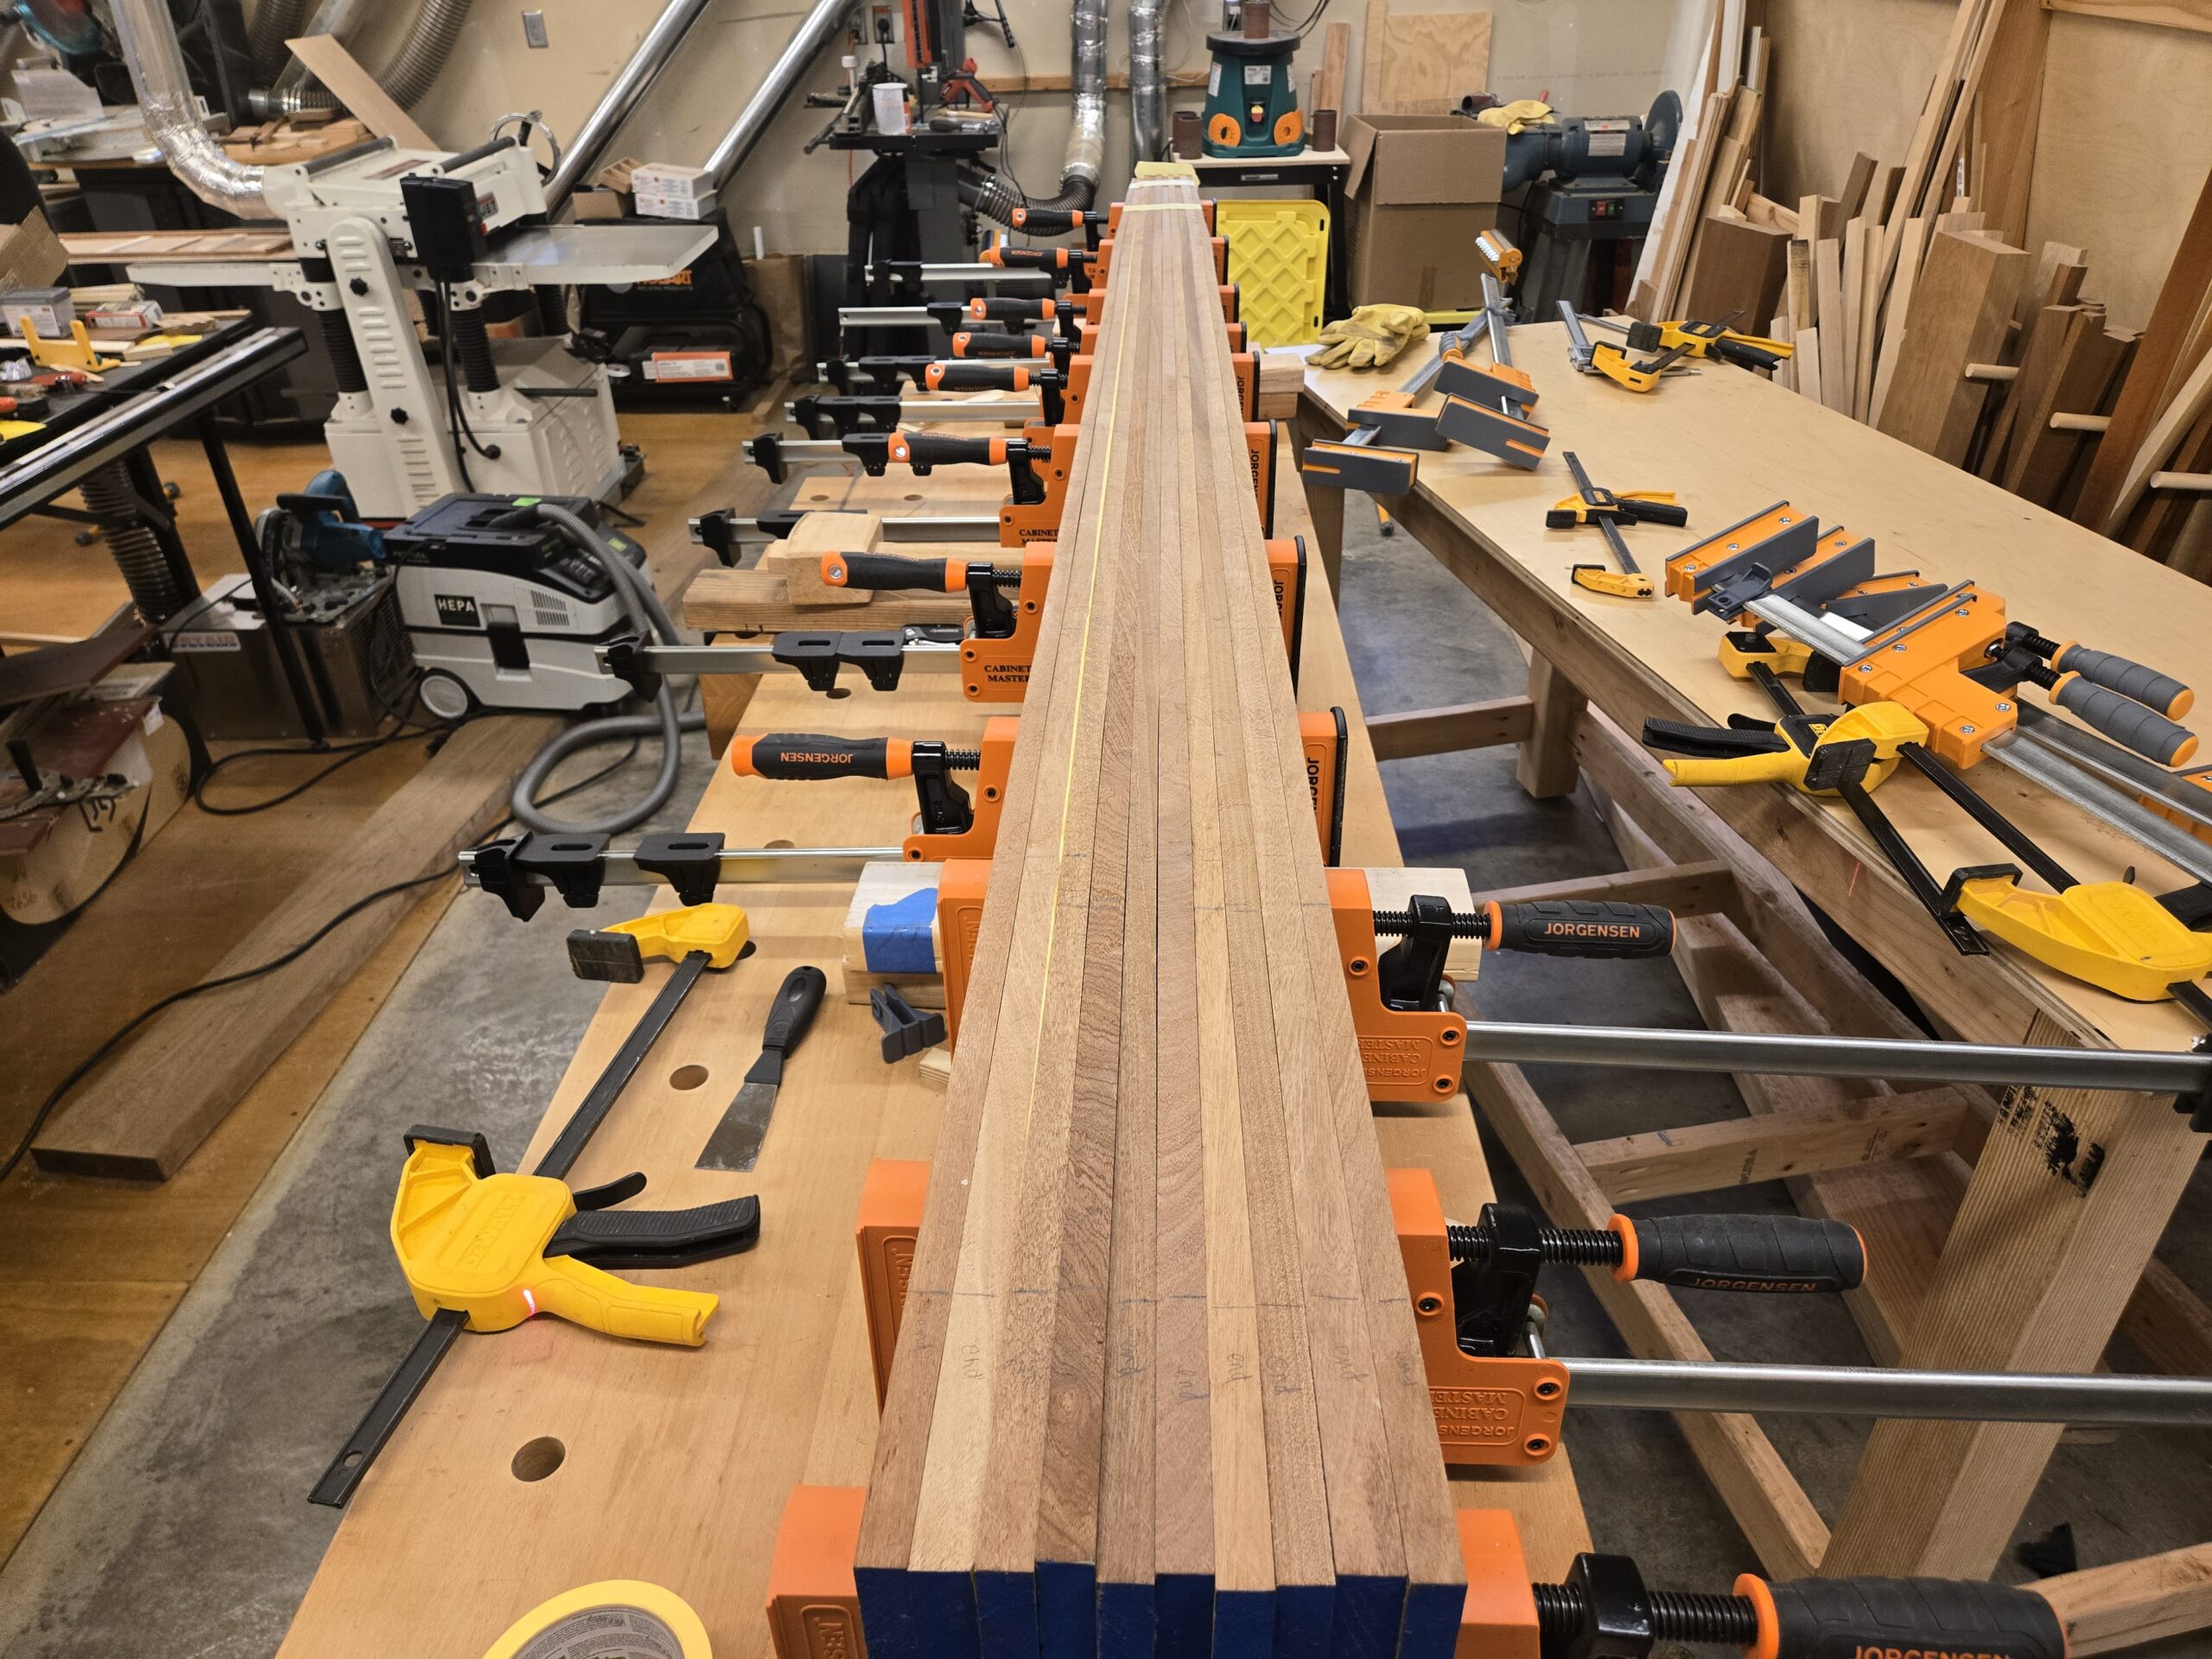
I am using the extra 4″ of length on each end to bolt the pieces together to keep them aligned for glue up. Without these bolts, epoxy-coated tapered boards would slide all over the place and alignment would be near impossible. Once the lamination is complete the ends will be cut off and the true end will be fashioned into the appropriate shape.
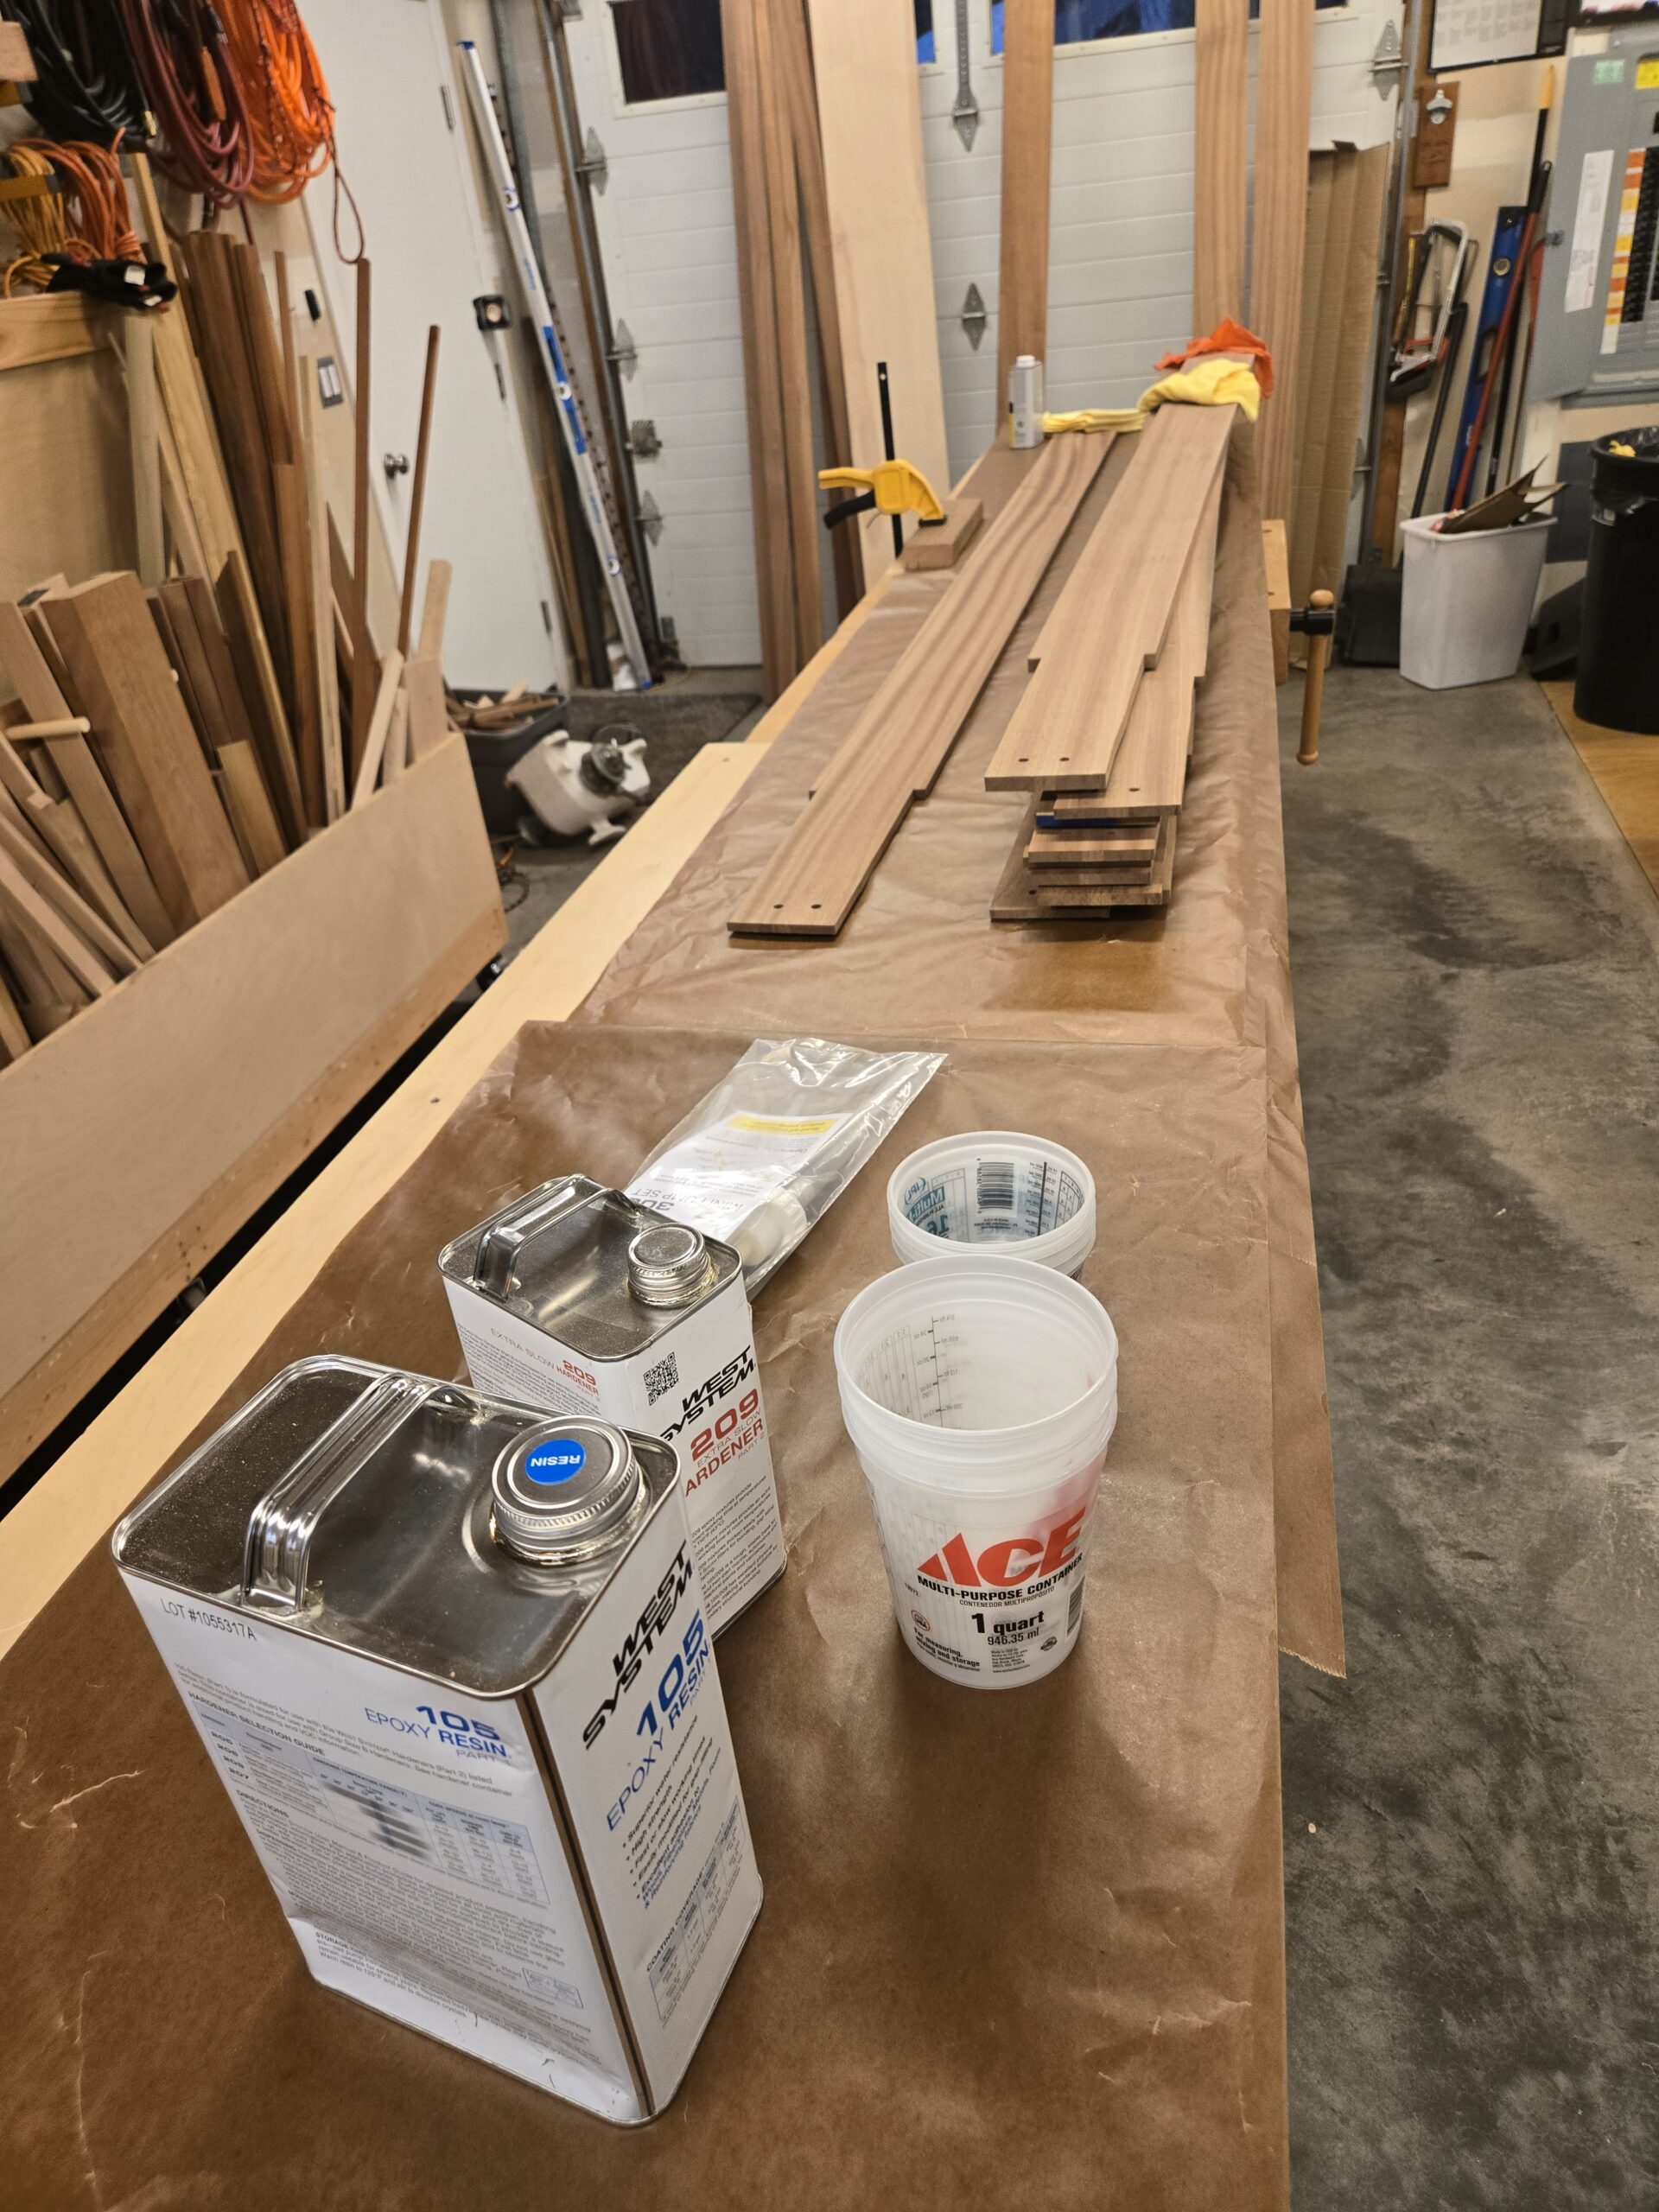
I am using West Systems 105 resin and 209 Hardener. This is the tropical hardener and gives me 1 hour pot life and 3-6 hours of thin-film working time. I do not want this stuff setting up before I am ready. Downside is the minimum working temperature is 70*F, so the shop will be a little warm for a day or two. Above picture was after I finished wiping everything down with acetone.
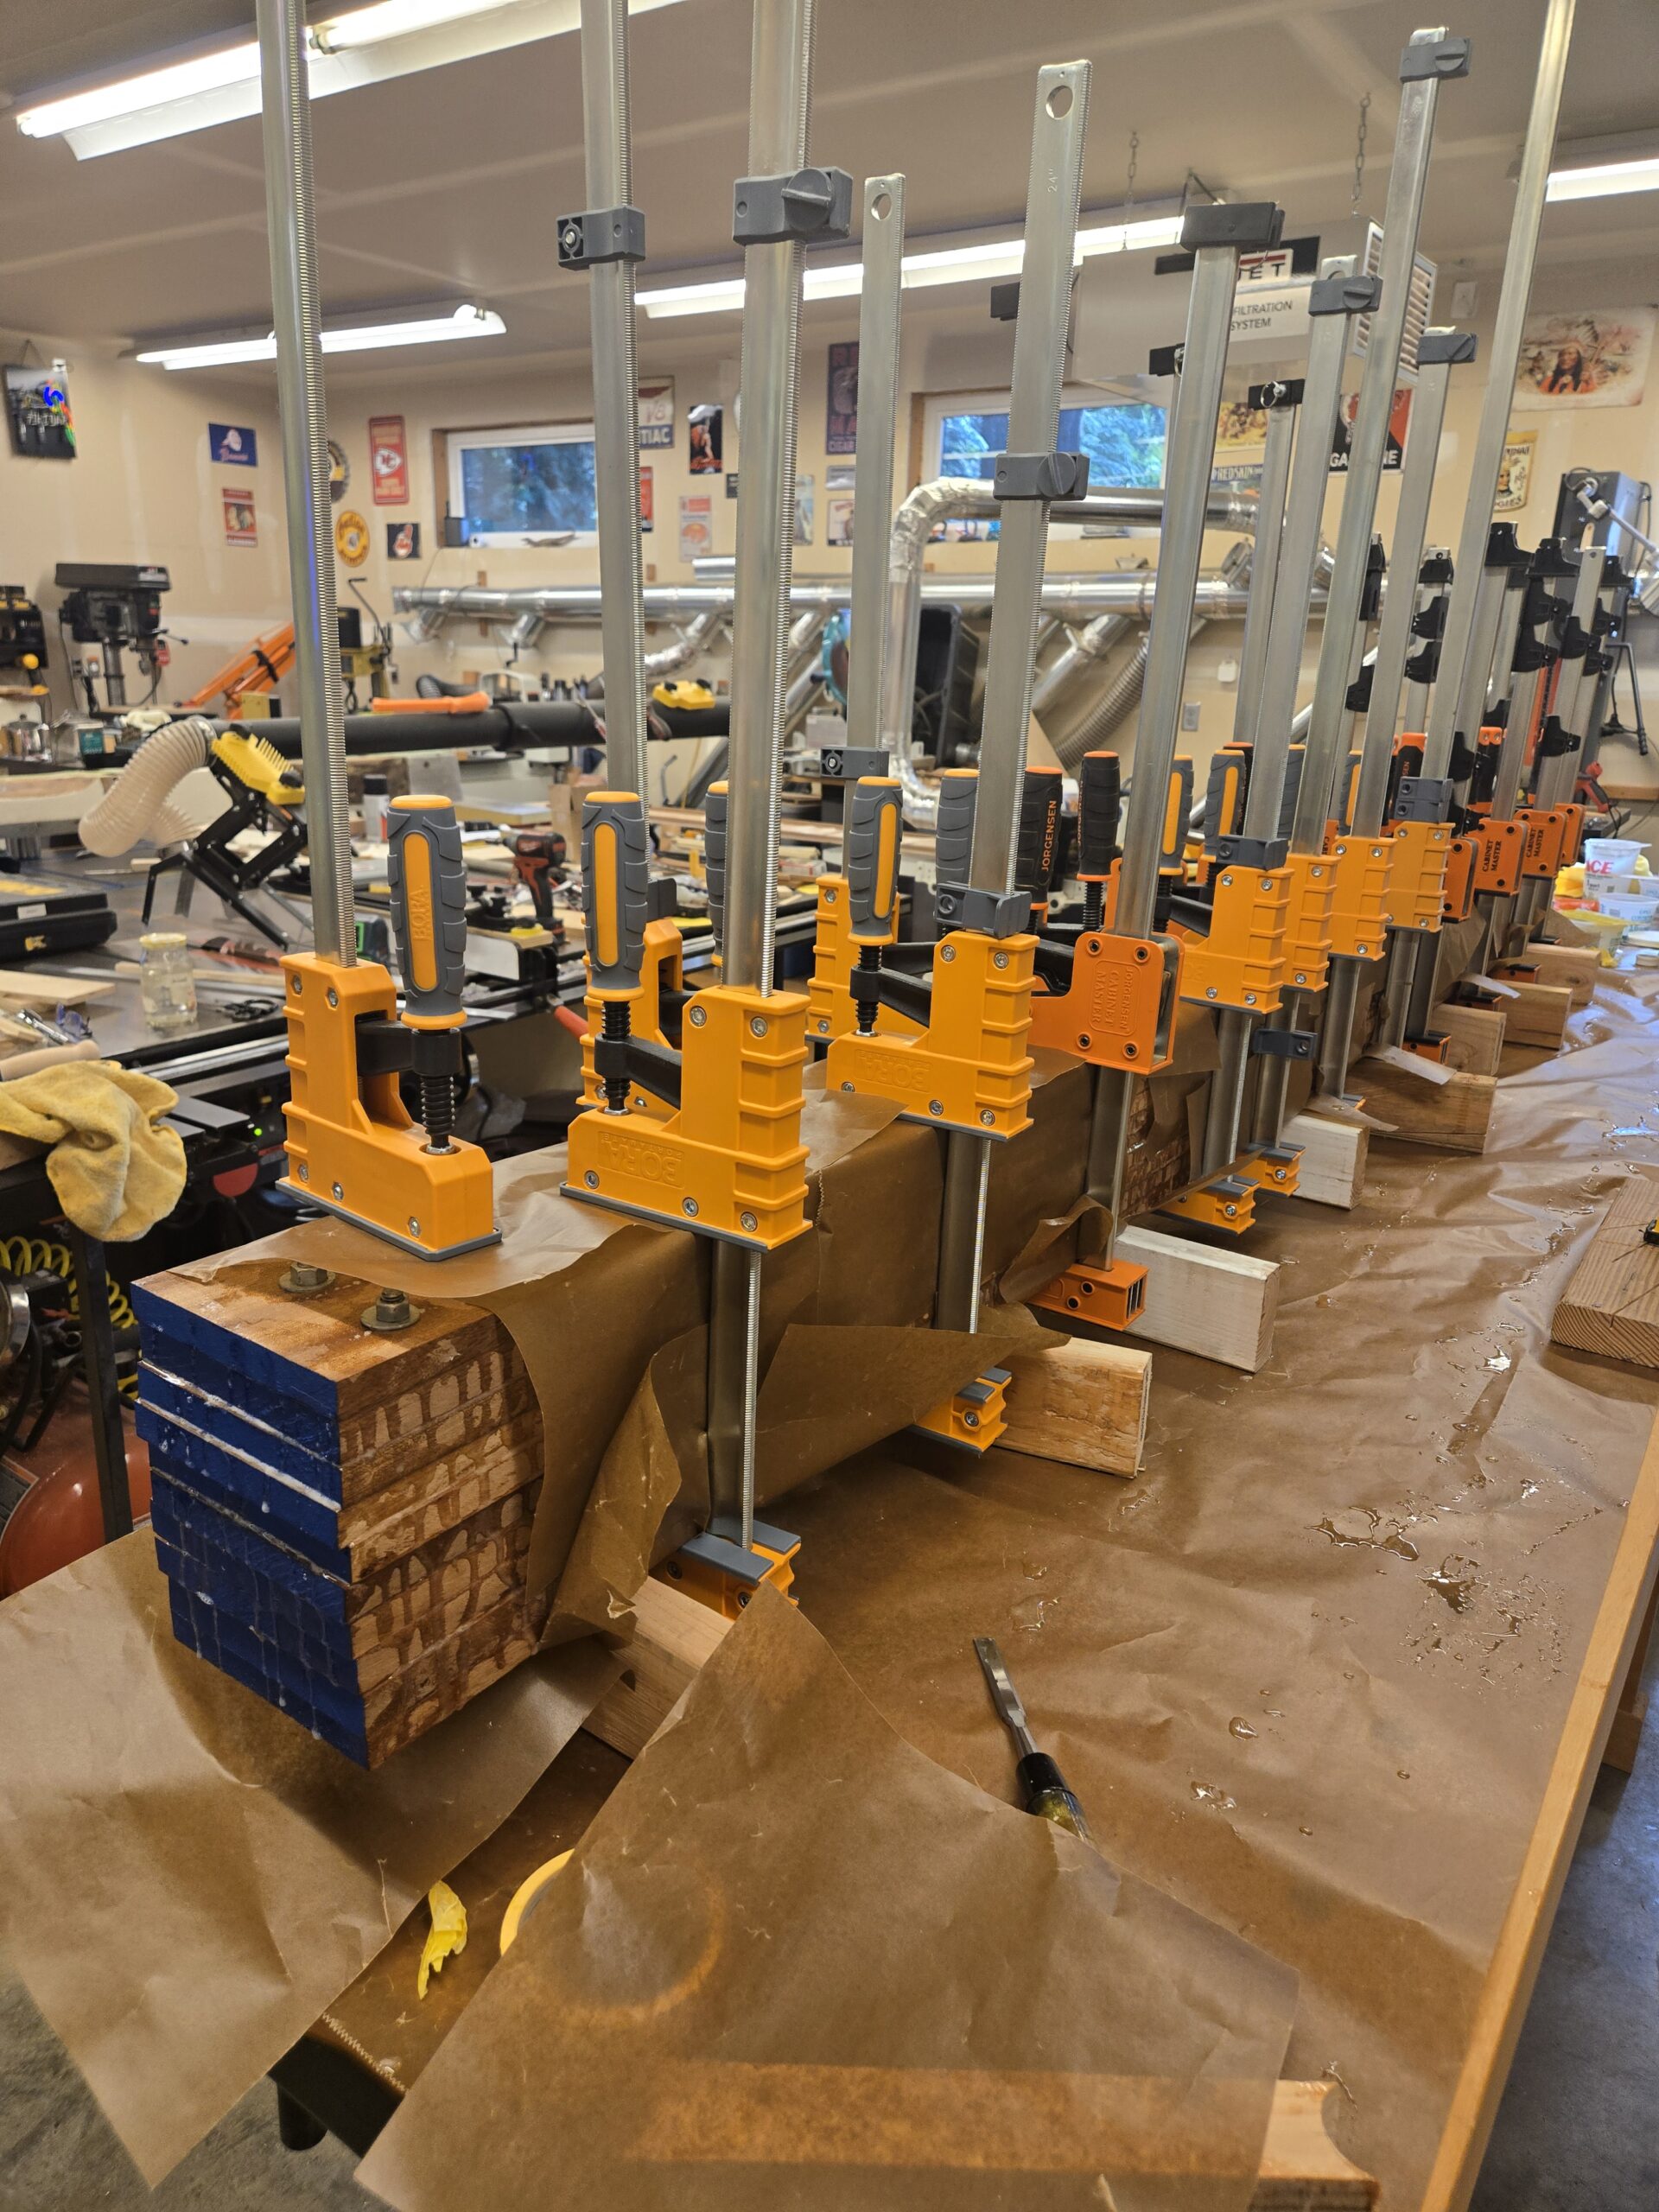
The glue up used 24 parallel jaw cabinet clamps plus the two bolts on each end. Had epoxy everywhere. In a 75*F shop it took it close to six hours to solidify, the next day before I would call it cured. It still wouldn’t be fully cured for another 24 to 48 hours, this was a great time to remove the clamps and remove the excess epoxy before it was hard enough to dull blades. I used a Makita electric planer.
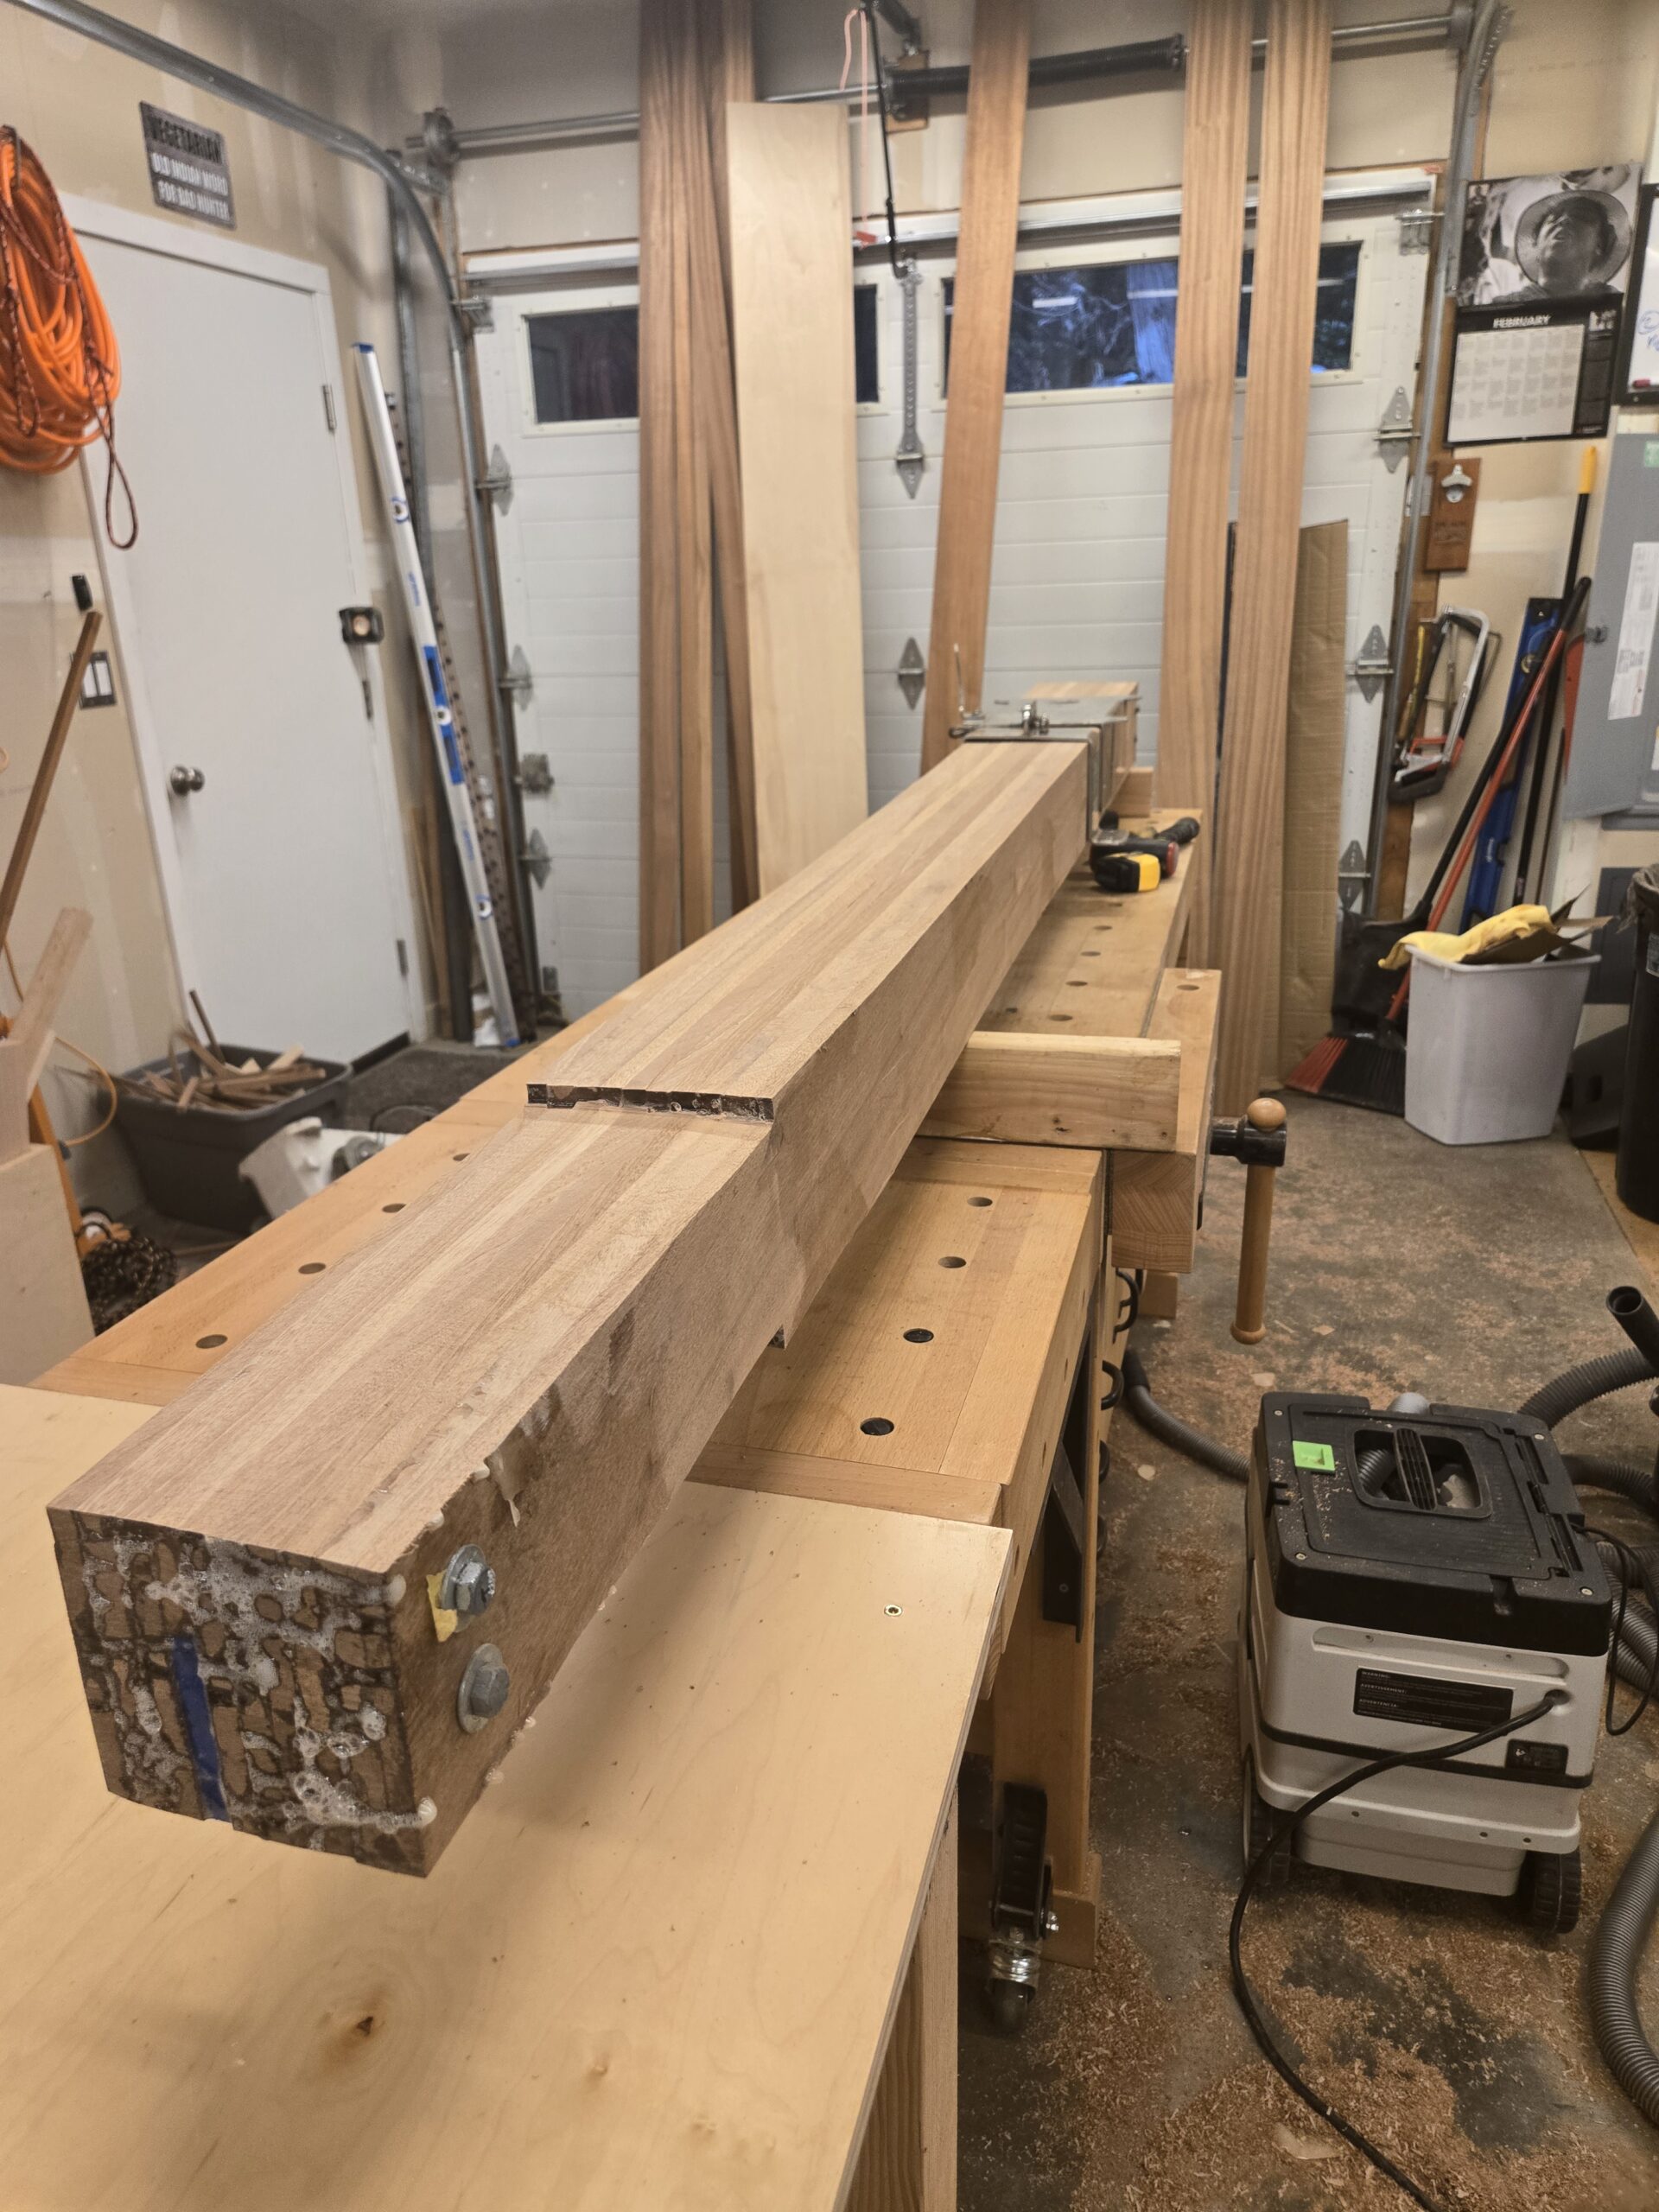
I left the round end at a 4-3/4″ high because I want to carefully trim it down to a 4″ round. The outside boards will be cut at the cranse iron, this is by design so the eight inner boards contribute full thickness to the final round section.
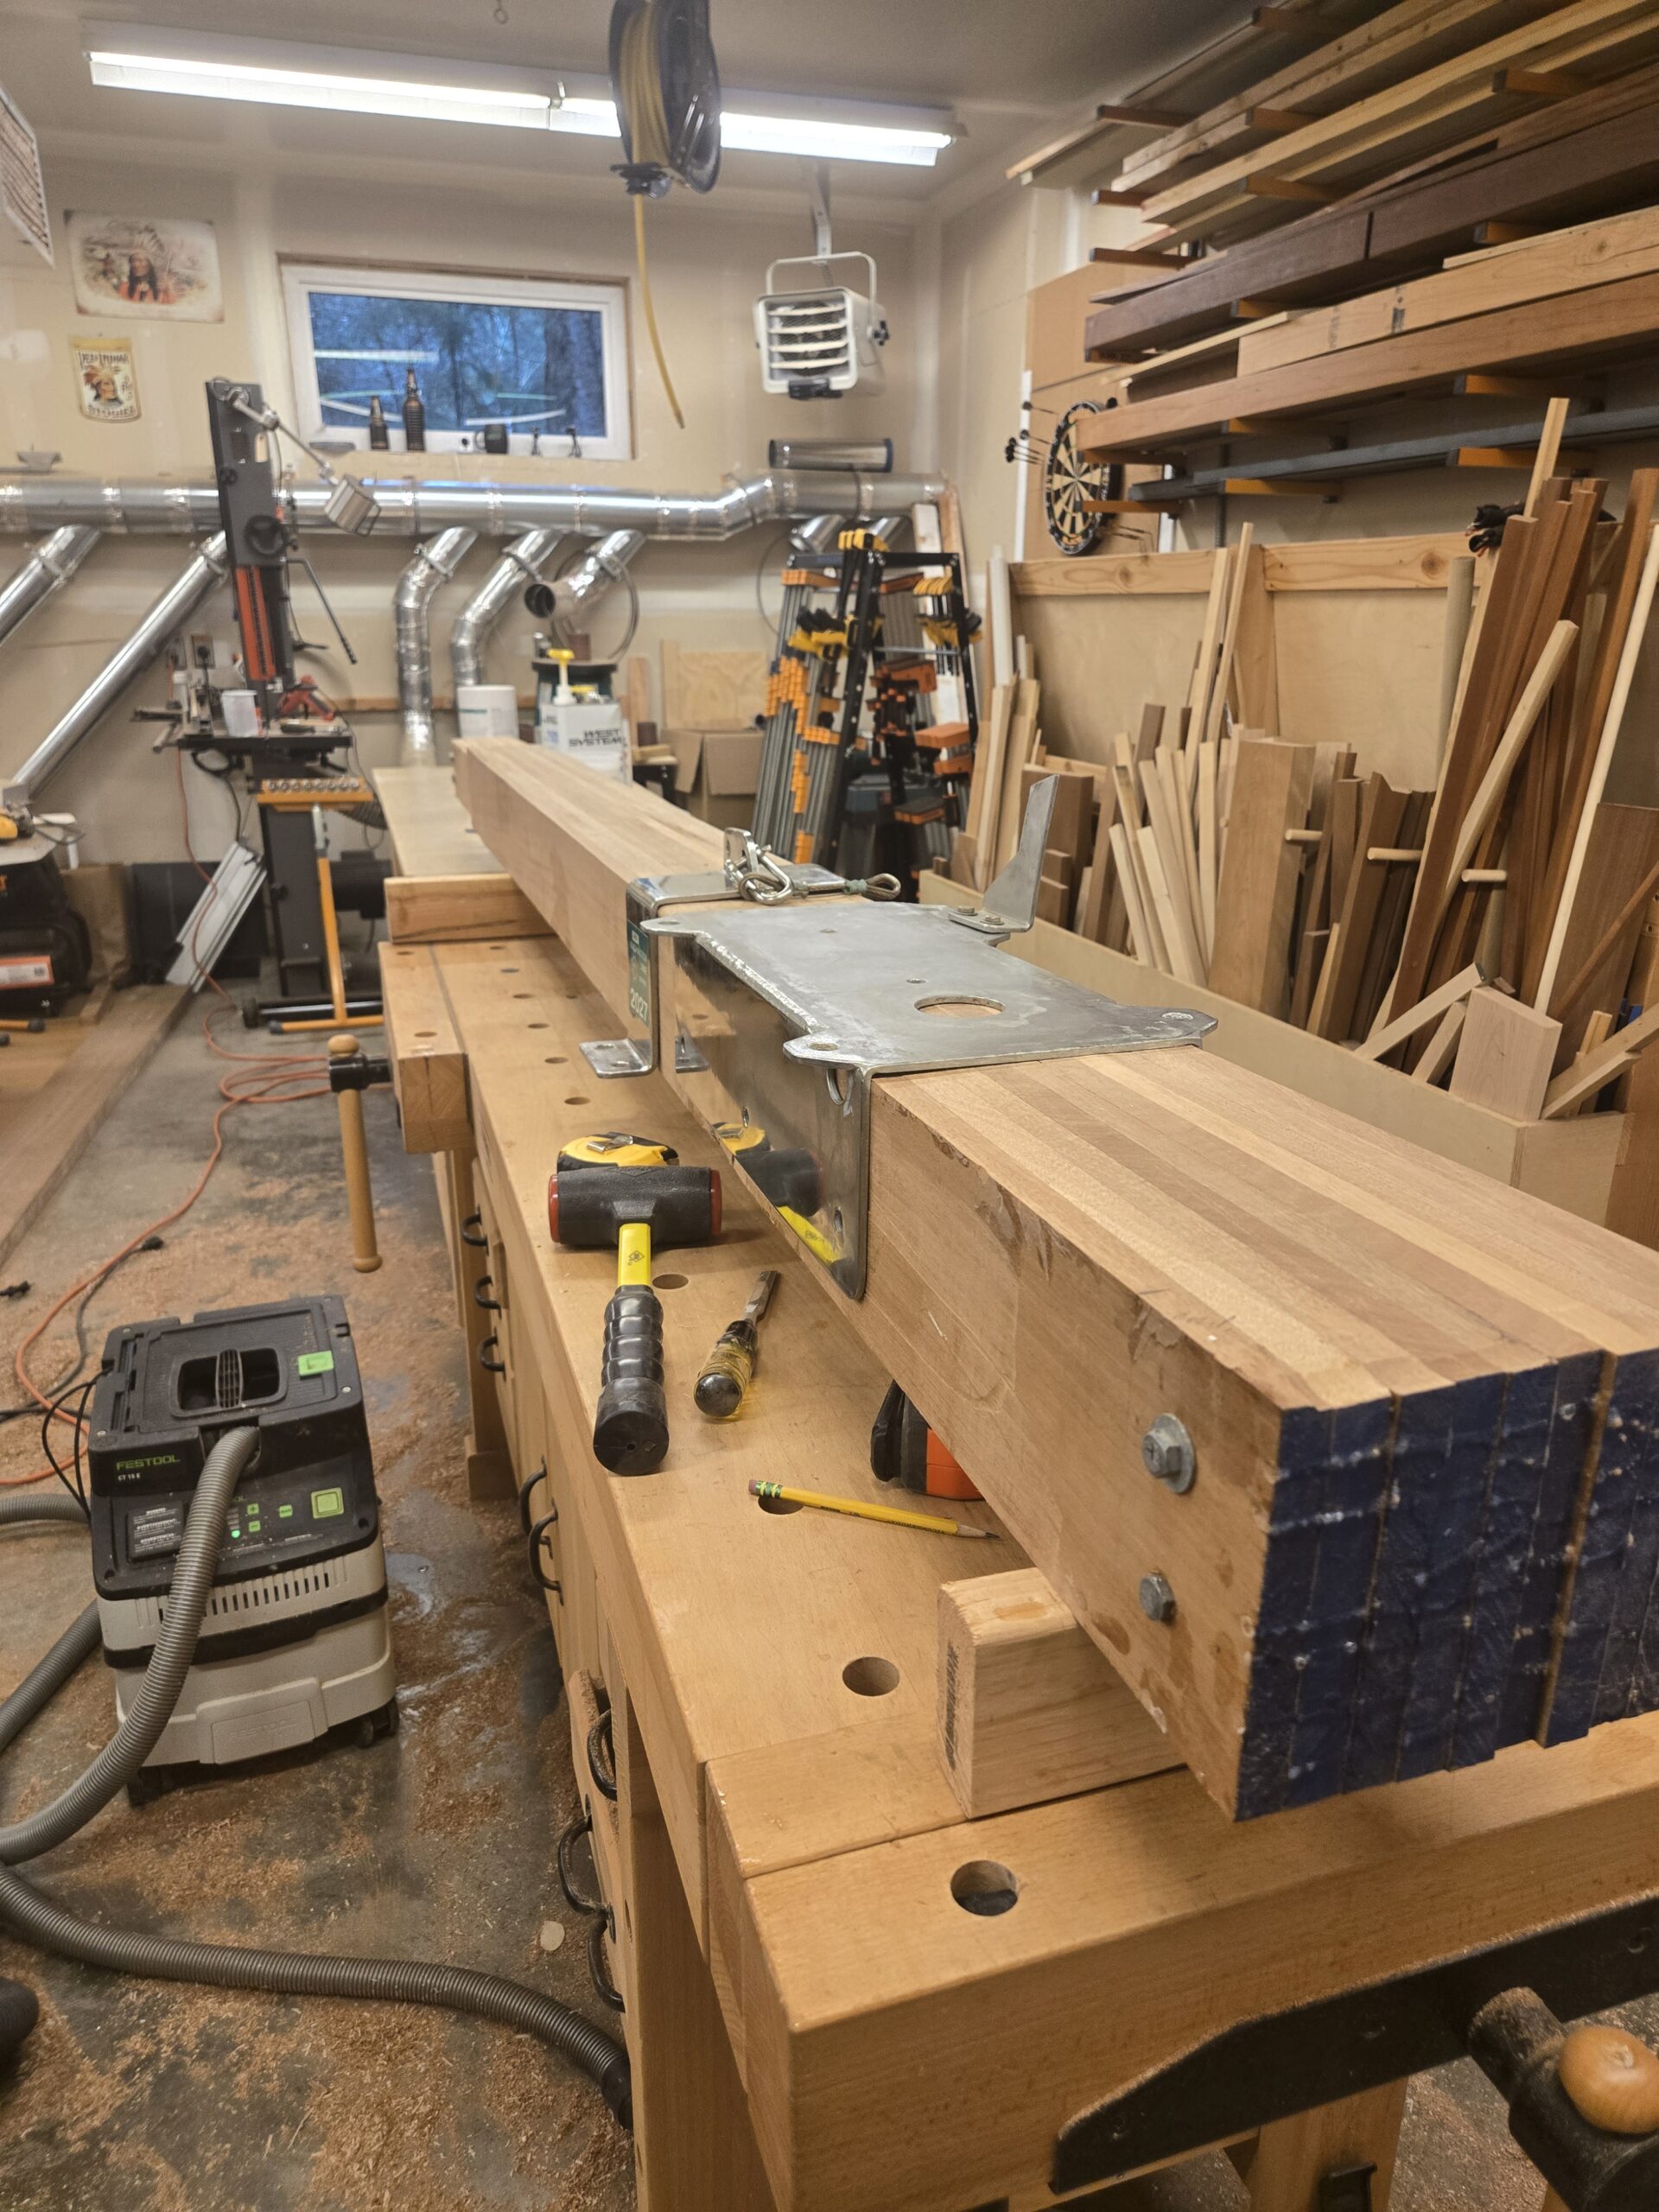
I decided to laminate the new sprit on it’s side. This was mainly to slow epoxy draining from the joints, although I was using thickened epoxy. Even with the bolts on the end I had more board movement in the middle than expected. By the time I flattened the surfaces I had exactly the height required for the hold down bracket. Next time I would clamp the glue up both directions to prevent this movement.
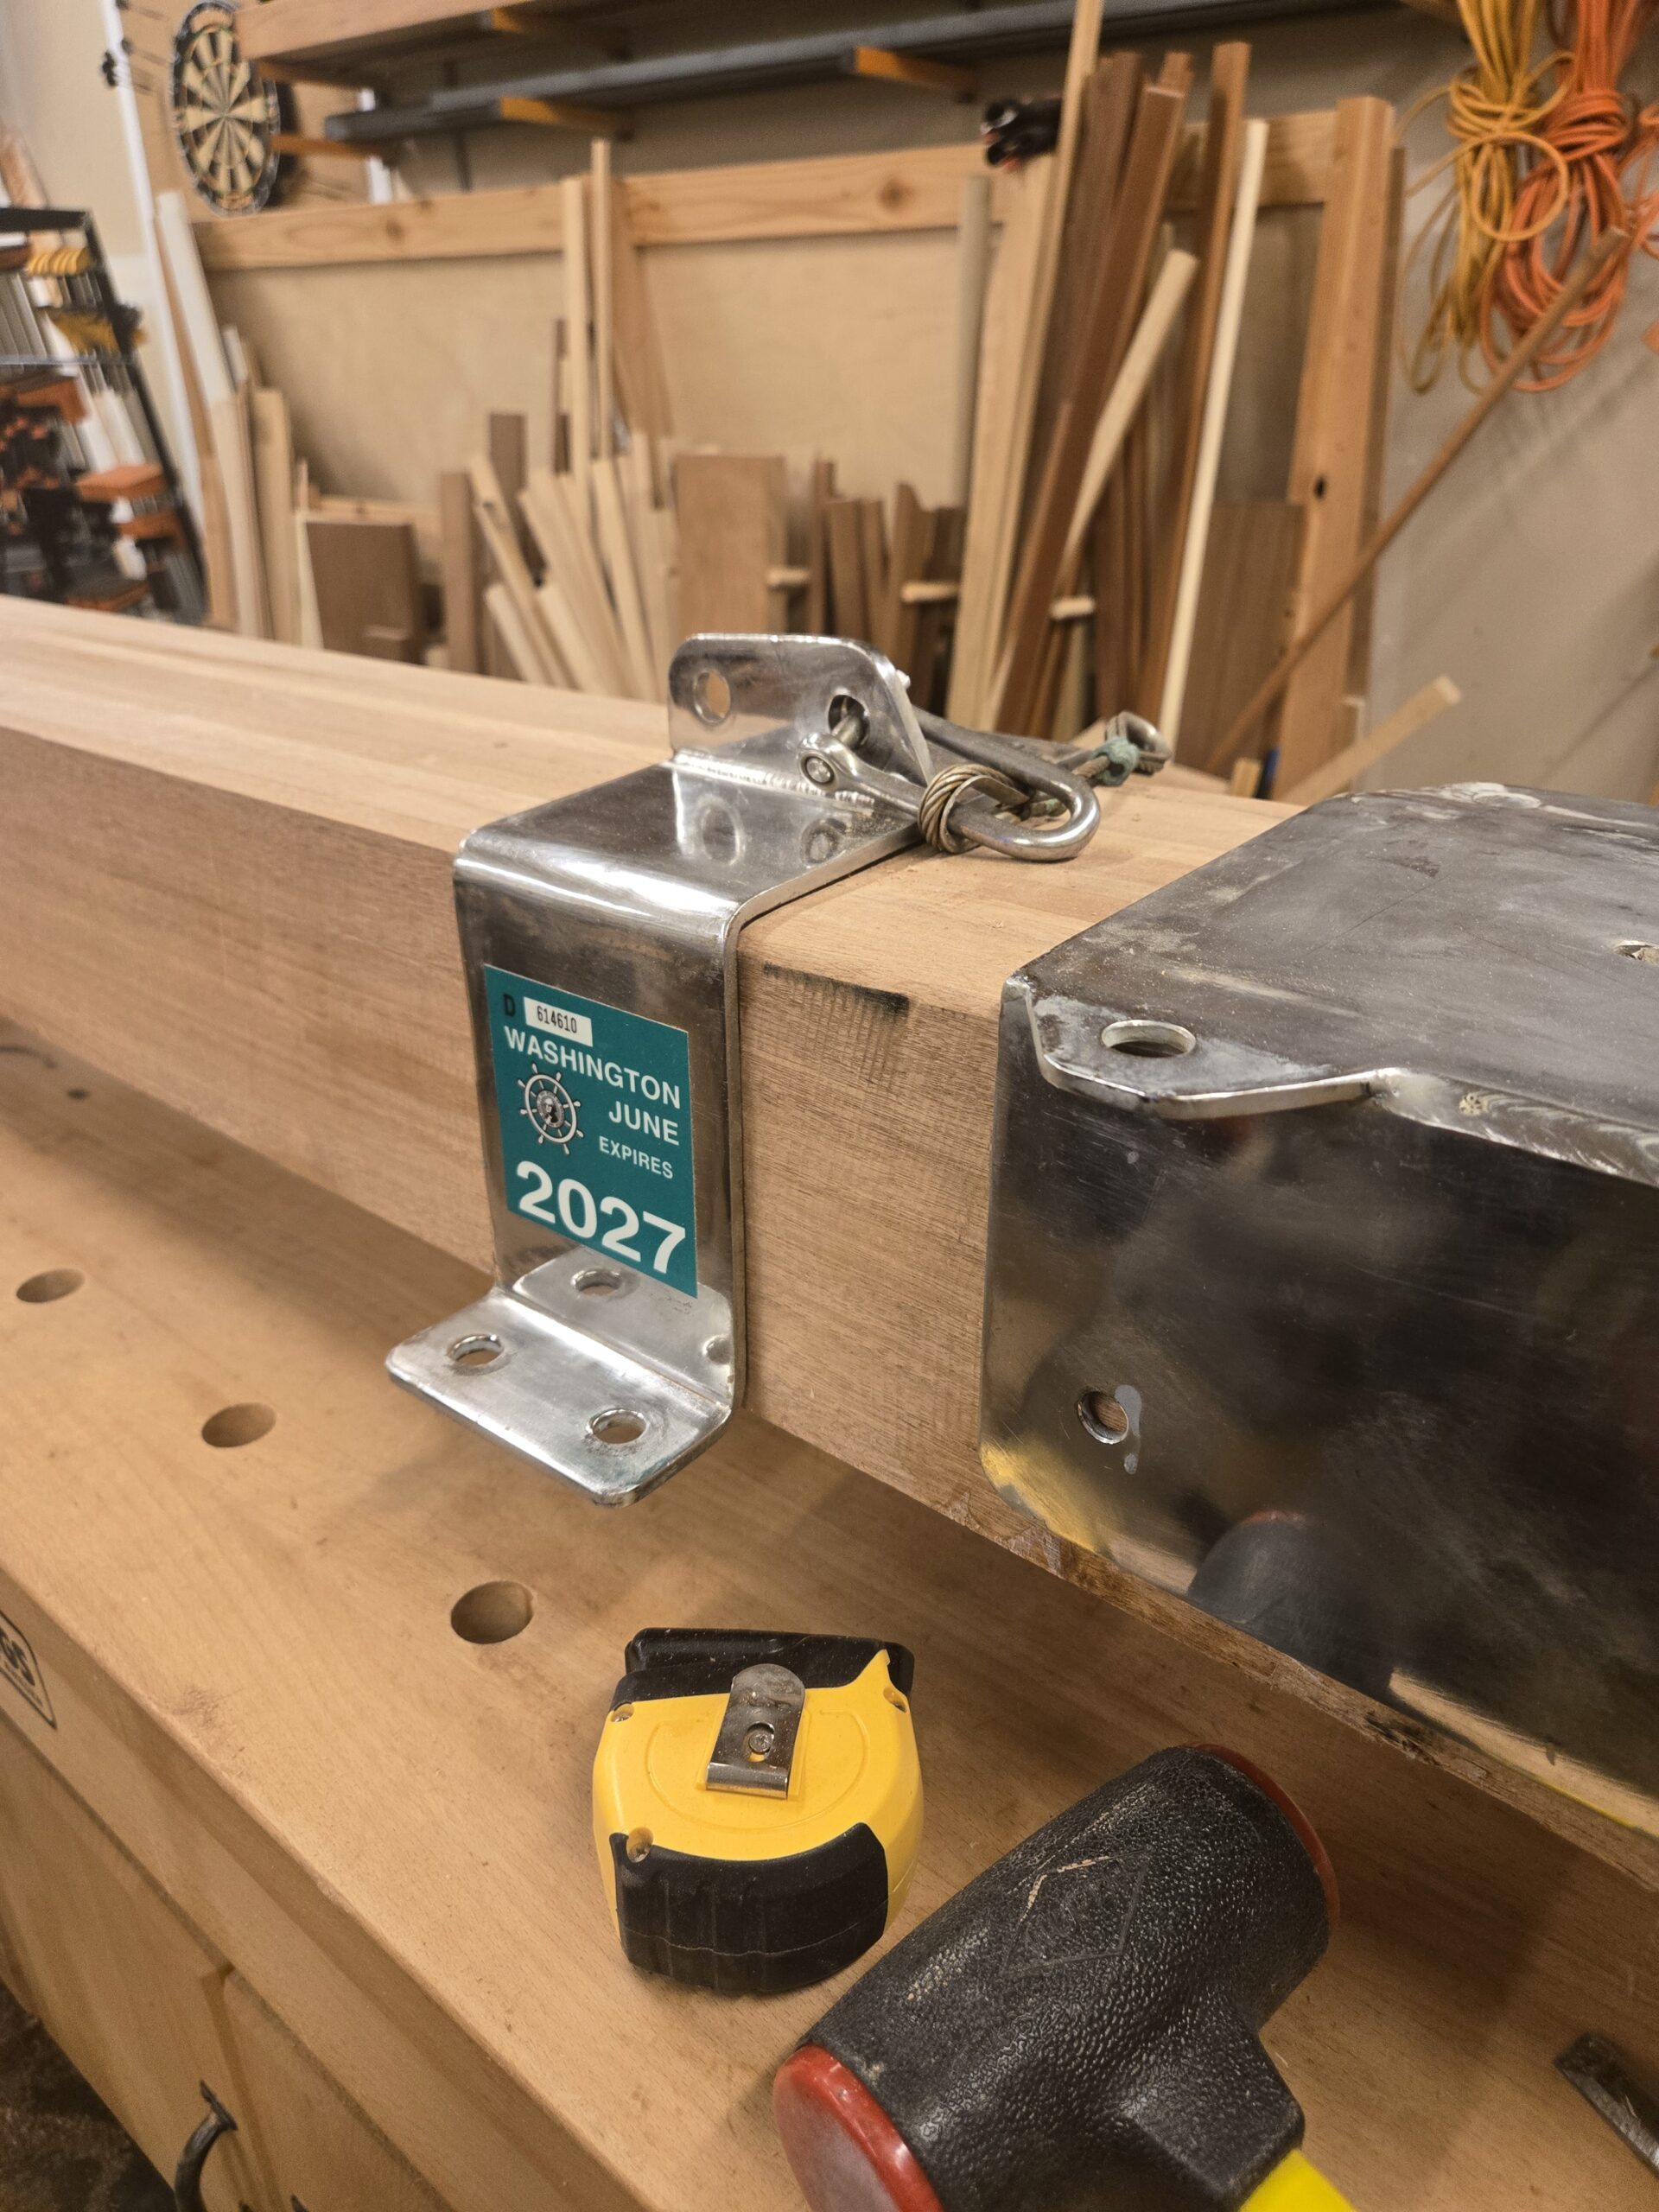
The mounting bracket and windlass bracket both fit where they need to be, although I am still waiting for the new Muir Cheetah to confirm mounting bracket changes and to drill the very scary large hole through the new bowsprit for the wires. Next steps are to mark and carve the octangonal middle section, and turn the outboard end into a perfect 4″ square, then an octagon, then a hexadecagon, then a triacontadigon, and then a circle. You basically keep doubling the number of sides until you sand it into a circle.
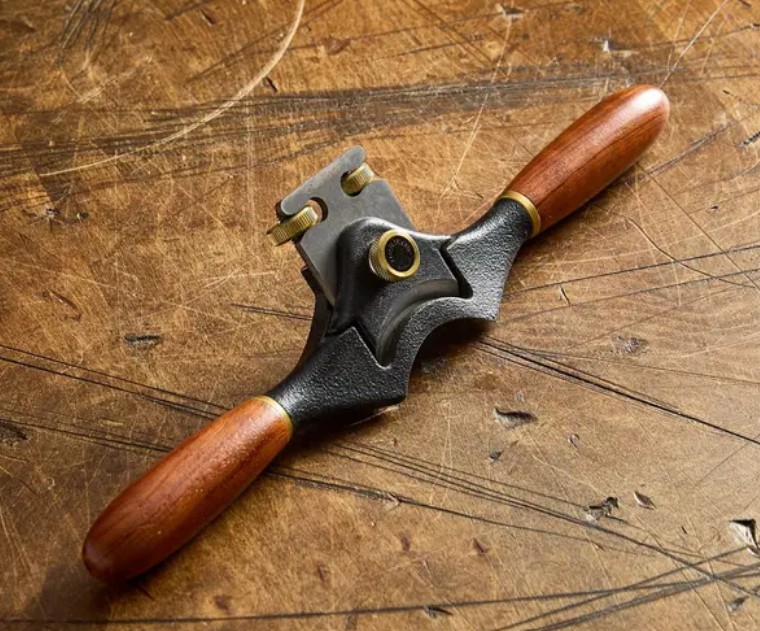
This is the only actual carving I will do on the entire bowsprit, never used a spokeshave before, looking forward to it!