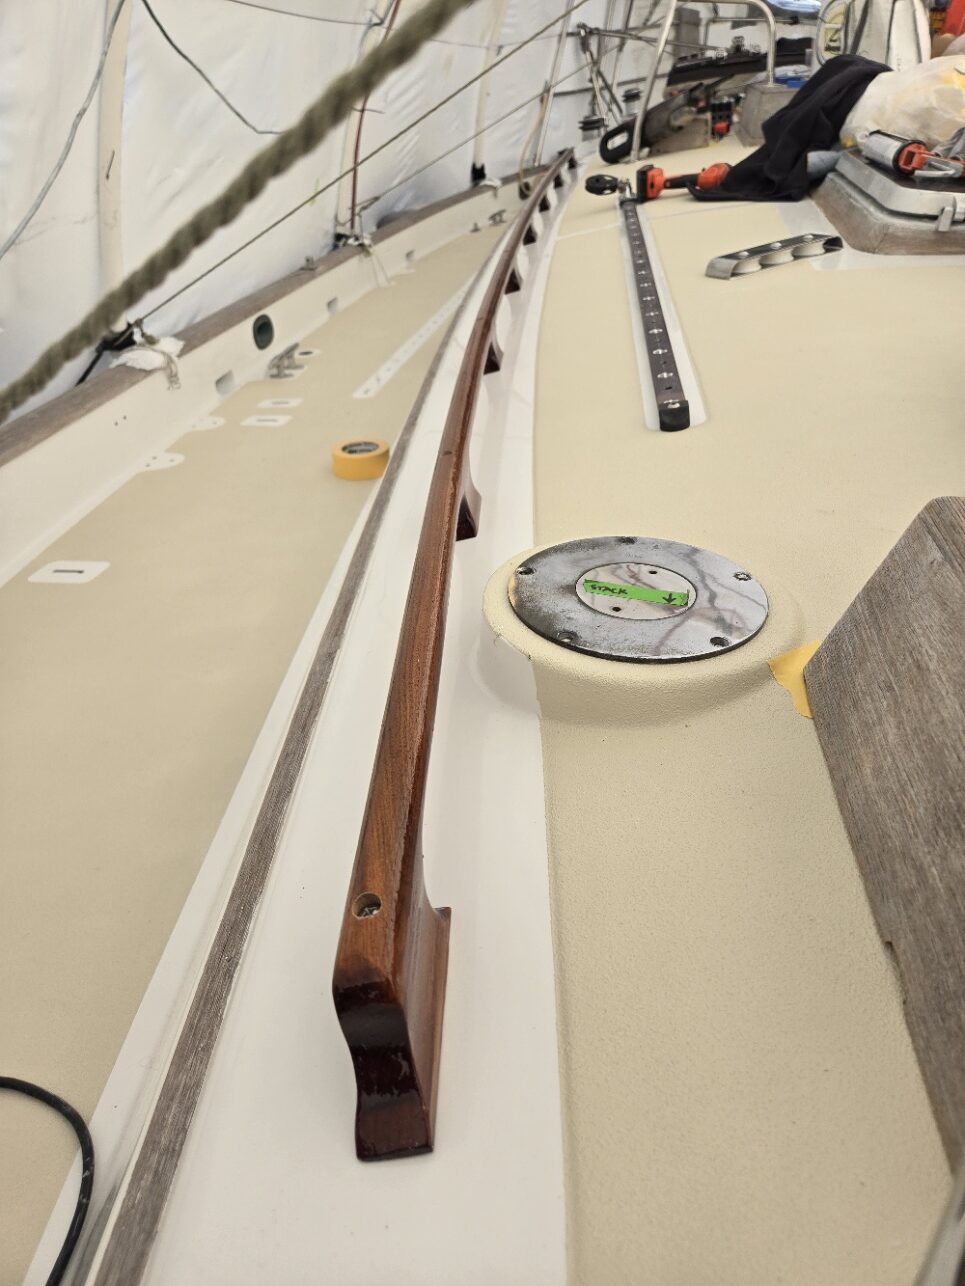
When they removed the mast from the boat one of the wires caught on the handrail and snapped it. So add new handrails to the to-do list. The originals were old and brittle, time to make new ones anyway. The handrails on our boat are 13’2″. not exactly something you buy off-the-shelf at West Marine. Like the bowsprit, I’ve never made handrails before, but it seemed like a fun challenge.
I found an article from an old Wooden Boat that described a way to make rather elegant handrails and since I didn’t want them to look like blocky cut-outs using a bandsaw, I adapted their methods to make appropriately sized handrails for our boat. It appeared I could achieve 90% of the shape with machine work, a worthwhile goal.
We decided these should be made from teak, so off to Edensaw to shop for wood. I needed around 1-1/2 x 3″ finished dimensions, 13’2″ long, times two. I bought a piece of 8/4 teak, 7″ wide and 13’2″ long for just slightly less than sending your kid to college for a semester. Just kidding, it was $680 dollars. It was a really good deal, the same price per boardfoot they sell reclaimed teak, full price for that piece should have been over $1,000! See why I rarely make anything out of teak anymore?
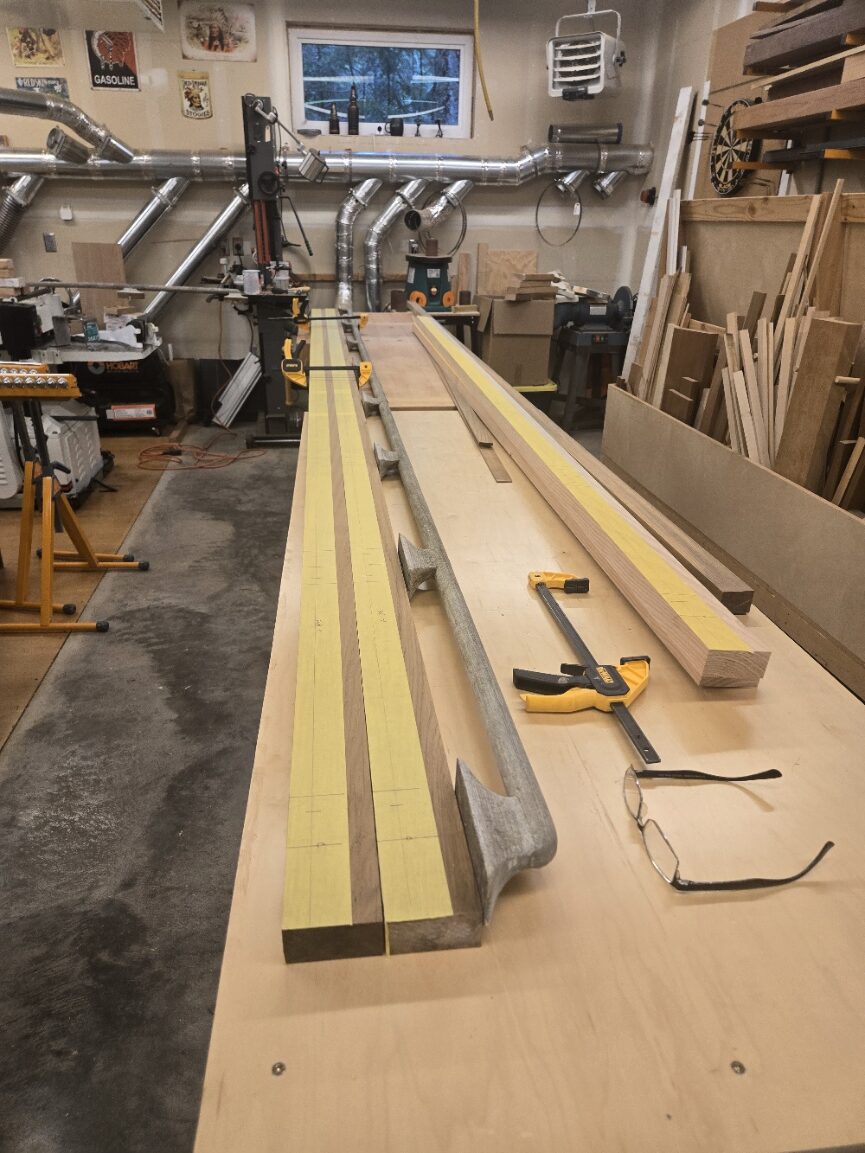
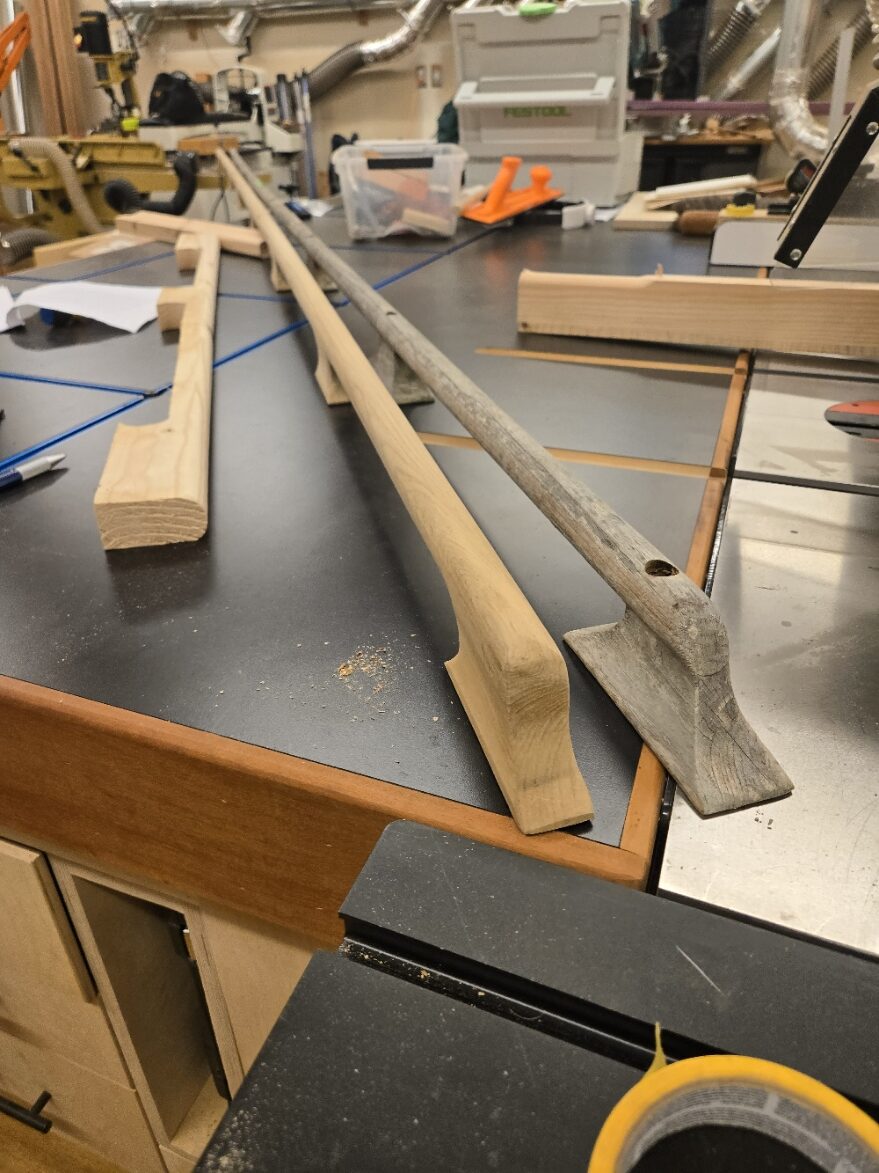
I dimensioned the teak to give me 2 handrail blanks. I also made 3 additional blanks out of some fir 2×10’s I had lying around. There is a lot of machine set-up to make handrails and I wanted to successfully complete each step with fir before I committed the more expensive teak. Above are the two teak blanks as I copy the landmarks from the one intact original rail.
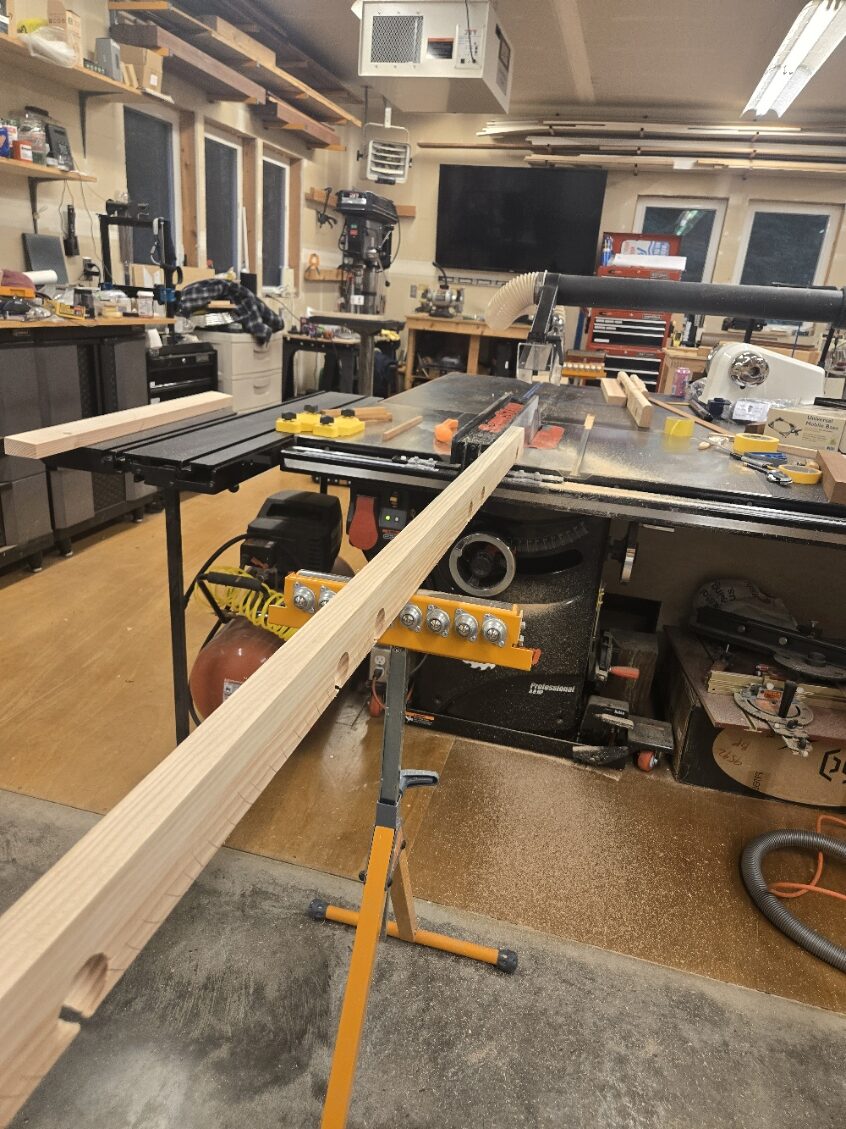
Before we get into the process, let me say my woodshop is not set up for this. When you set up a shop you decide how much infeed/outfeed each machine gets. In my shop, I am setup to work on things a maximum of 8′. So working on 13′ handrails required moving machines to gain enough room to process wood.
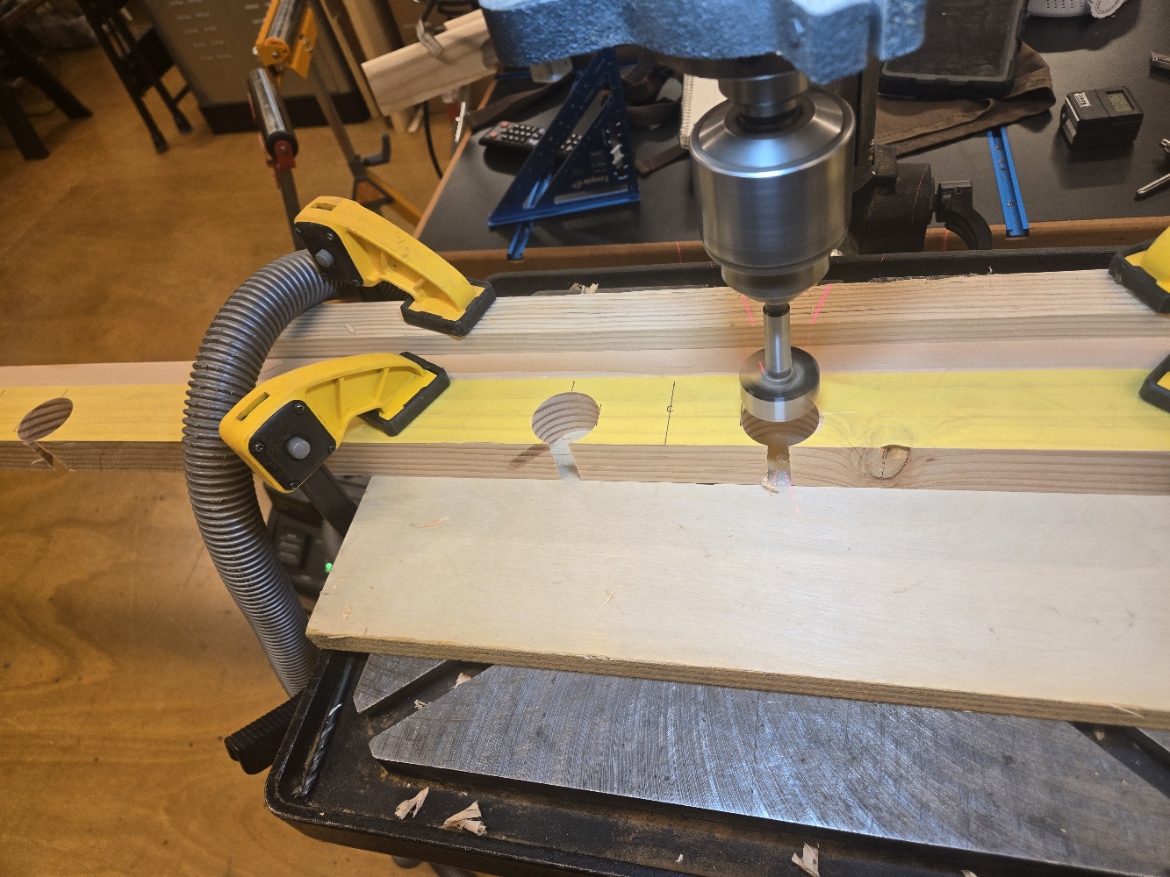
After marking all the mounting holes and support tower positions, the first step was to cut a 1-1/2″ hole through the blanks, these become the inside radii of the arches in the handrail. A forstner bit gives a very clean hole. I was able to relocate my drill press in the center of the shop to have 13′ on each side.
The next step for me was to deviate from the Wooden Boat article and cut the shape into the ends of each railing. Since I was about to start cutting angles, coves, and other shapes it seemed easier to cut these with a jig-saw while everything was still square. The above picture is cutting the two teak blanks, my three fir sacrificial pieces and the original rail are on the right.
Angling the sides with a three degree cut gives the finished rails a less blocky look, a little more streamlined. The fir pieces came into play because I was cutting a 3 degree slope on each side while leaving the bottom 1/8 untouched so the base was square. Since newer table saws are left-tilting for safety, I had to move my fence to the other side to make these cuts.
Because this cut was shaving the entire side, it was really messy. Not much saw dust went under the table and I couldn’t get the overarm chute close enough to really do anything. Lots of vacuuming!

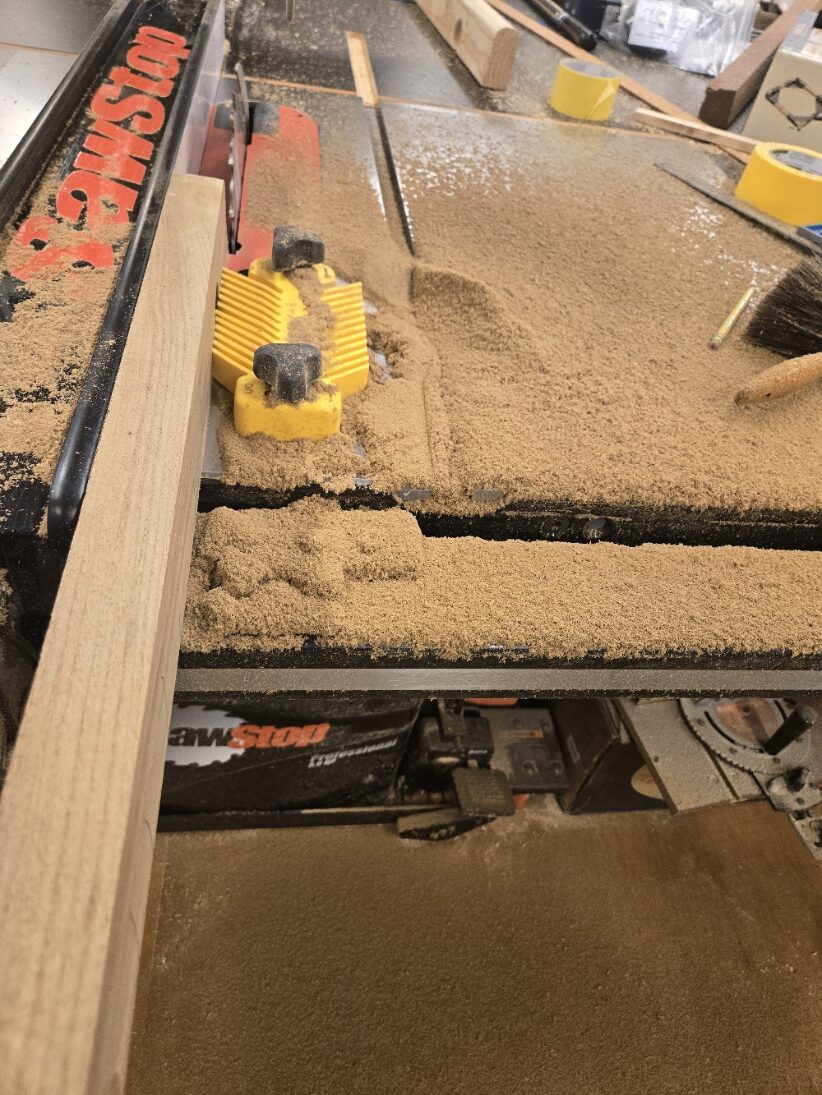
The next step was to cut a shallow cove into each side of the rail blanks. This gives the rails better shape, and if done correctly really leads into the rounded rail on top. You cut a cove with a table saw by setting your blade height to the depth of the cove, 1/8″ in this case, and running the piece diagonally across the saw. The angle dictates the length of the cove. In this case my article failed me, suggesting trial and error was the best method. However, I found a website that calculates the angle. https://www.thewoodpecker.net/cove/cove.htm
You input your blade diameter, depth of cut, and desired width of the cove, and it calculates the angle to pass the piece across the saw. For this cut, it calculated 46 degrees. So I set my fence to 46 degrees and had a perfect cove on the side of the blanks.
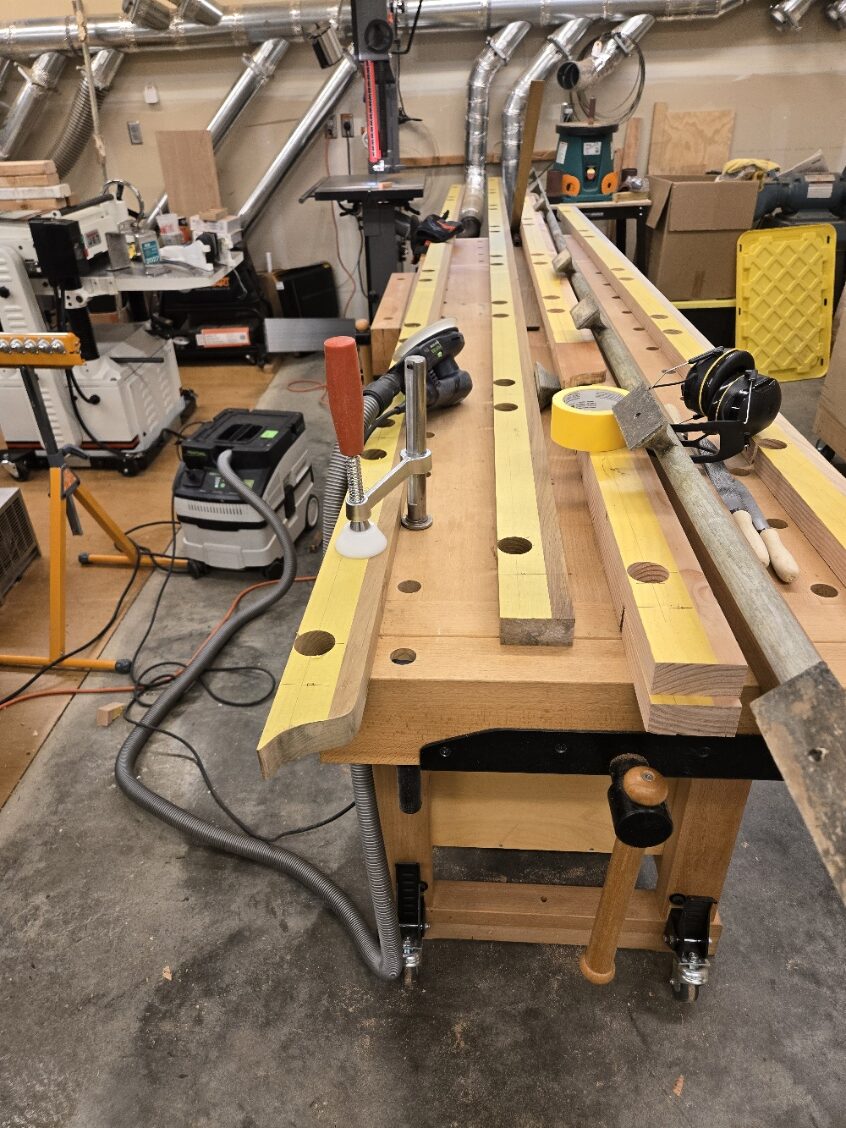
I used the teak cutoff as a fence and used mag-switch feather boards to keep the handrails tight to the fence. With a good Forrest cross-cut blade, the coves came out perfect. I did have to use some of the outdoors to give myself 13′ on infeed, and had to move my jointer for 13′ of outfeed in the shop.
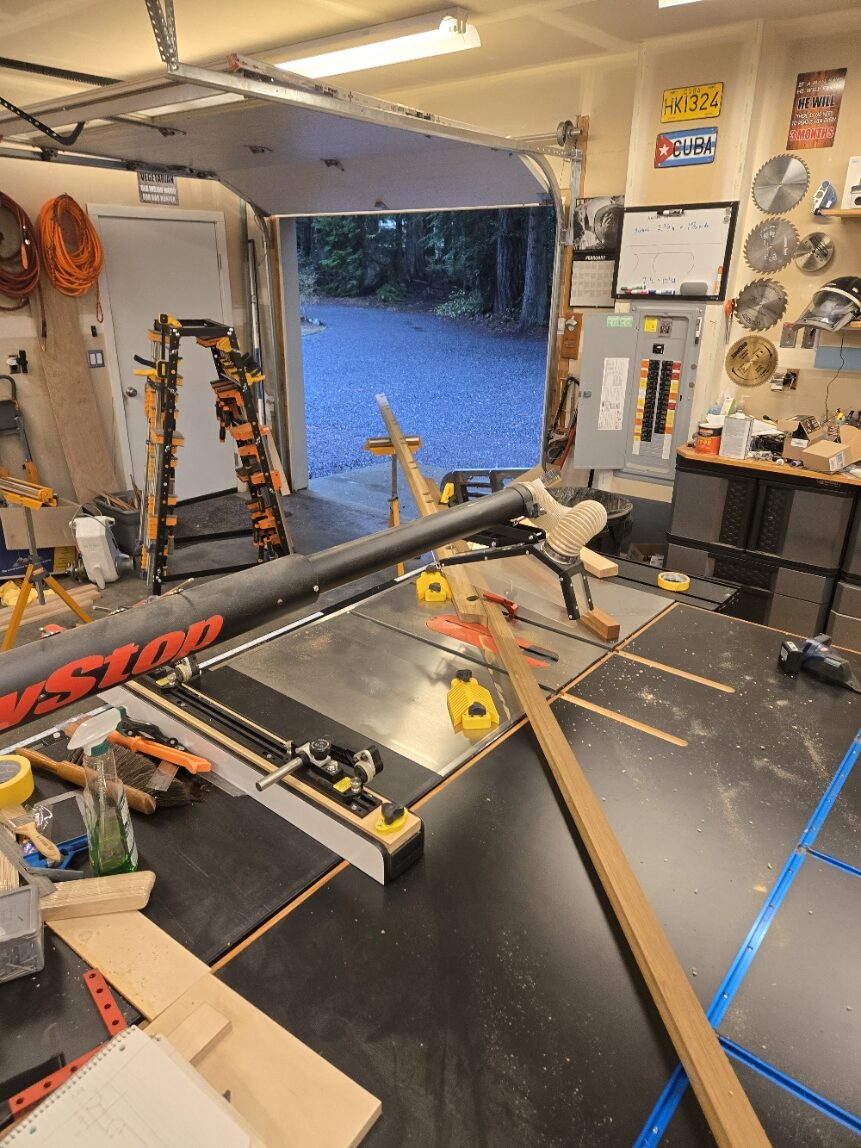
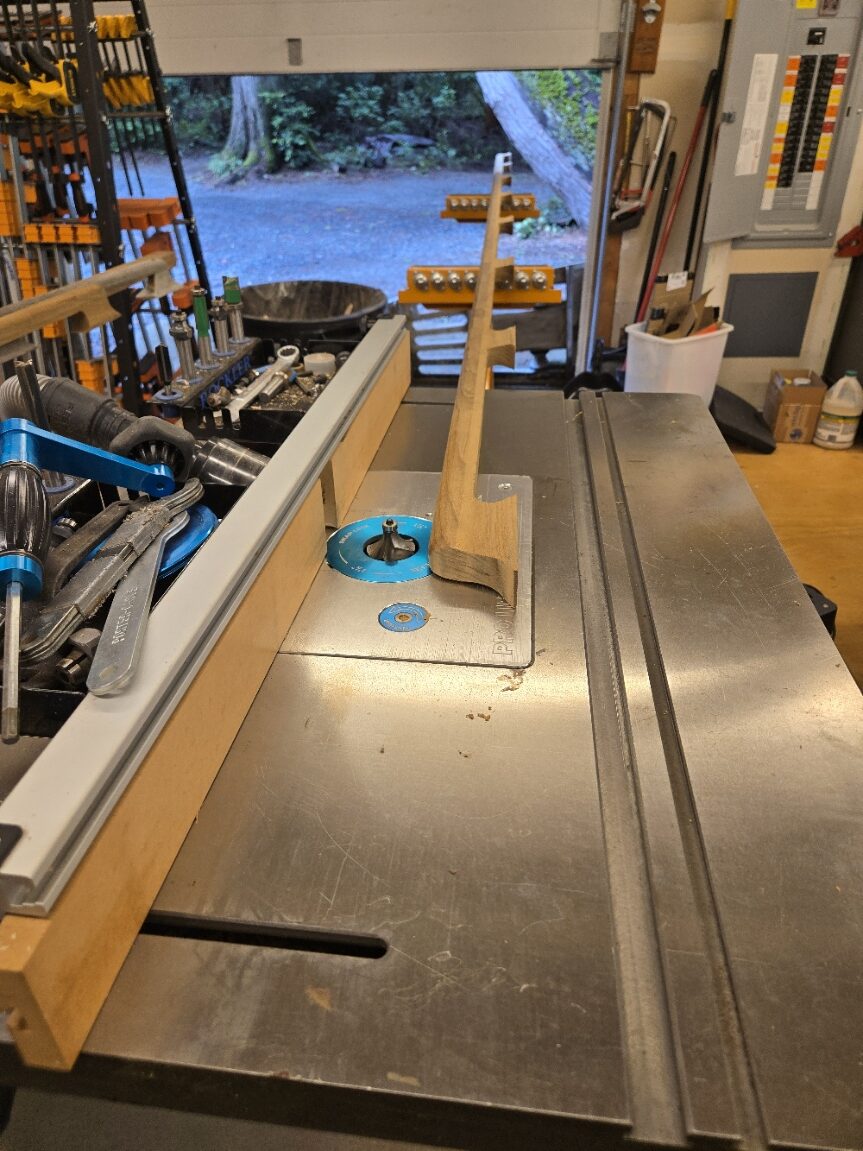
Finally time to cut out the arches, which means cutting between the 1-1/2″ holes we cut in the blanks. Because I cut the 3 degree angles into the sides, I have to tilt my bandsaw table the same amount so the cuts are parallel to the bottom of the feet. Since my shop is only 24′ deep, I had to open the roller door and stick the end outside to make the last cut.
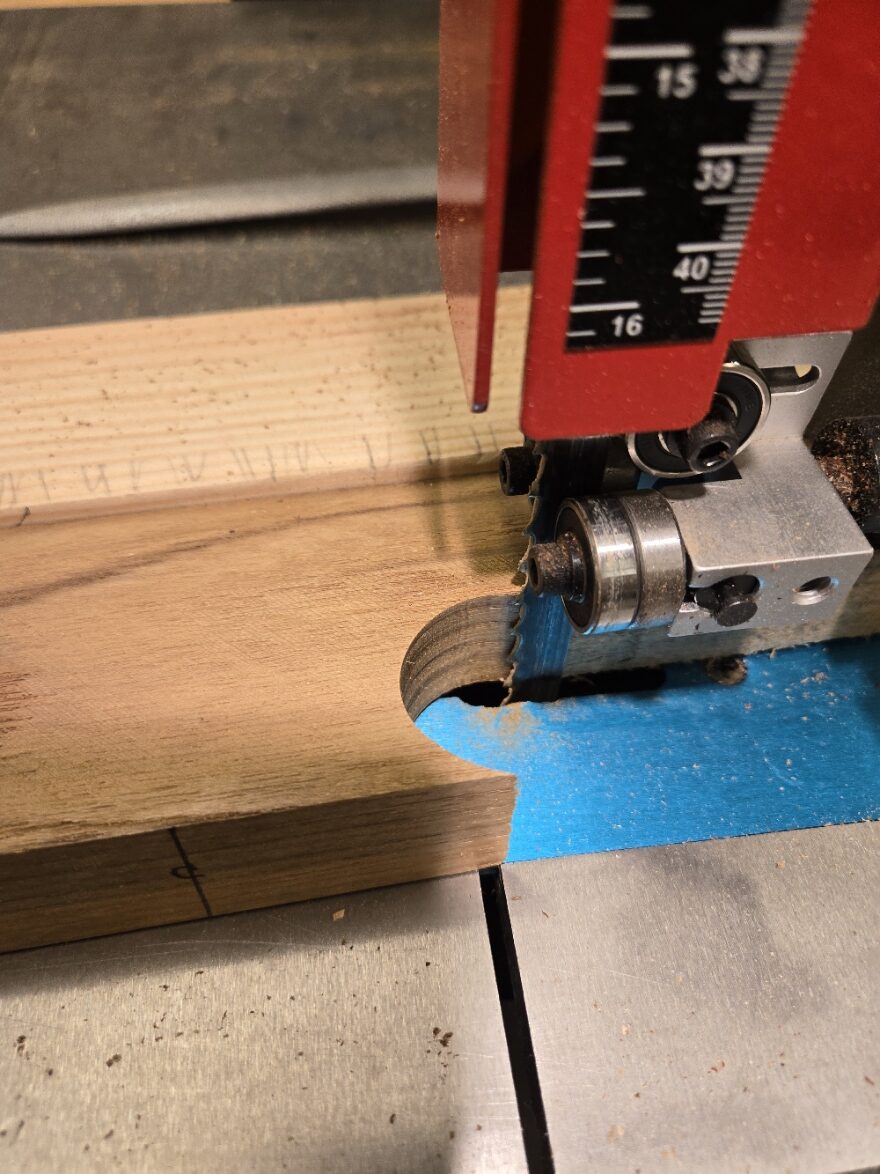
I chose a blade narrow enough to fit into the cut circles but still wide enough to give a nice, straight cut. It is vital to have the bandsaw setup well so it cuts a very straight line!

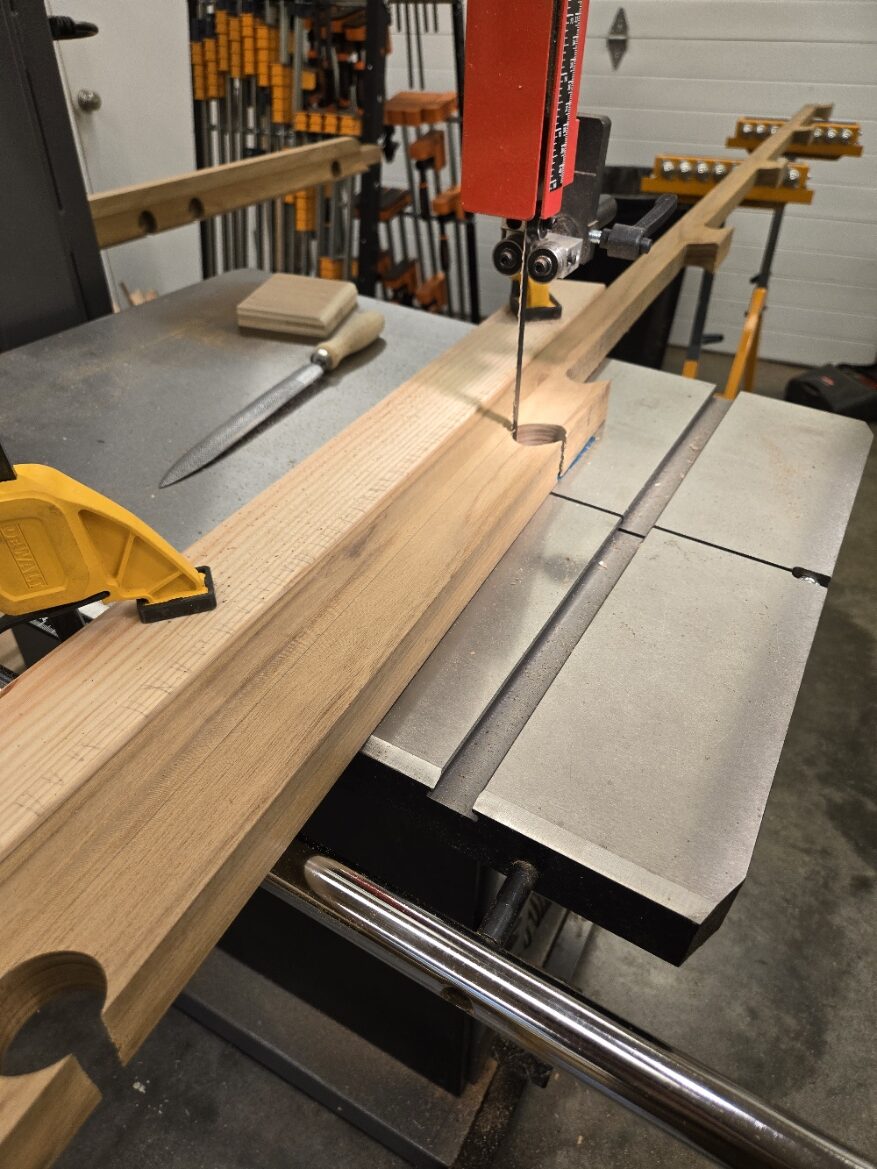
Here are the two teak handrails next to the original. So far I have been operating on faith, but I am beginning to believe this might actually work. Clearly they need some rounding. Since I drastically changed the dimensions from the original article, I ordered a couple of large radius round over bits to make the “round” part. My railings are destined to be more oval shape for strength. After a bit of experimenting on fir, I decided a 5/8 round-over bit for my router was the best answer. I ordered two Whiteside bits since I wasn’t going to risk my expensive teak on cheap Amazon router bits.
Back under the knife they go, this time on the router table. One complete pass down each top corner, then a more nerve-wracking cut on each inside arch. I ran the bit half way down each mount. I was left with fairly complete rounded railings.
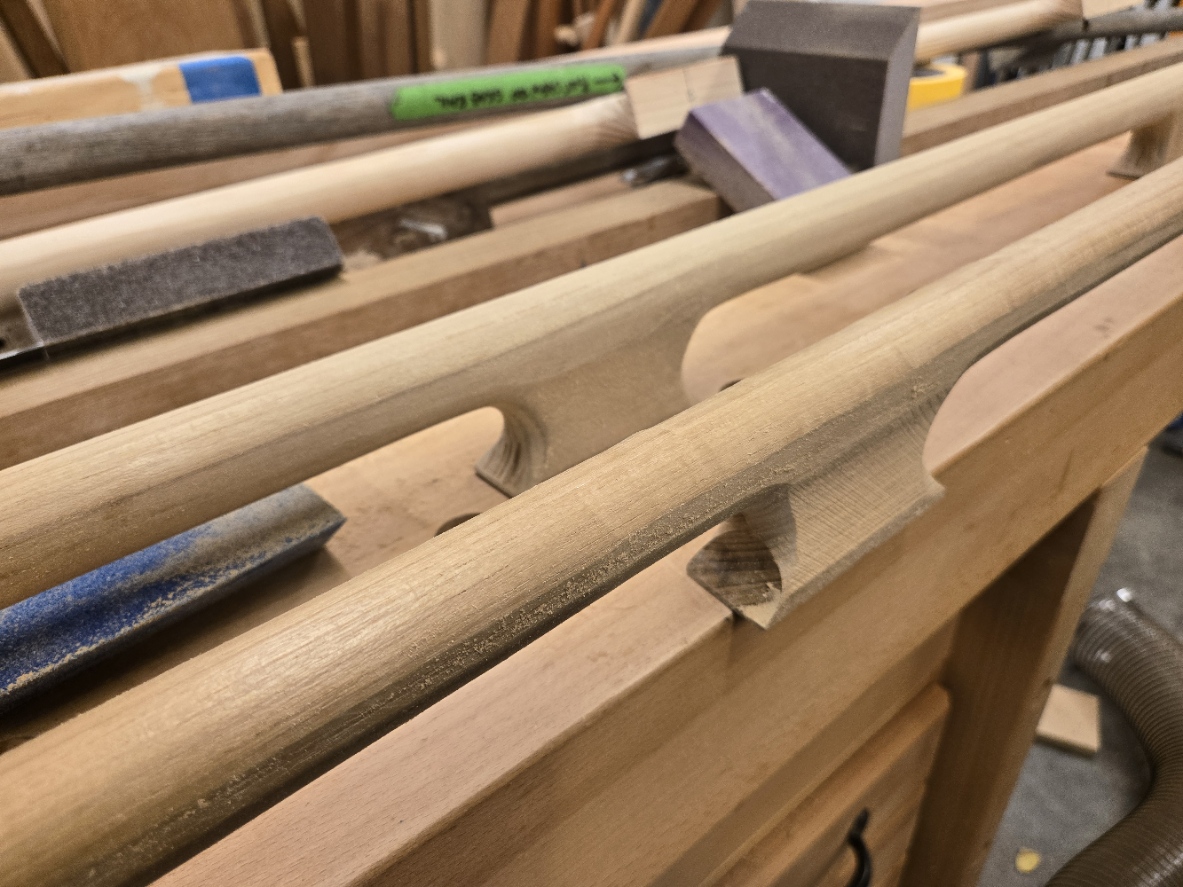
At this point I had a ridge on both top and bottom to sand off, 10 minutes with a sander. A quick removal of edges and other sharp transitions, and they were looking pretty good.
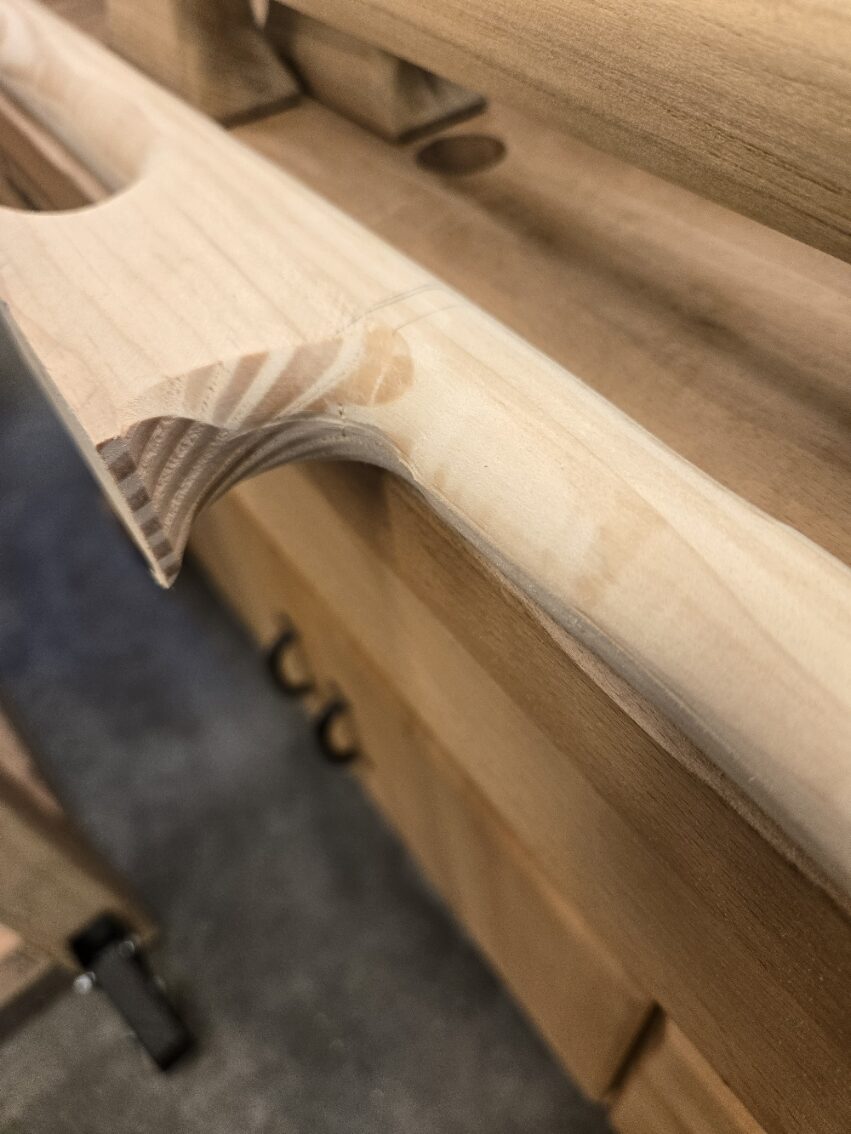
The inside of the legs were the biggest challenge where the round over bit needed to blend with the base. I grabbed some various diameter sanding sleeves from my spindle sander and was able to hand sand and blend these ridges very easily with the cylindrical sanding sleeves.
Quite pleased with the result, especially considering I only spent three hours sanding both handrails. Kind of meets my goal of getting most of the shape without endless, dreary hours sanding.
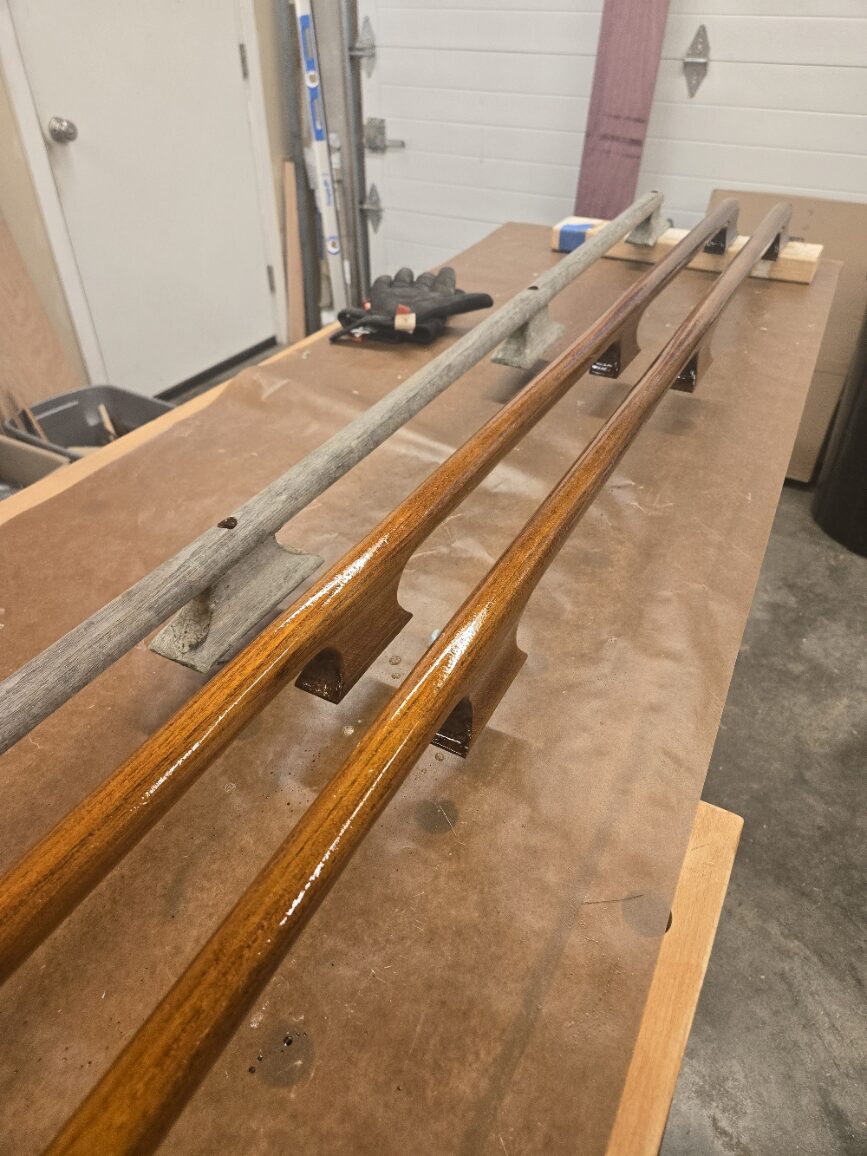
Gave them a few coats of Awlwood in the shop so they were at least partially protected. I did skip the step of sanding these perfectly round. Apparently, one sands a section to perfection, then uses hard styrofoam to shape a sanding block, attaches sand paper to the styrofoam, and sands the complete length. To perfection. For now, I will leave that an urban legend.
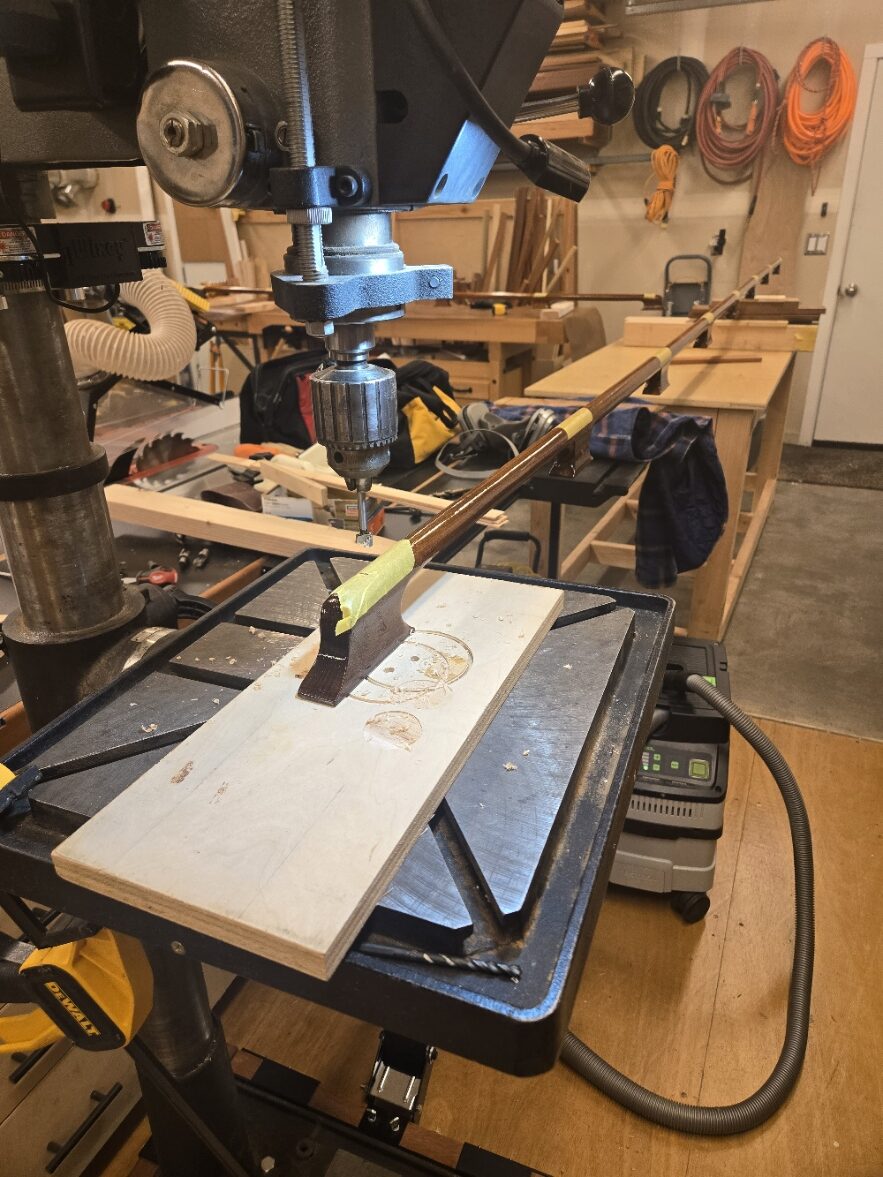
Last step in the shop is to drill the mounting holes. First a forstner bit for a bung, then the 1/4″ mounting hole. I chose to mount these from above with bungs, same as the originals. They can be mounted from underneath with the threaded screw into epoxy, it seemed excessively complicated just to avoid a bung.

And mounted to the boat. I’ll bung it tomorrow, and do a few more coats of awlwood. I was a bit nervous about the amount of bend required in these 1-1/4 round handrails, but it installed easily. In the end I am happy with how this came out!