With the decks faired it was time to start working on the primer for the gel coat.

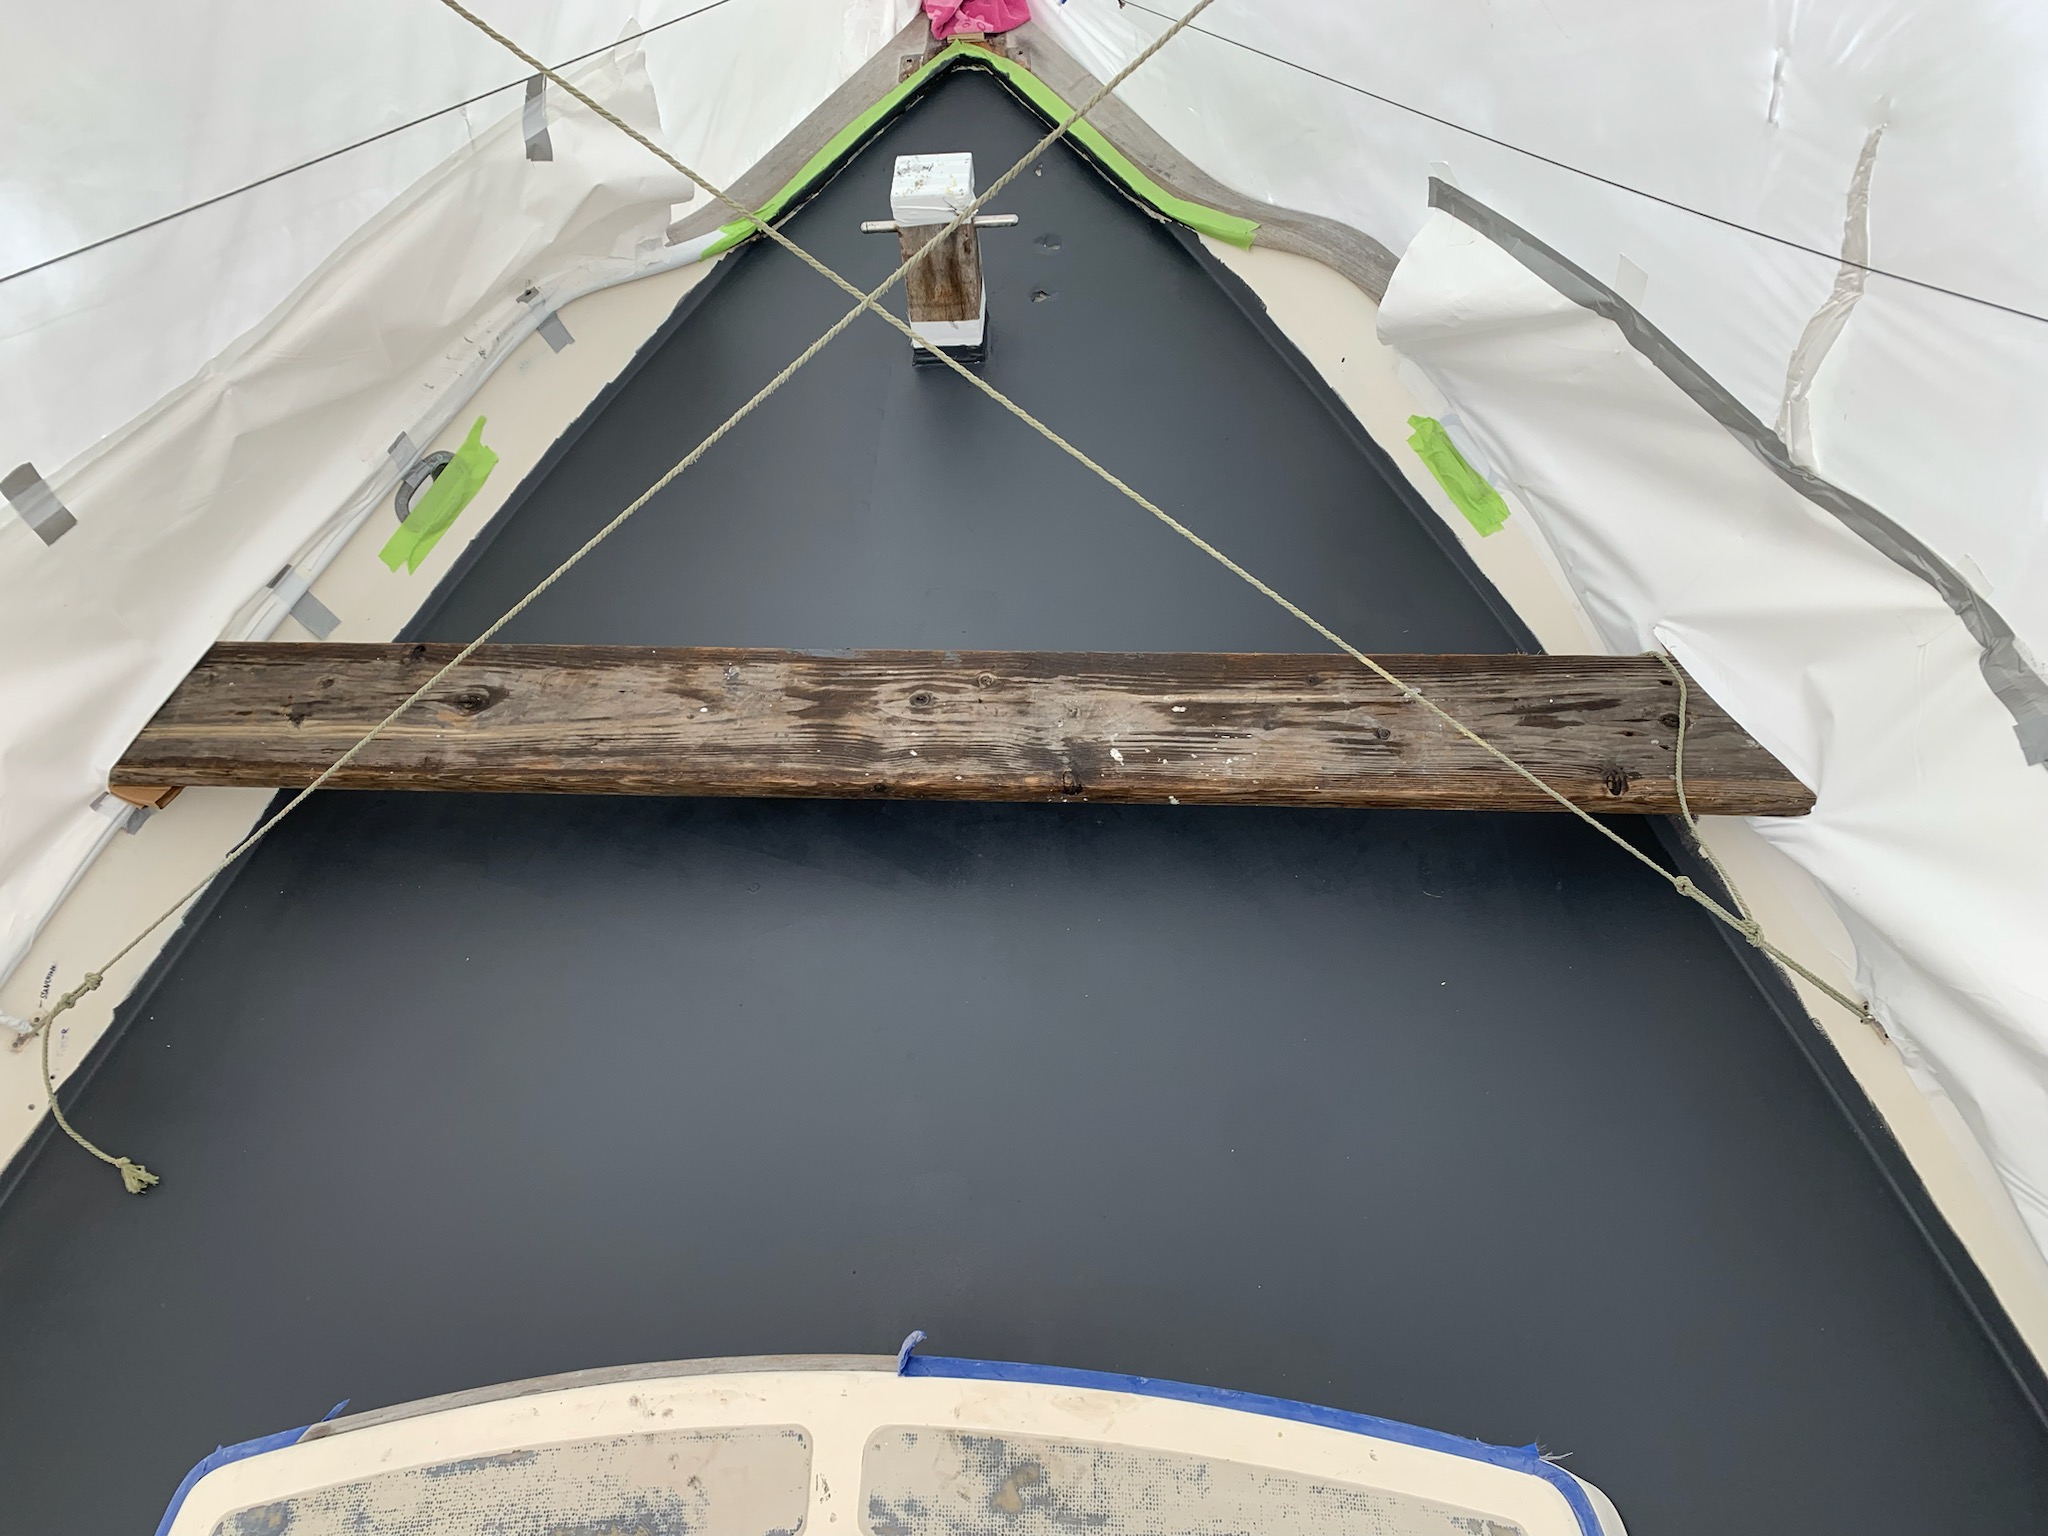
A plank across the foredeck gives access to lay on the primer and leave the space pristine and ready for sanding.
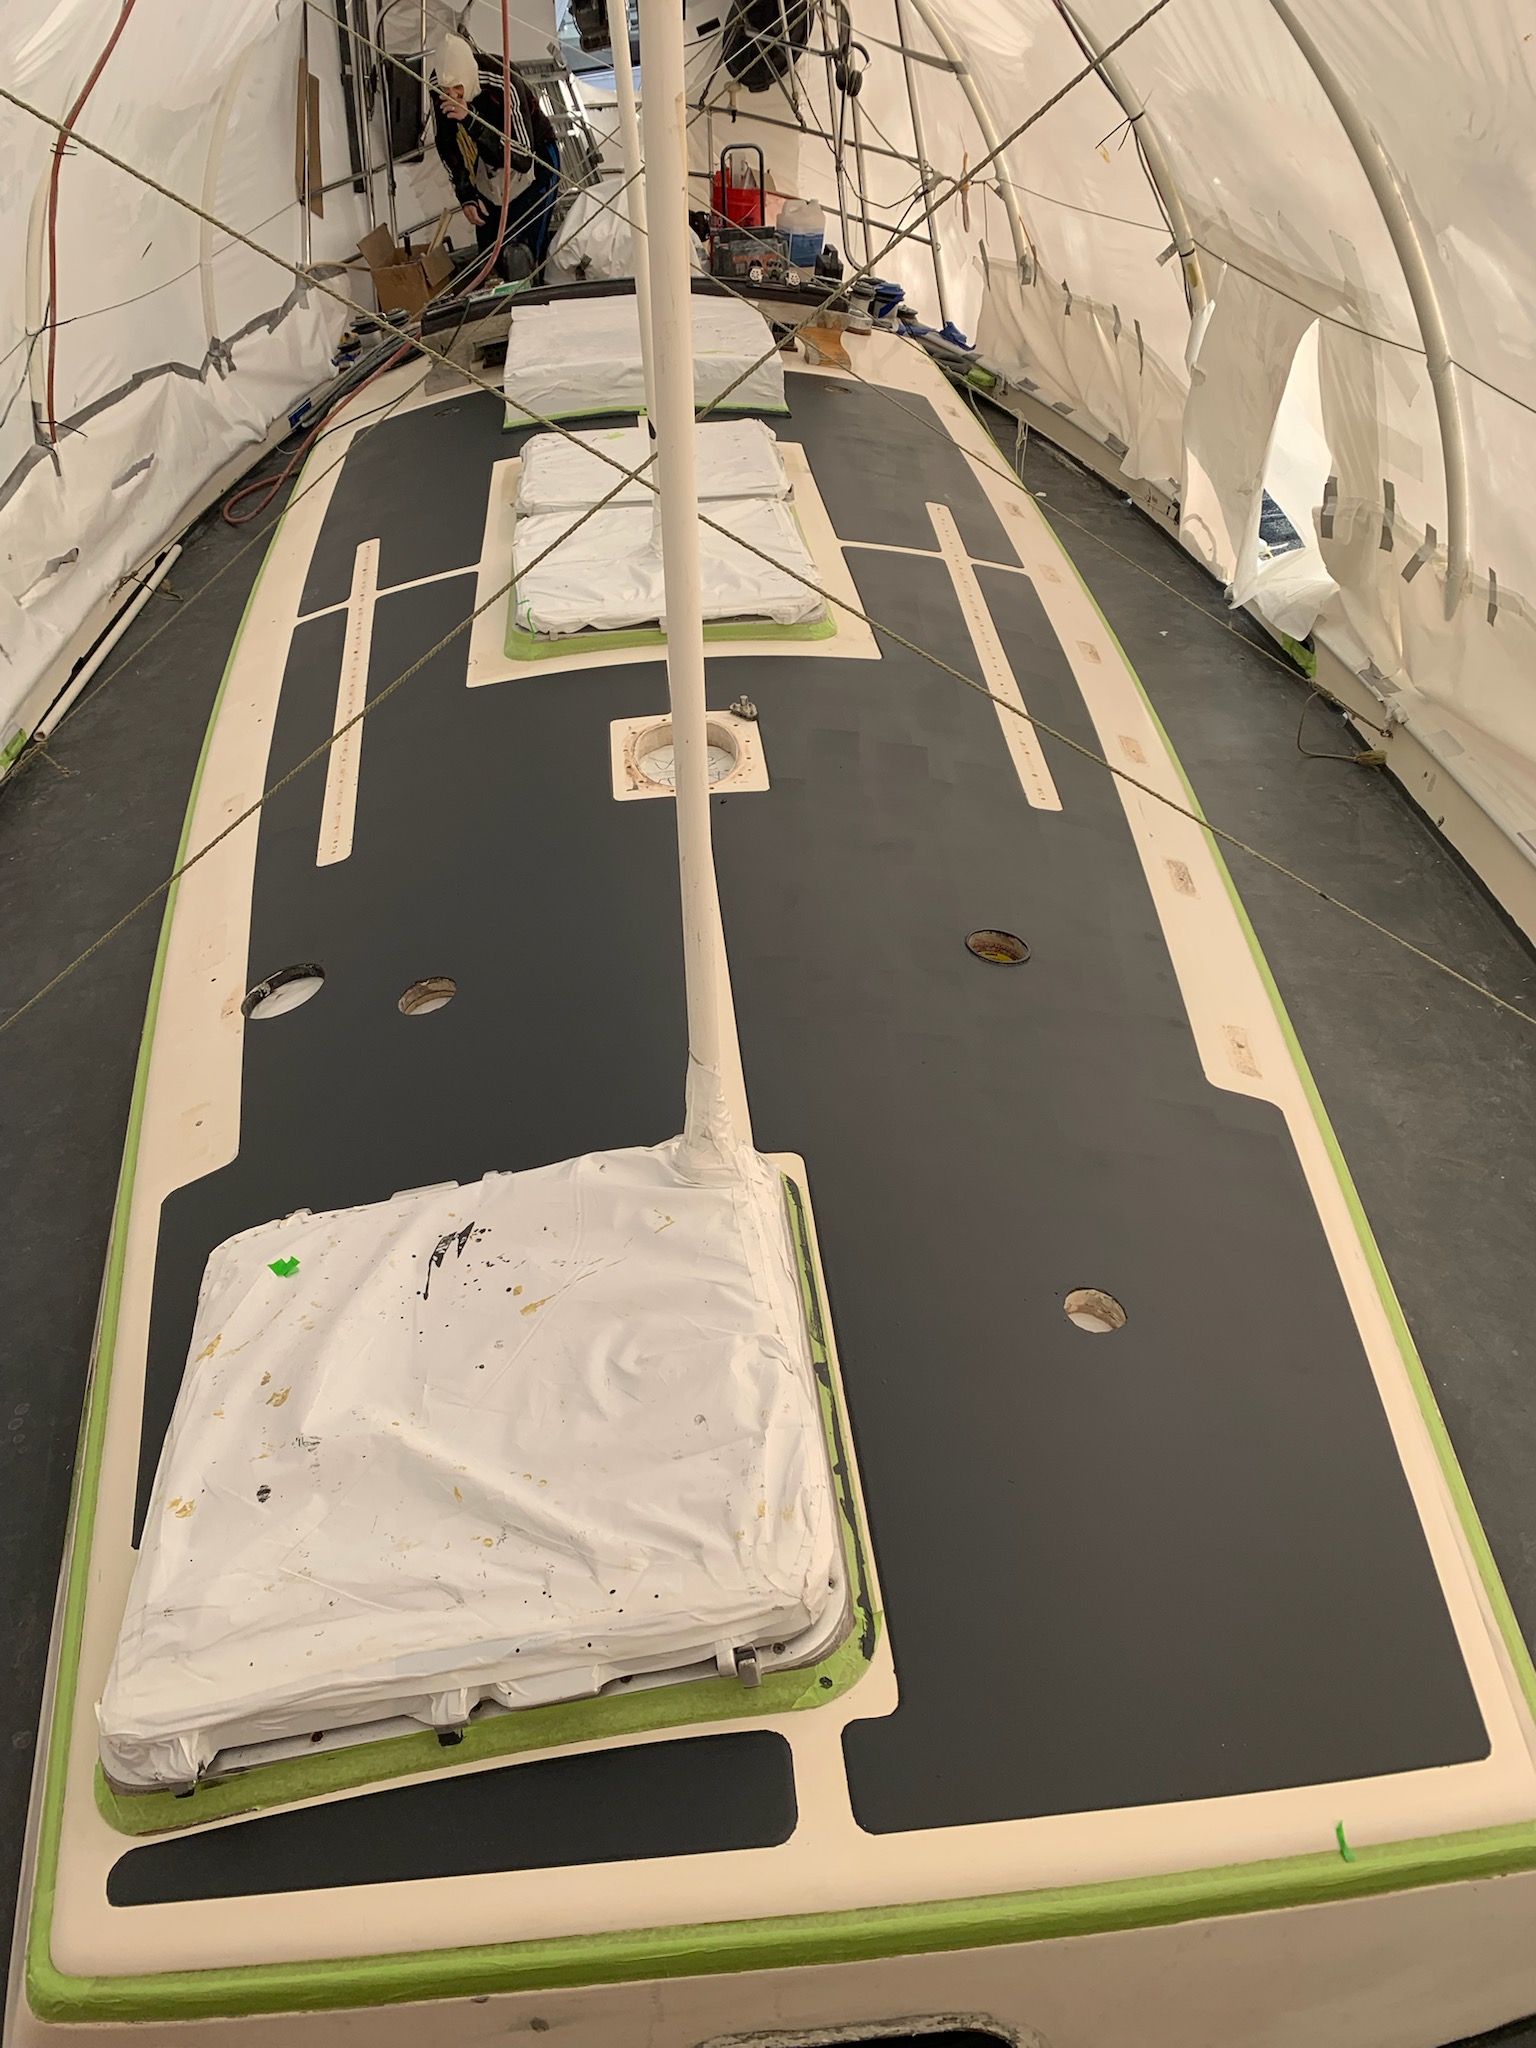
This is the primer on the foredeck. This primer has a built in guide coat to help sand for a perfect finish. Again from google: A guide coat is a thin, contrasting layer of paint or powder applied to a surface, typically after priming, to reveal imperfections like scratches, pinholes, and low spots before sanding. It is used to ensure a smooth and even surface by showing exactly where to sand and by what extent to continue sanding until the guide coat is completely removed from the high spots.
The cabin top still needed fairing before it was prepped for nonskid.
The primer is applied to the cabin top.
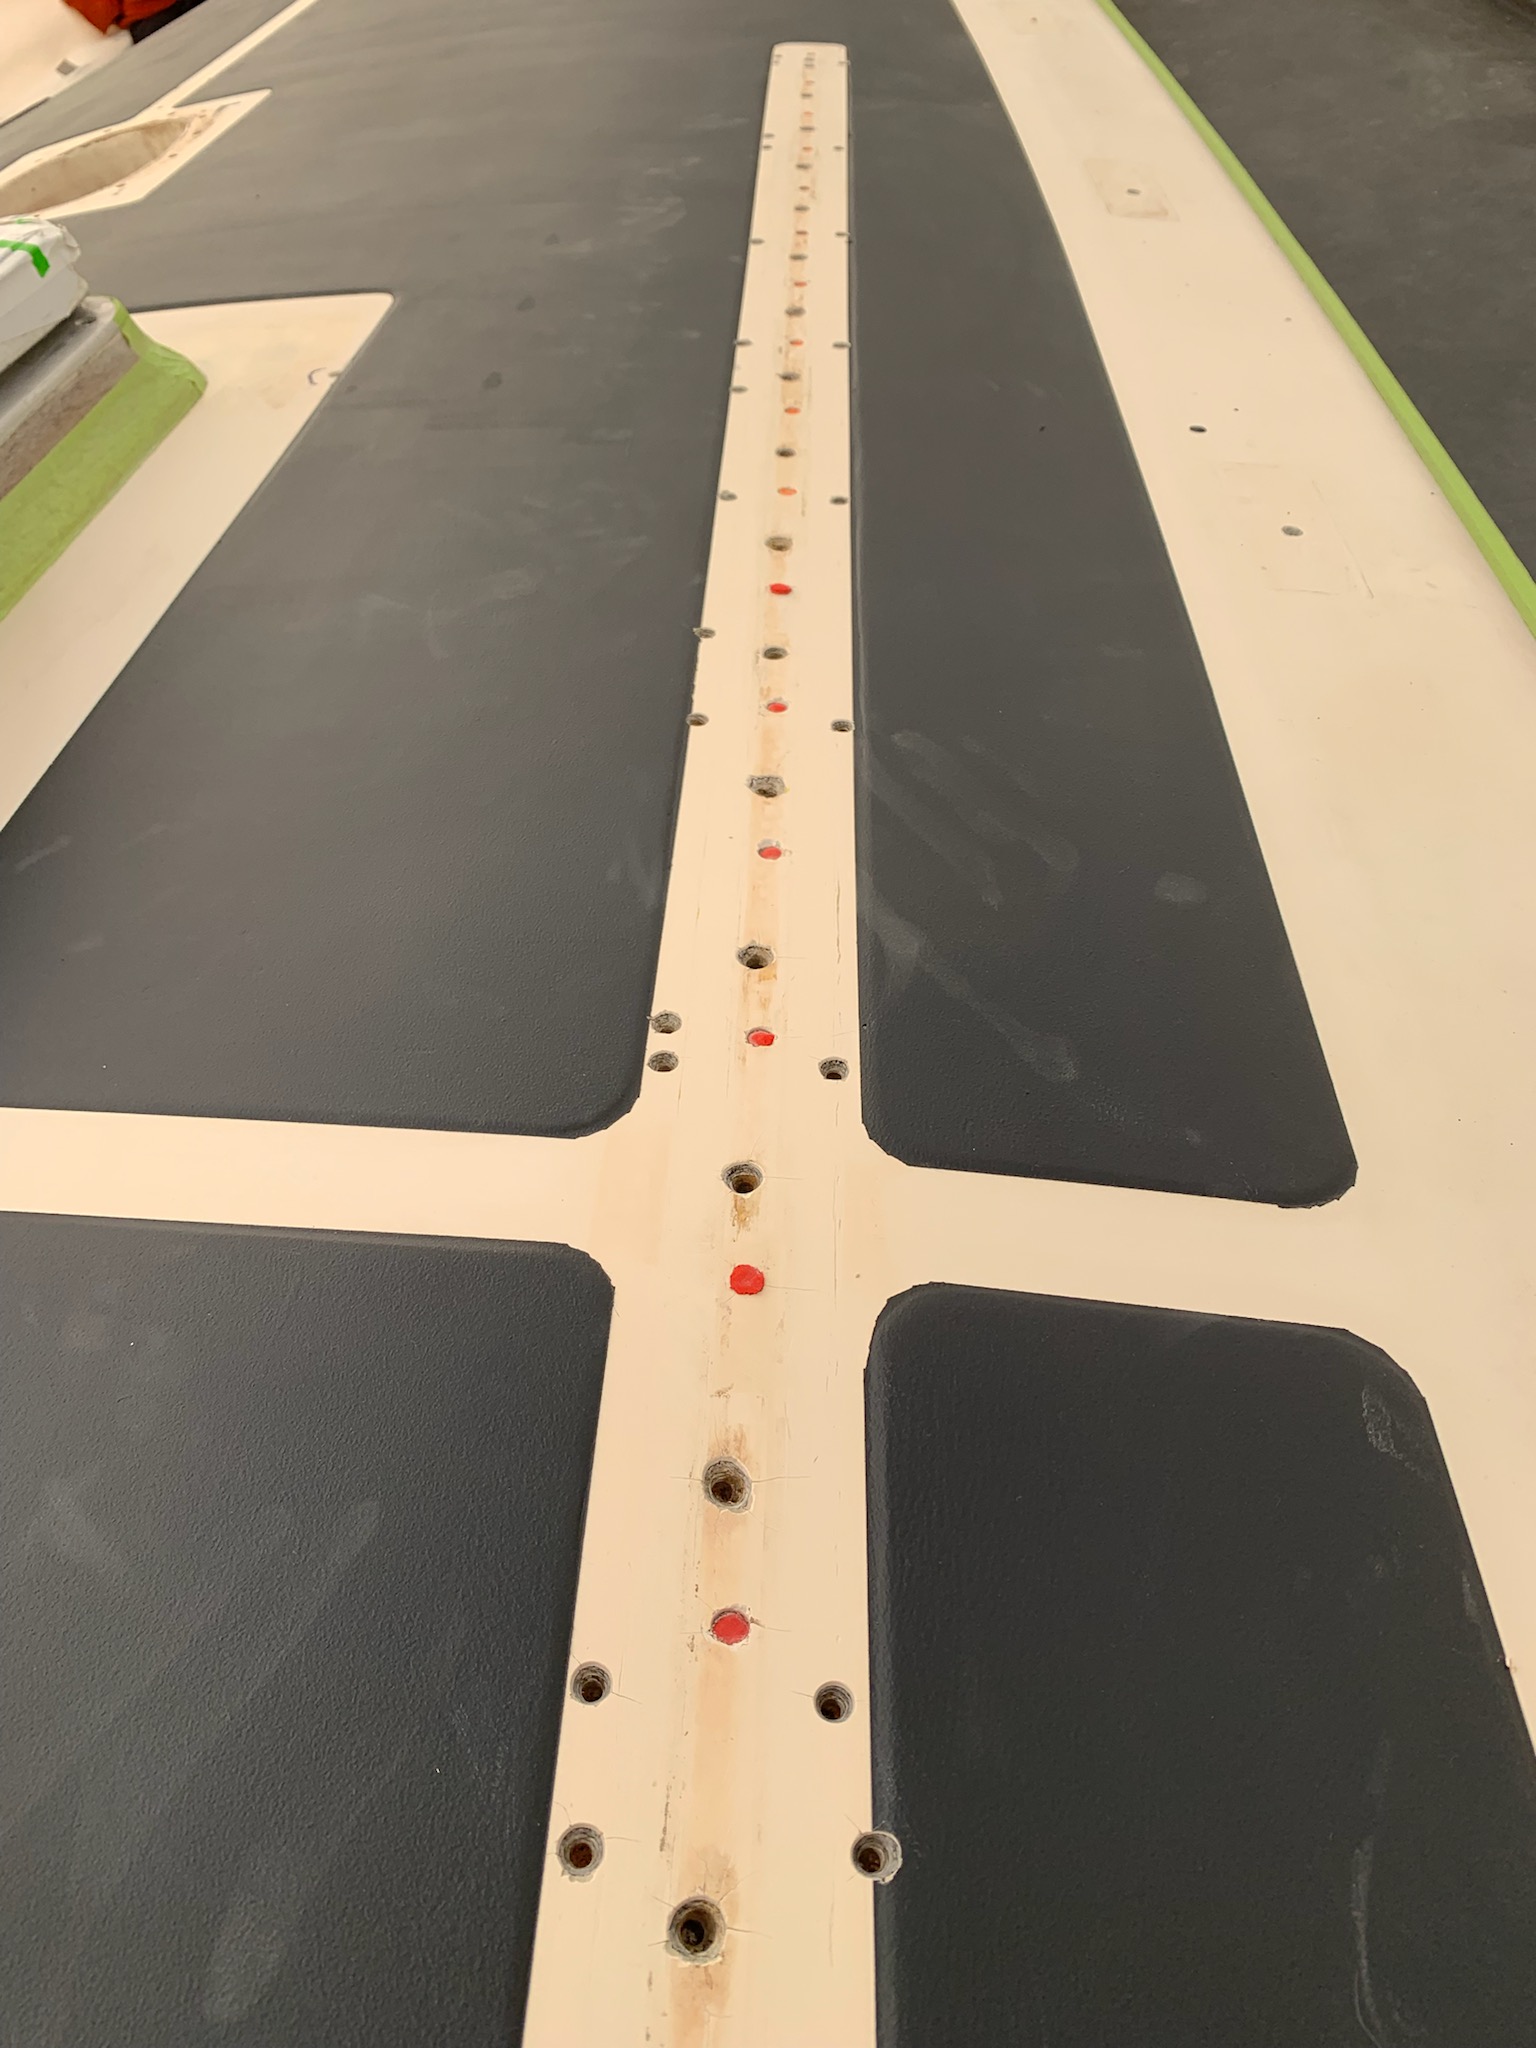
Now is the time to repair old holes. When we did the original refit in 2005 the staysail track was changed from a Schaeffer to a Harkin. The old holes had been filled with epoxy and hidden below the new track. Now was the time to clean that up.
Also on the cabin top were two mounts that were made of wood – one for the exhaust for the Dickinson diesel heater Rob had installed in 2005, and one for the vent in the head.
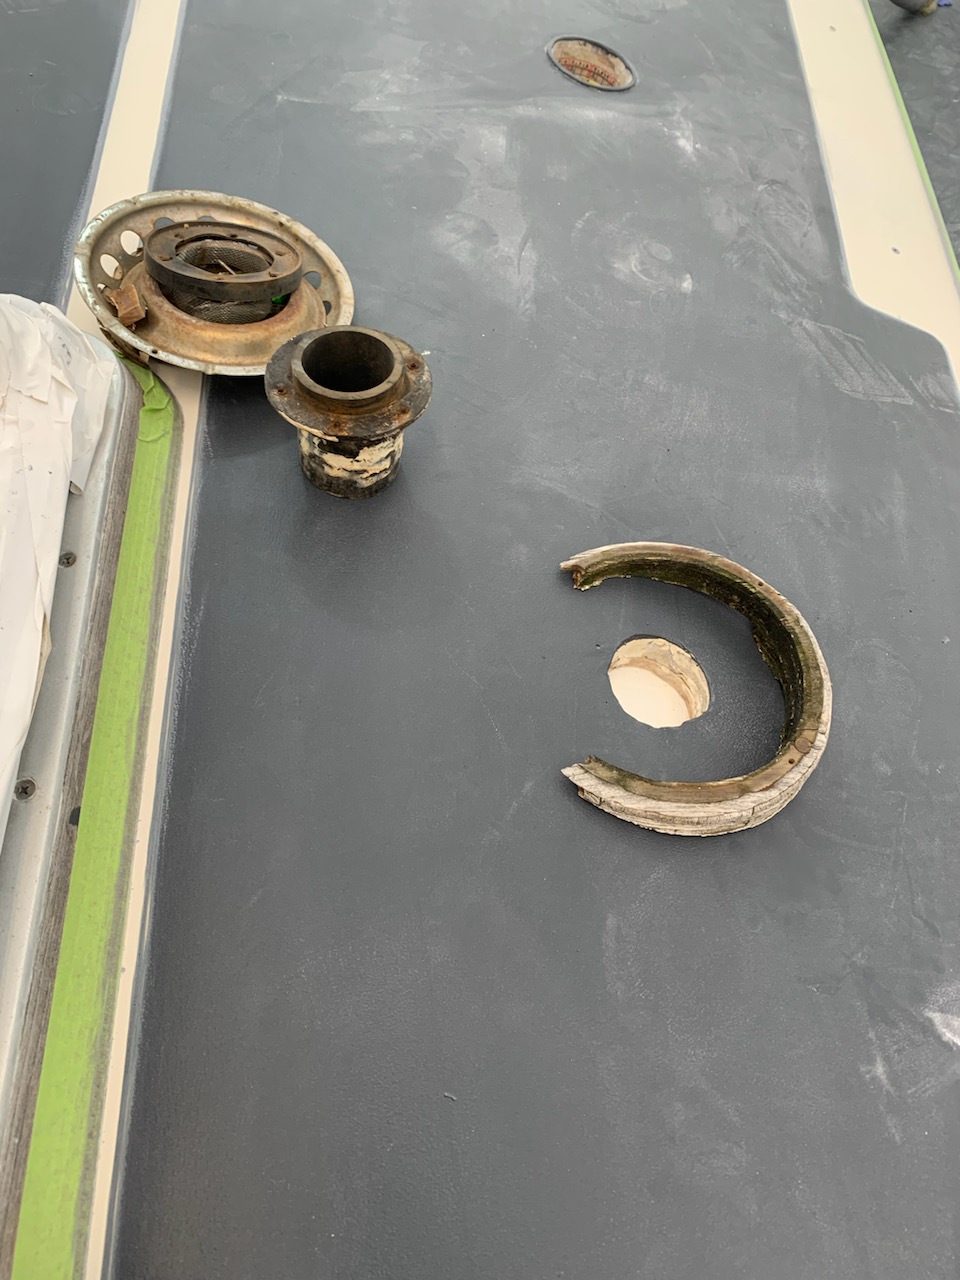
Ethan removed the old wooden mounts and manufactured new ones with Coosa board.
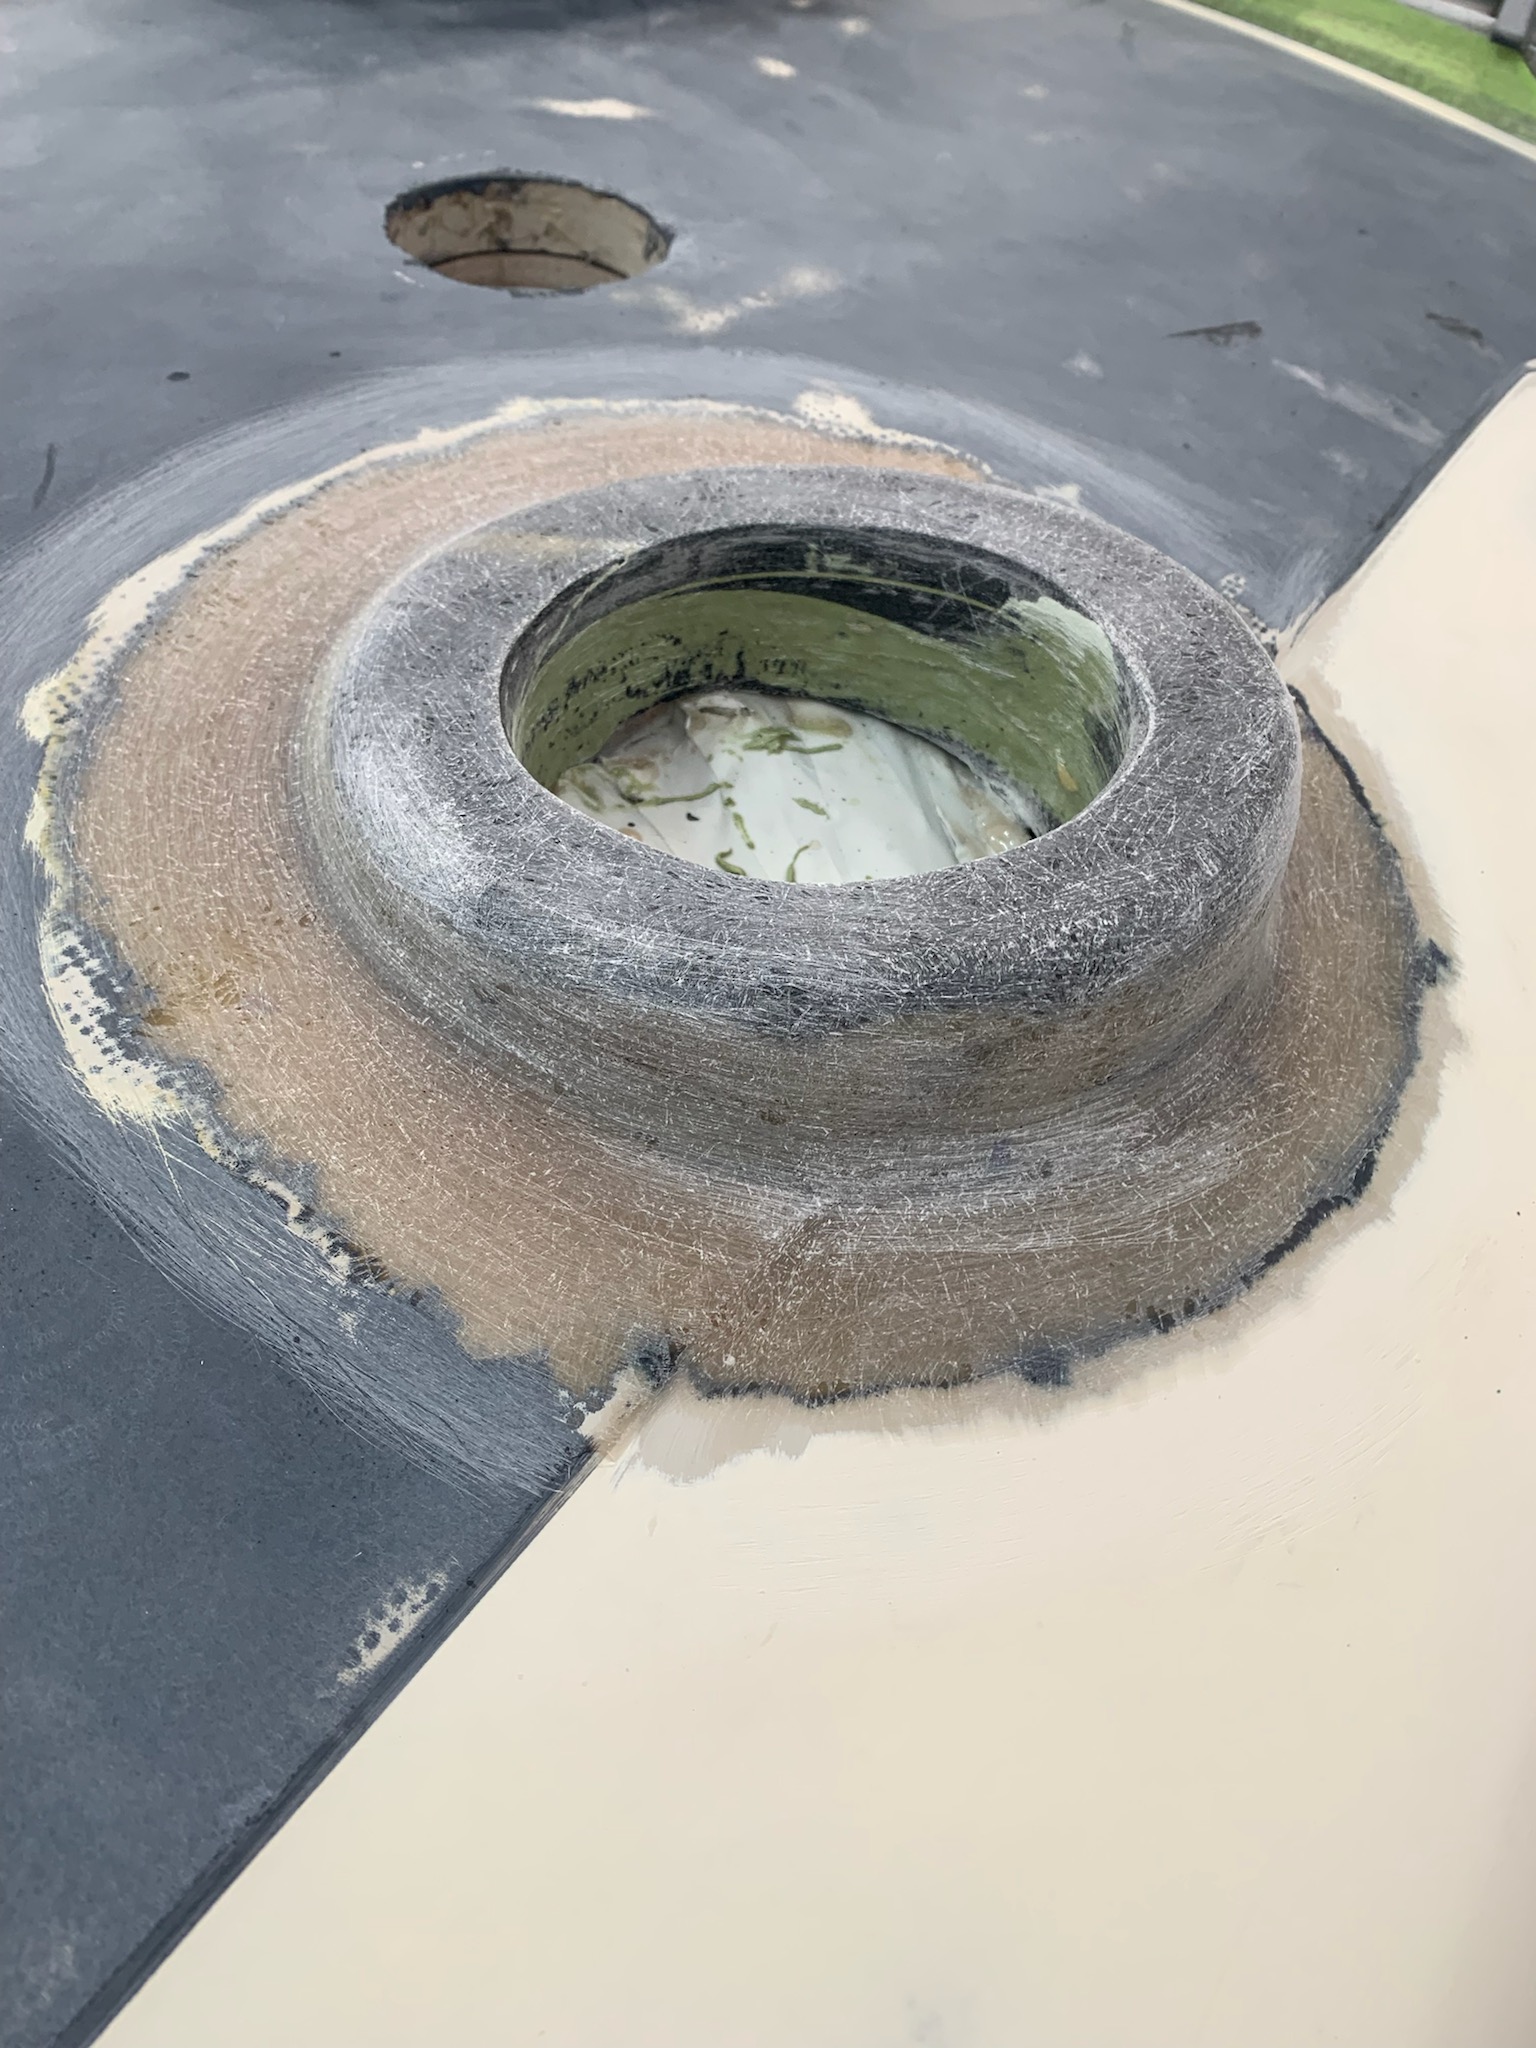
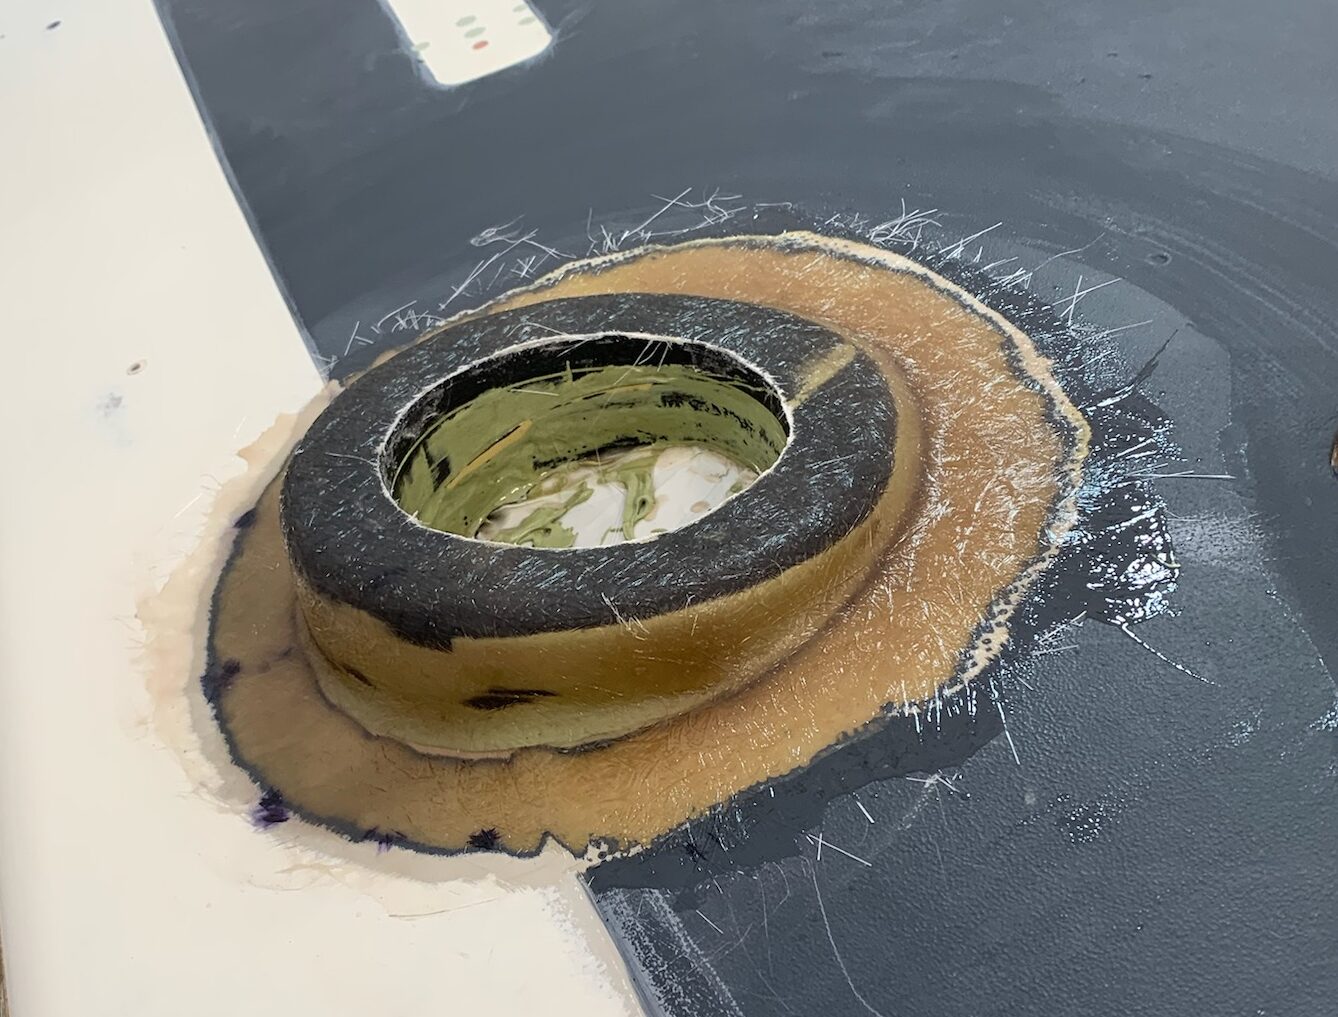
Glassed in mount for the heater exhaust.
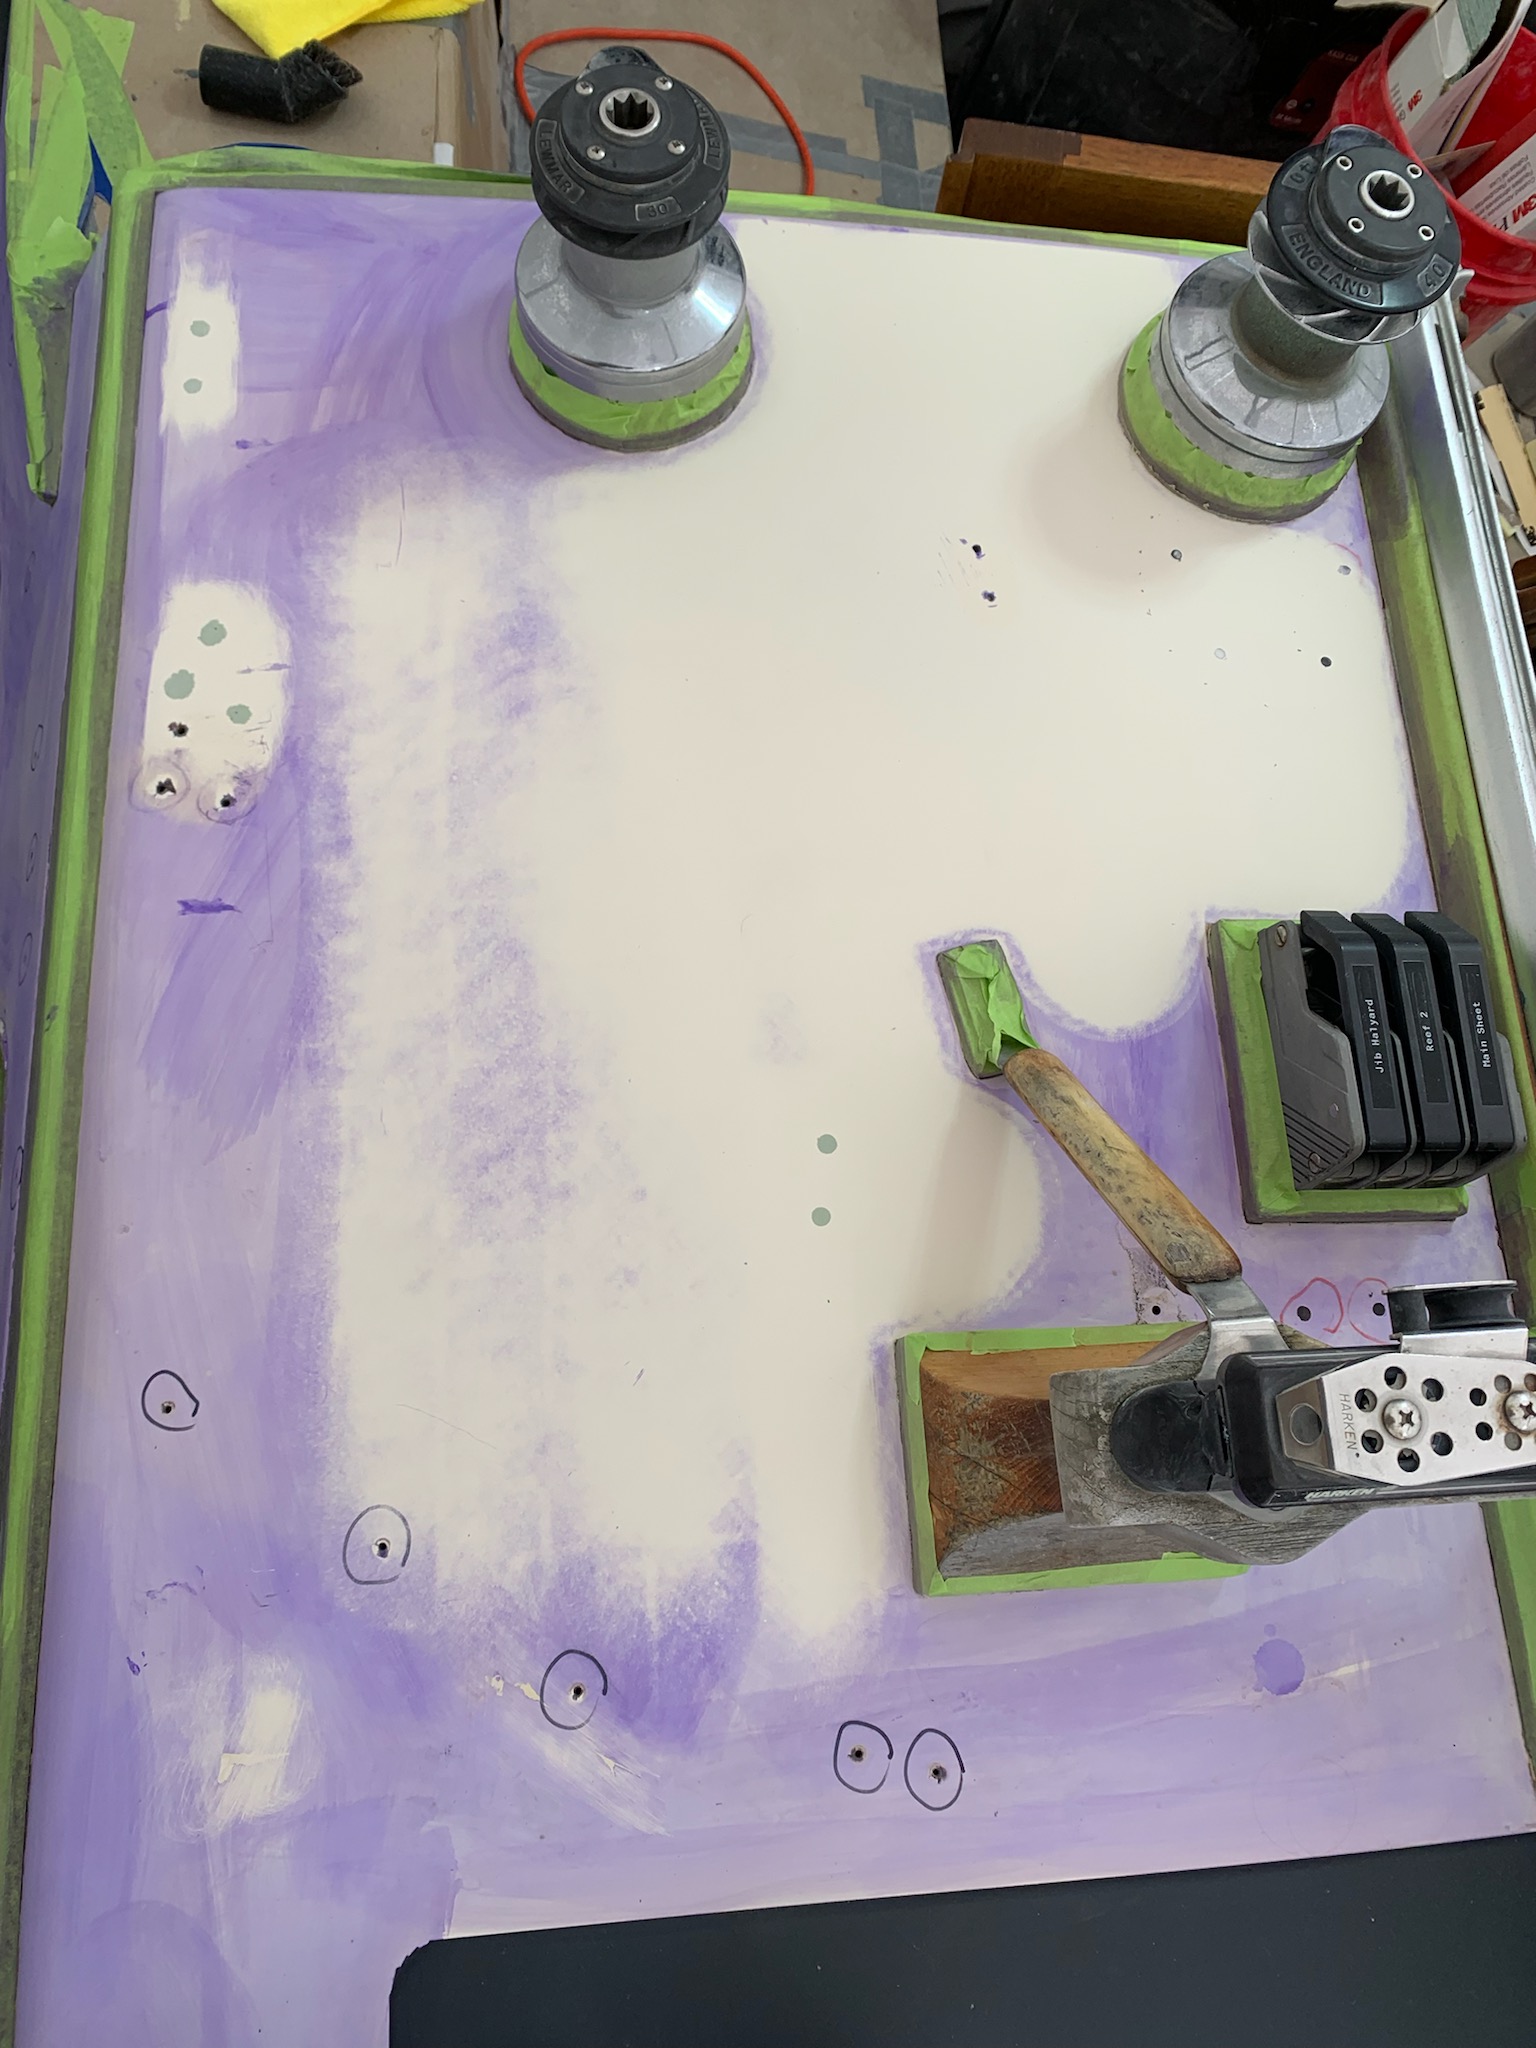
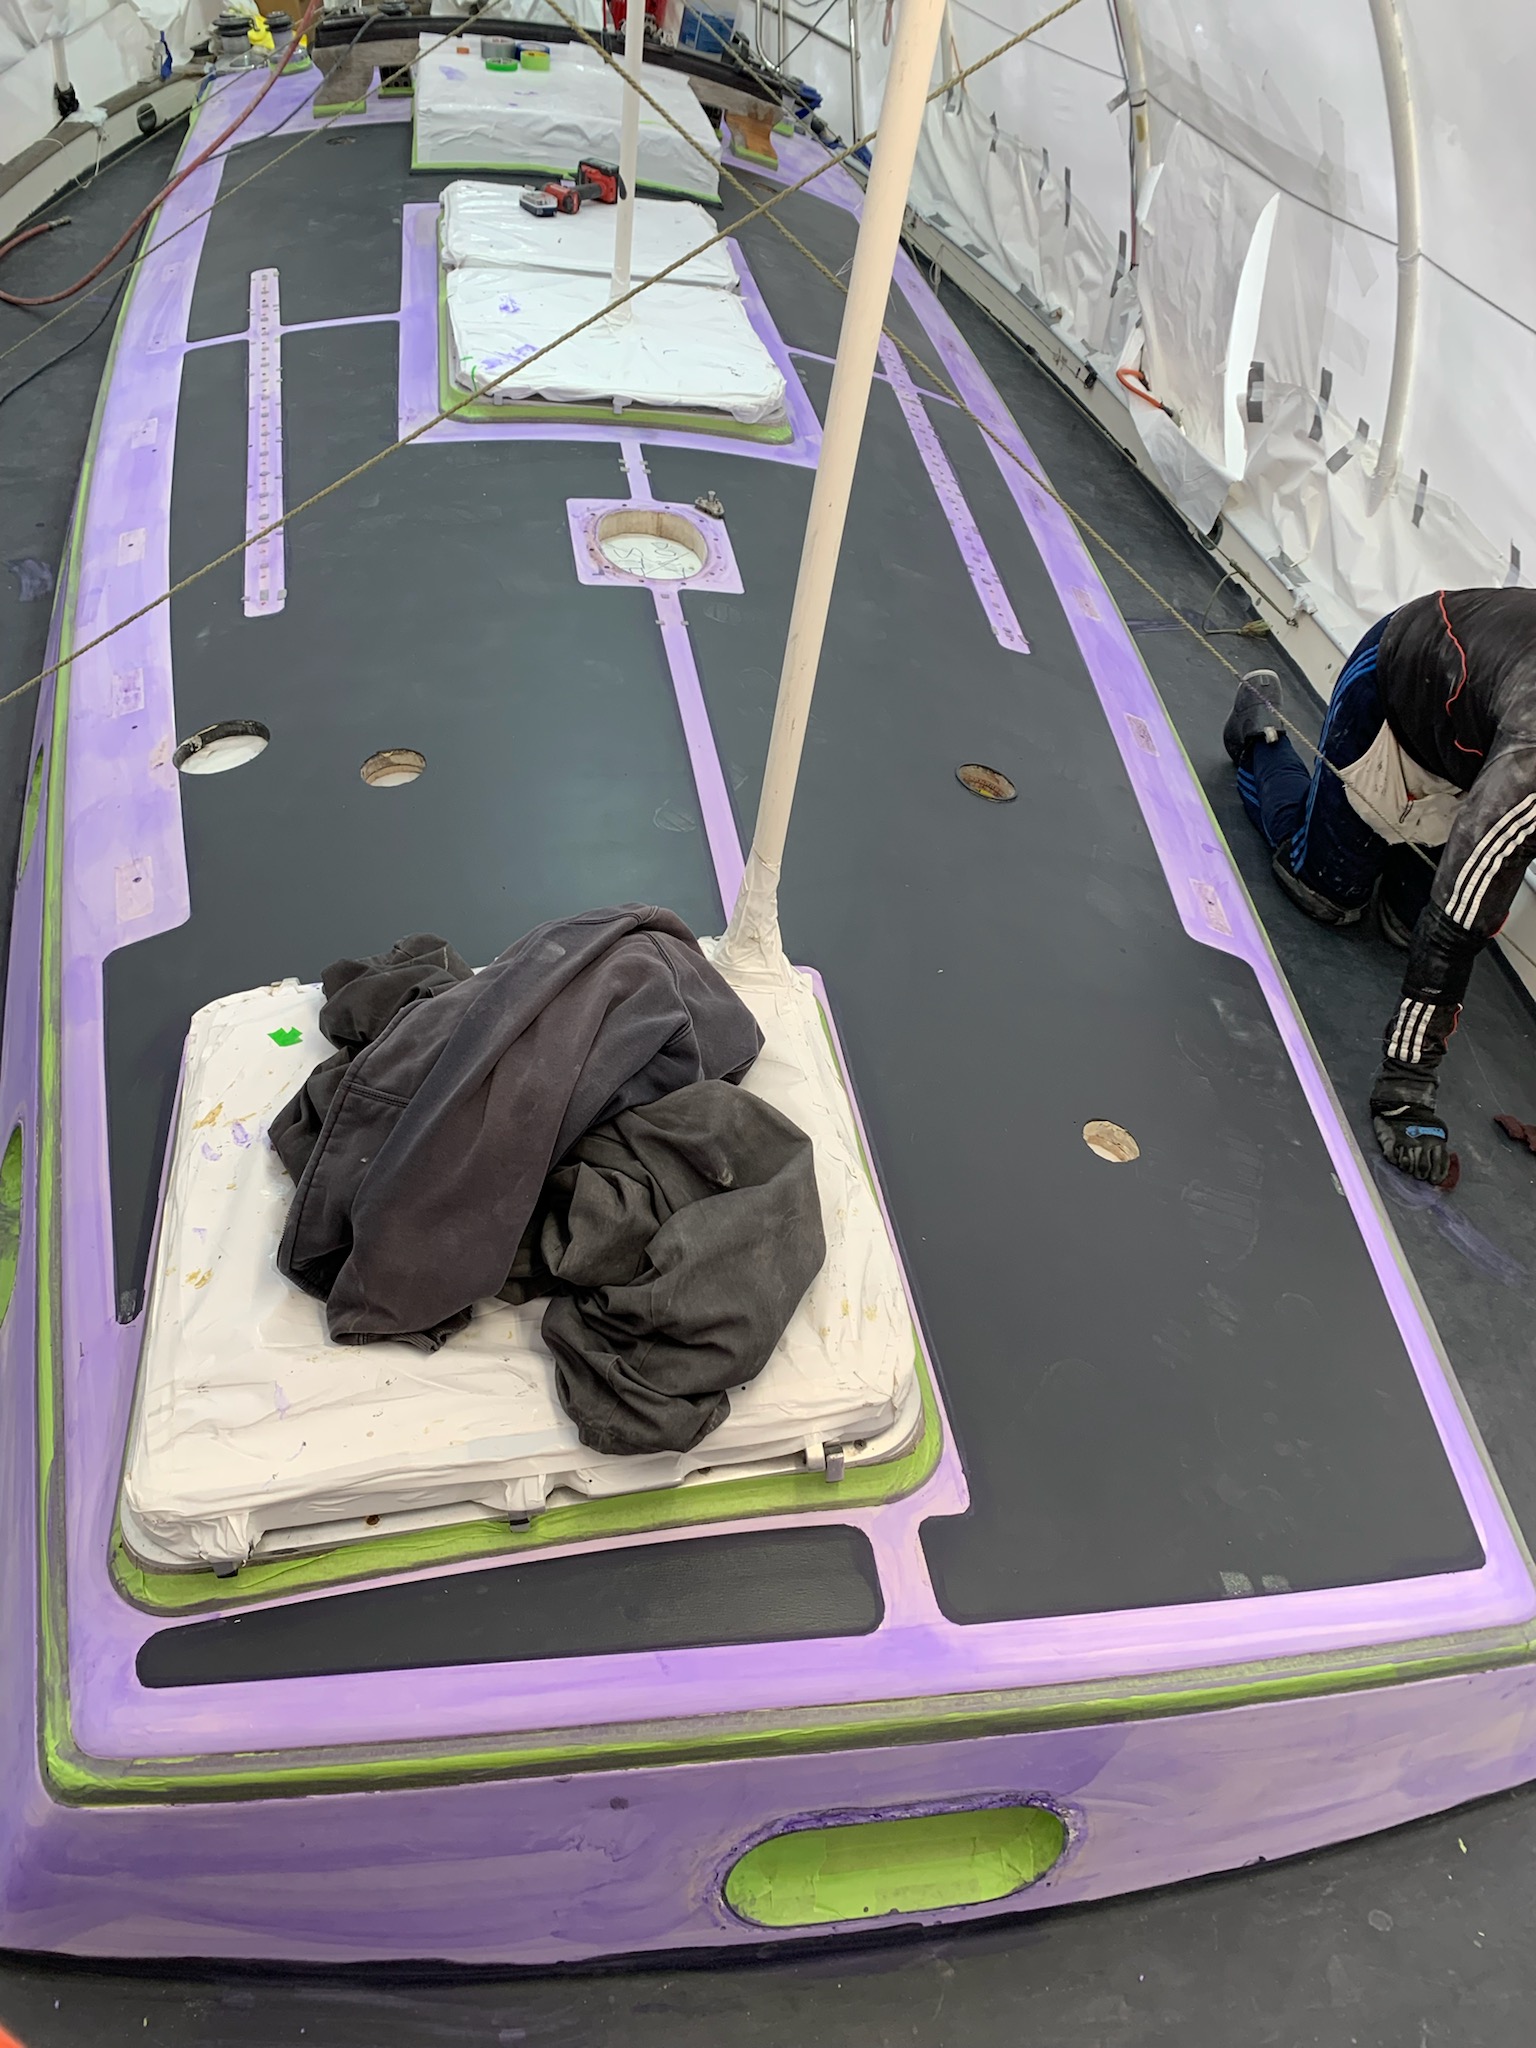
The guide coat on the cabin top is purple. Again we have some existing holes we need to keep for snaps for the dodger, but also some old ones where we changed to bigger winches and those need to be cleaned up here because they aren’t covered.
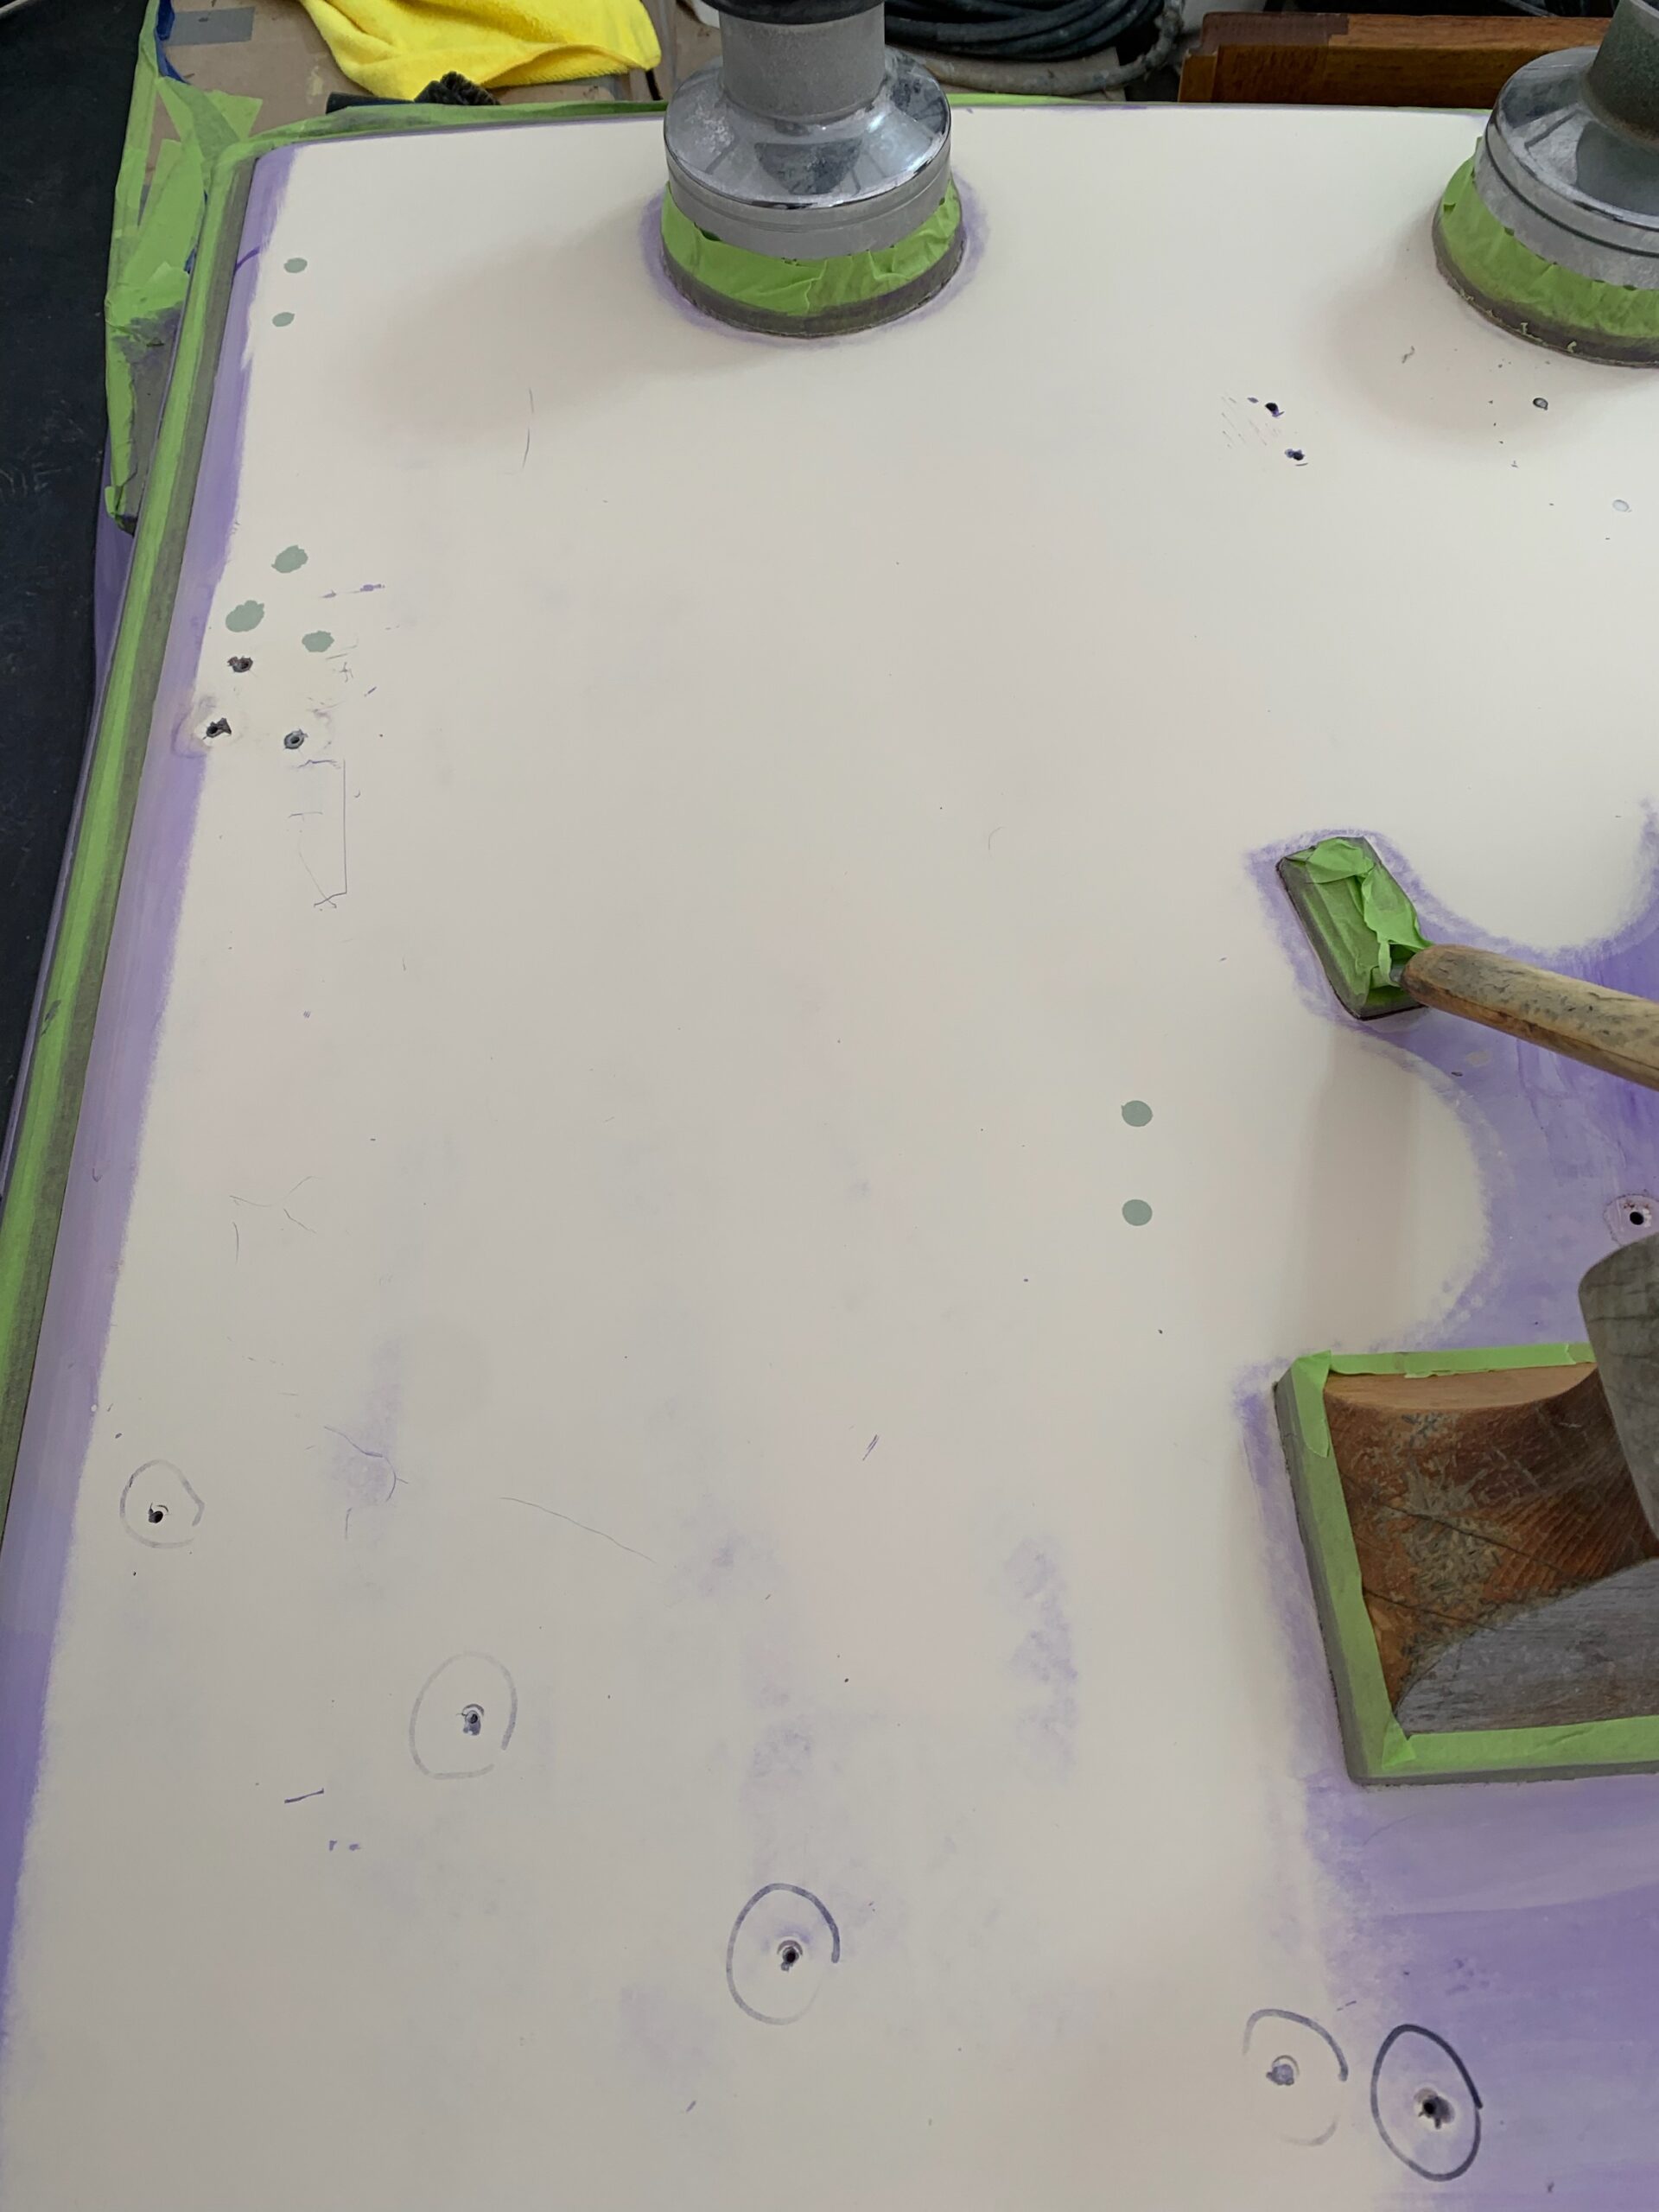
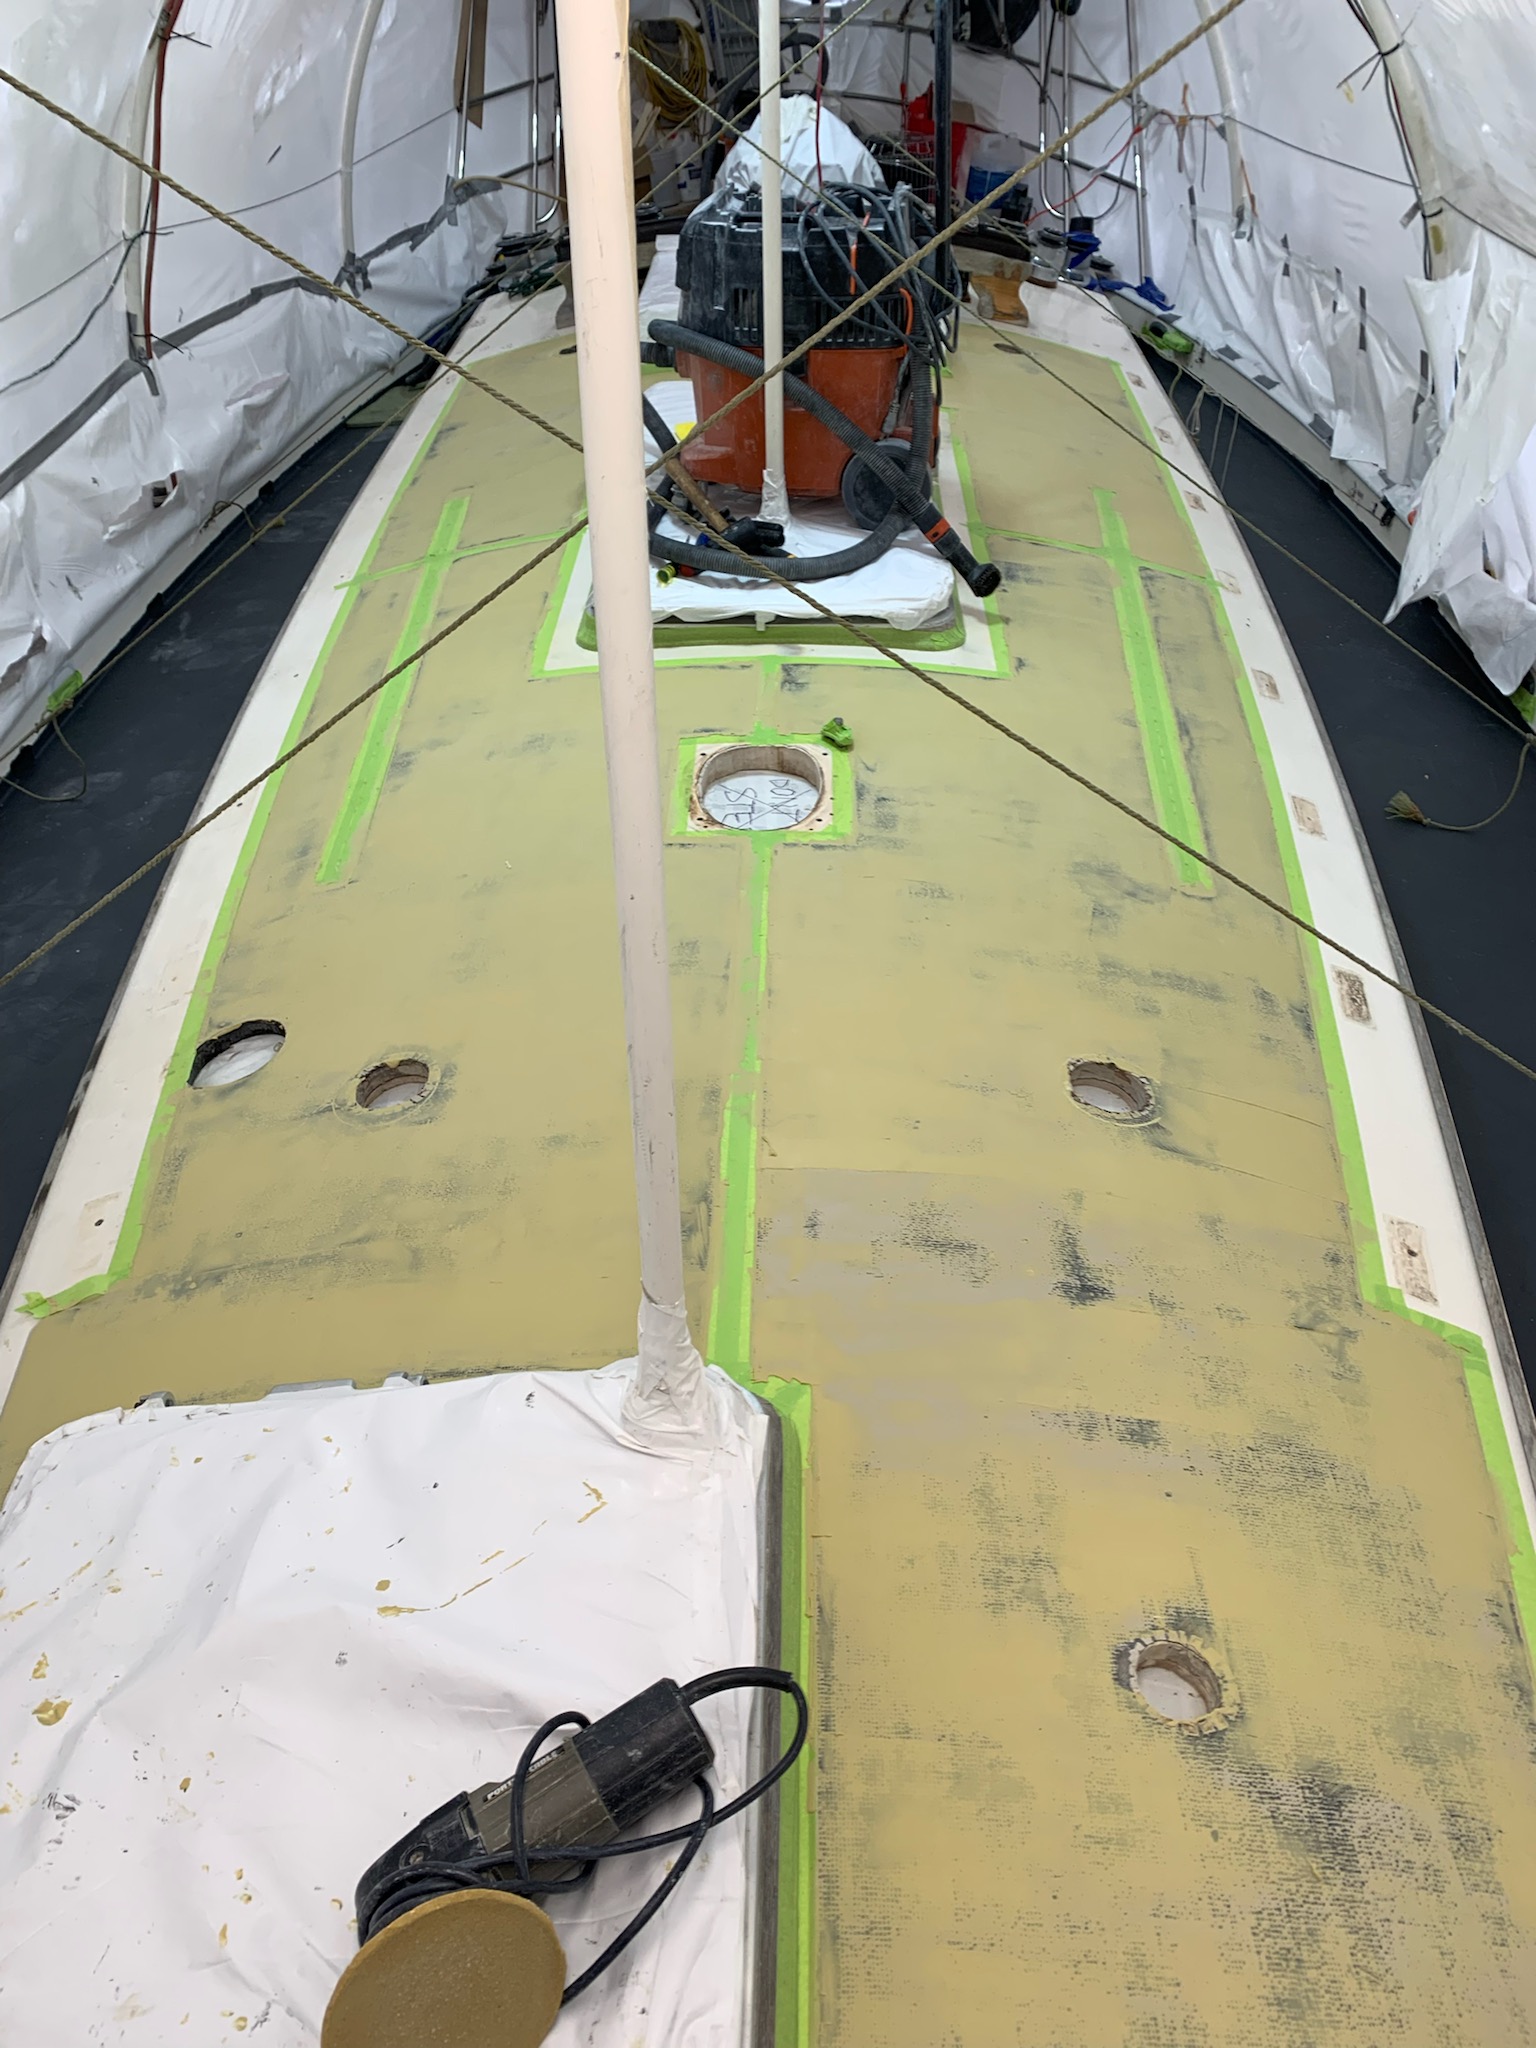
The sanded off guide coat tells us it’s ready to spray. Next up, gel coat, polish and non skid. Then we can start the hard work of reassembly.